During the early days of the Modern Era, the classic female muse was a stereotypical image of a woman who inspired the artistic genius of male artists more on the basis of their physical appearance than anything else. But as time progressed, the later part of the Modern Period witnessed her metamorphosis into something more just a glorified female form. The so called “deity” of inspiration was no longer privy to the male artist’s gaze just for her superficial beauty.
In continuation with last week, today’s post will explore some of these emancipated women who changed the male artist’s perspective towards the female muse and redefined her identity.
Kiki de Montparnasse (1901–1953)
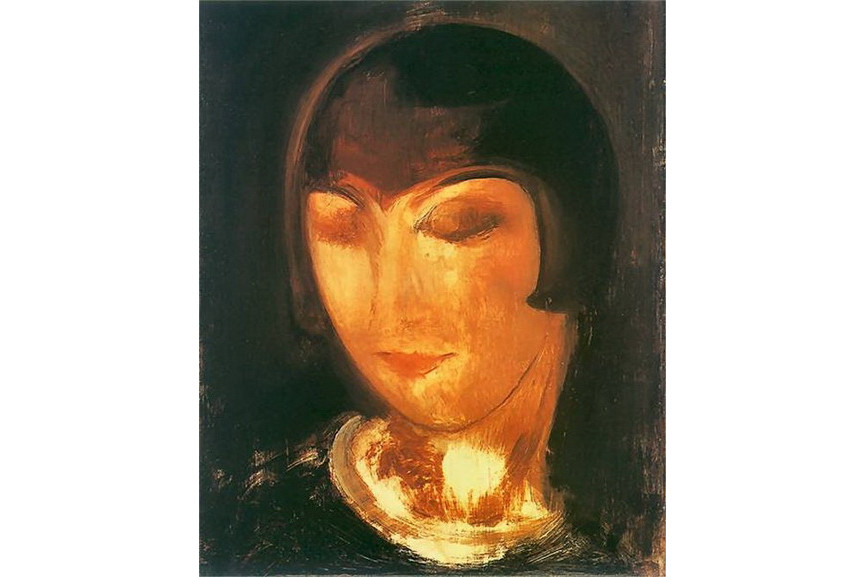
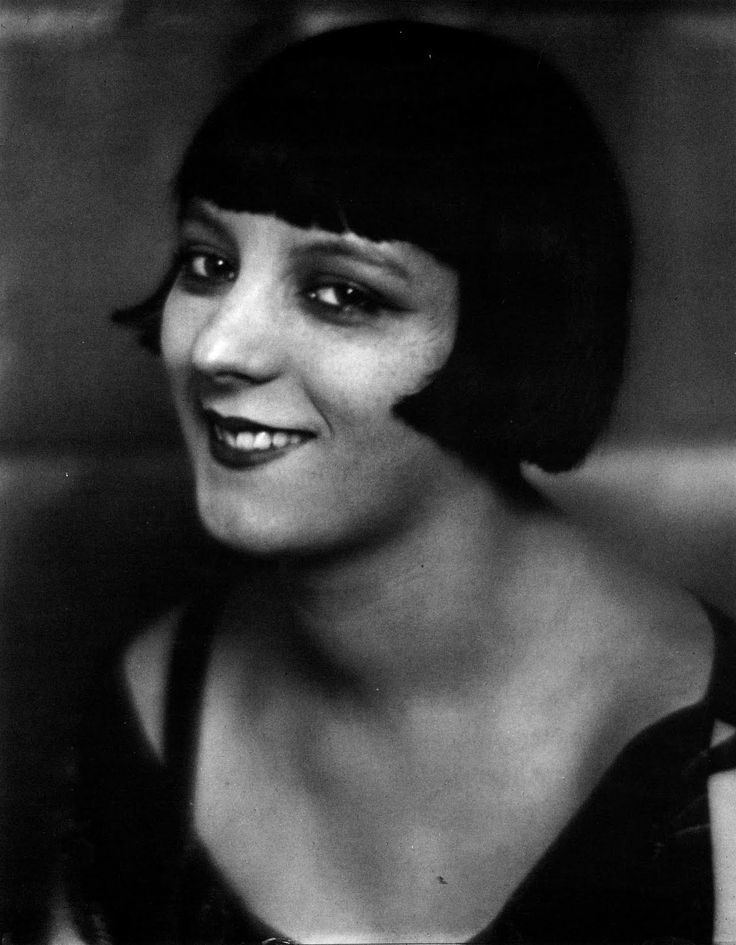
Born Alice Prin in France, Kiki de Montparnasse was a nightclub singer, painter, actress, and model. She posed for dozens of artists including Jean Cocteau, Moïse Kisling and Alexander Calderand inspired several others including Julien Mandel, Gustaw Gwozdecki, and Tsuguharu Foujita.
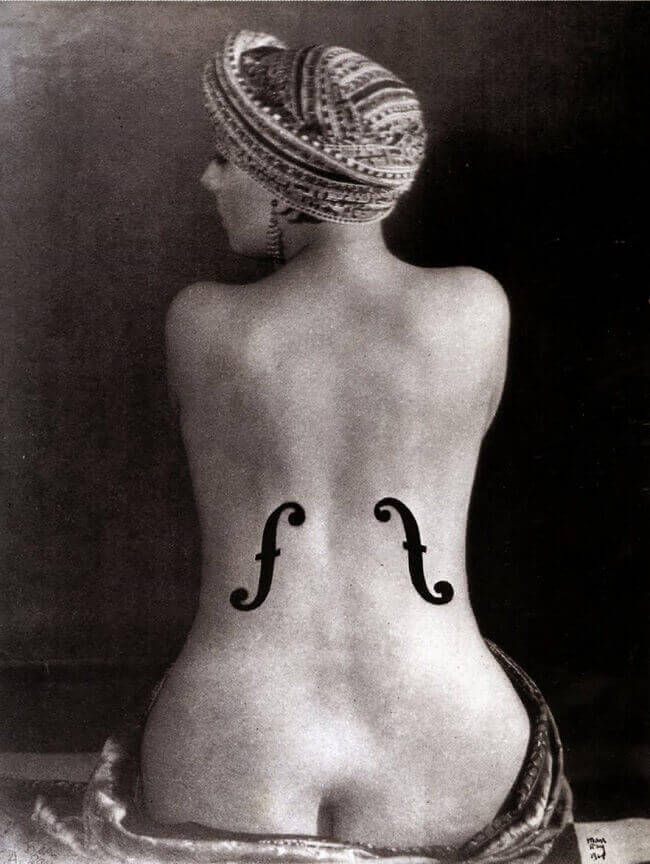
However, there is no doubt that she was Man Ray’s muse. Le violon d’Ingres, in which she is pictured from behind, with two violin f-holes painted on her back and Noire et Blanche are two of the most recognized works of Kiki by Man Ray.
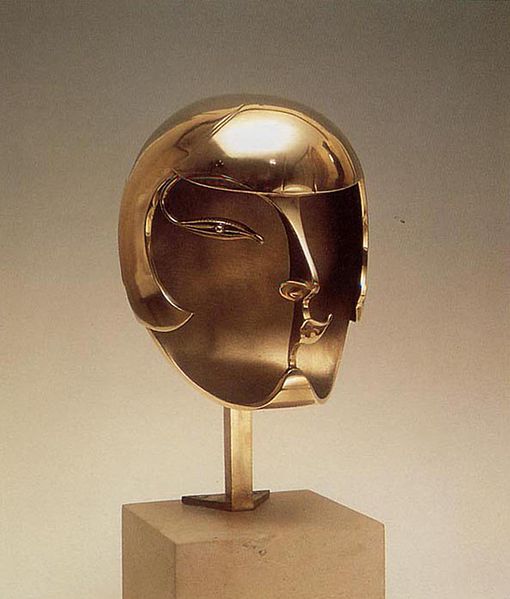
Her look was legendary: a sharply cropped black bob with straight, thick fringe, pale white skin, dark red lips and severely painted eyebrows. This iconic helmet-like hairstyle would be seen in works of art including paintings, photographs and Pablo Gargallo’s 1928 bronze Kiki de Montparnasse.
Le violon d’Ingres by Man Ray
Noire et Blanche by Man Ray
Pablo Gargallo’s 1928 bronze Kiki de Montparnasse
Gustaw Gwozdecki-Alice Prin
Kiki de Montparnasse
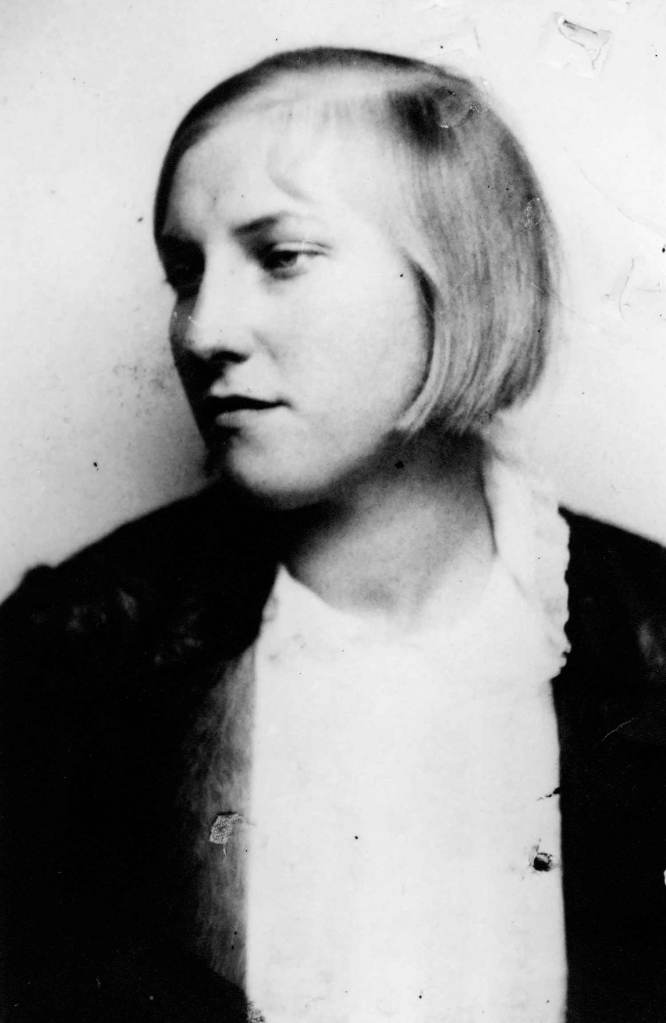
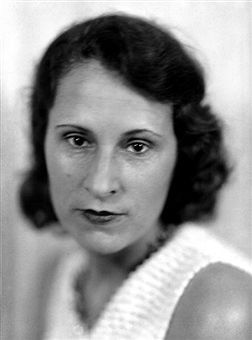
Marie-Therese Walter (1909-1977)
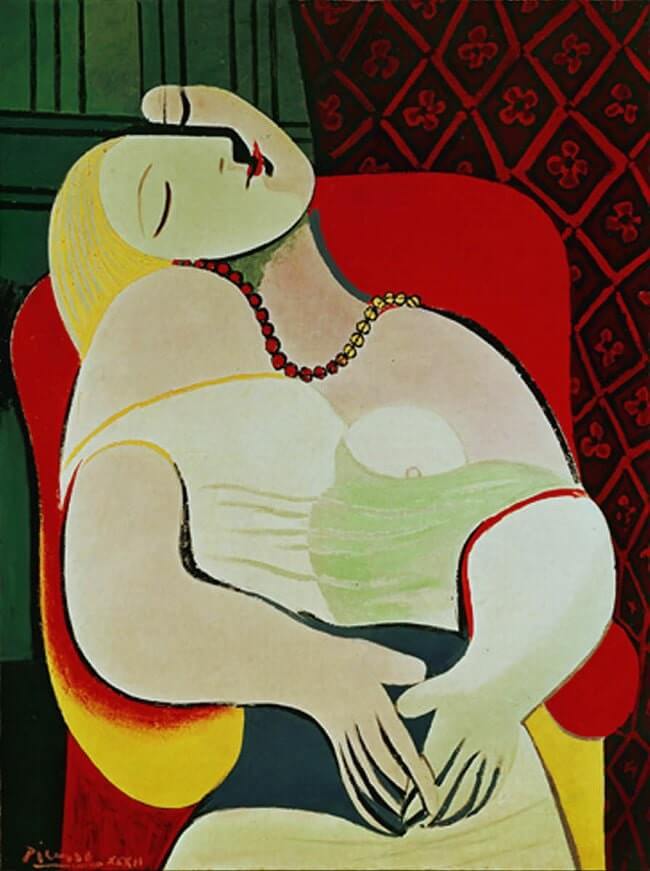
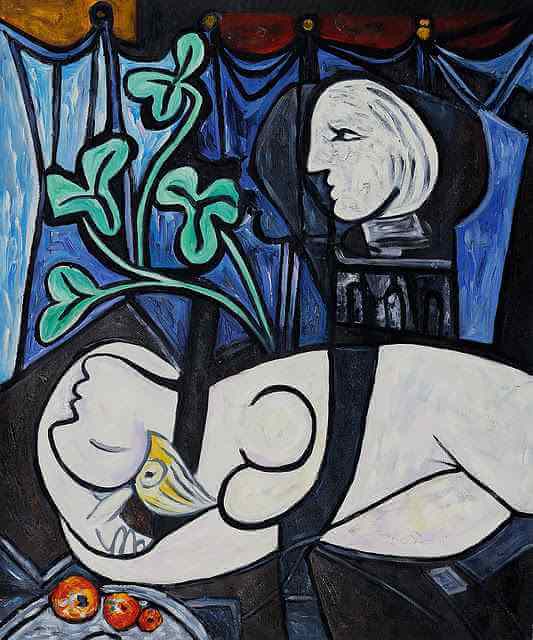
Marie-Thérèse Walter was the lover and model of Pablo Picasso. Some famous pieces depicting this French muse are Le Rêve and Nude, Green Leaves & Bust. Their relation fell apart after Picasso started seeing Dora Marr. While Picasso found another mistress, Marie-Thérèse never stopped loving him, and it’s believed he never stopped loving her — there is an abstract sculpture of her on his grave.
The Dream (Le Rêve), 1932 by Pablo Picasso
Nude, Green Leaves and Bust, 1932 by Picasso
Marie-Therese Walter
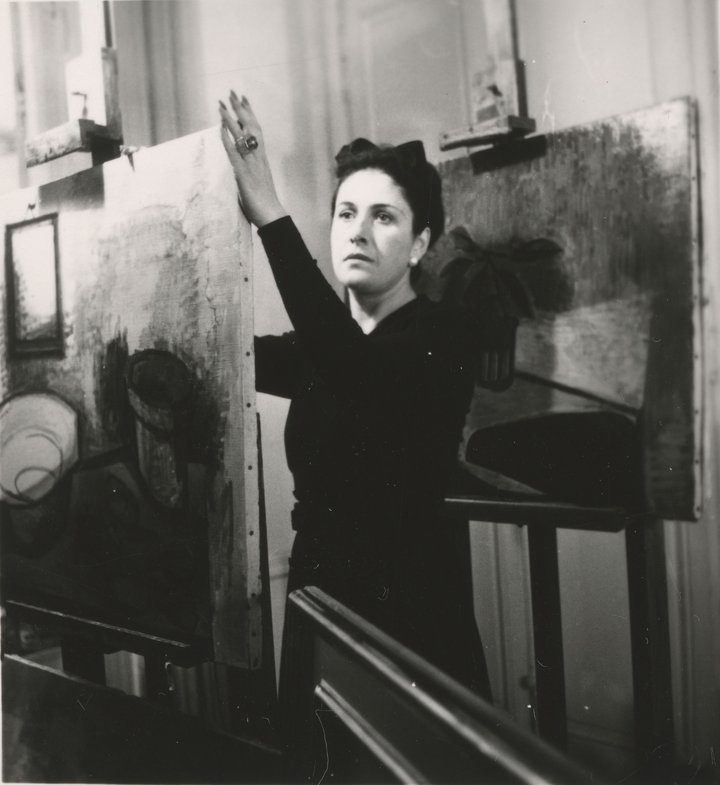
Dora Marr (1907-1997)
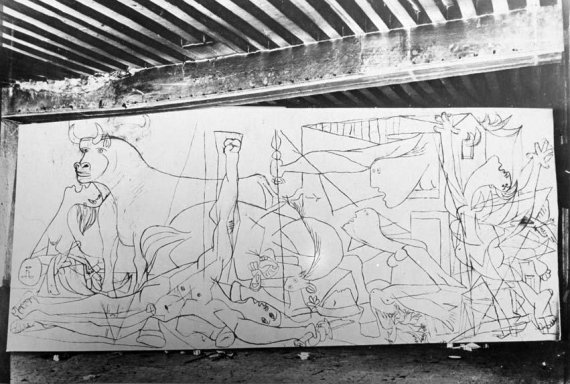
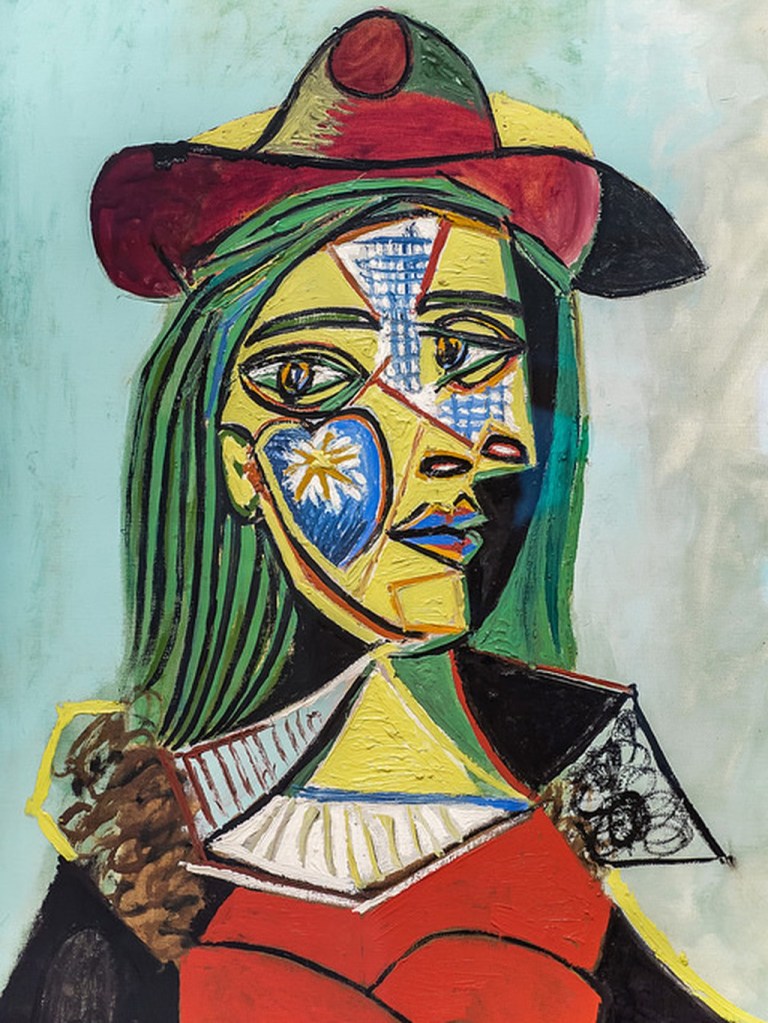
This dark-haired beauty was the muse of Pablo Picasso during the 1930s and ’40s. She has inspired several of his most famous paintings, including Guernica(1937) and The Weeping Woman(1937). Marr, a photographer, was the only person allowed to capture the successive stages of Guernica as Picasso painted it. She is also said to have worked on elements of the painting. This brilliant intellectual was also a talented painter herself.
Dora Maar
Dora Maar’s report on Guernica’s progression
Dora Maar, photograph of Guernica, May-June, 1937
Pablo Picasso, Portrait of Dora Maar (1937)
Picasso-The Weeping Woman,1937
Pablo Picasso, Woman in Hat and Fur Collar, 1937
Monique Bourgeois (1921-2005)
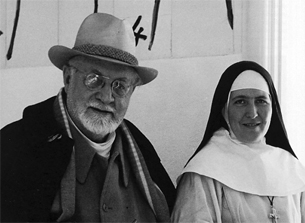
In 1941, when Matisse was recovering from treatment for cancer, Monique Bourgeois took the job of nursing him, and doubled as his model. In 1943, after they had been separated by the fortunes of war, Bourgeois entered a convent. She didn’t meet Matisse again until 1946, when she came to see him to ask him to design and execute the Chapelle du Rosaire, his last and greatest complete work.
Monique Bourgeois and Matisse
Chapelle du Rosaire
Gala Diakonova (1894-1982)
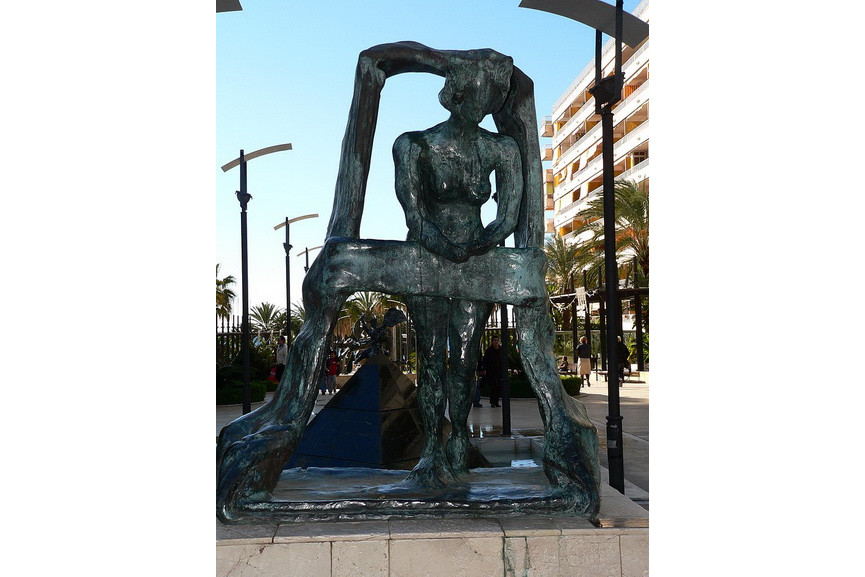
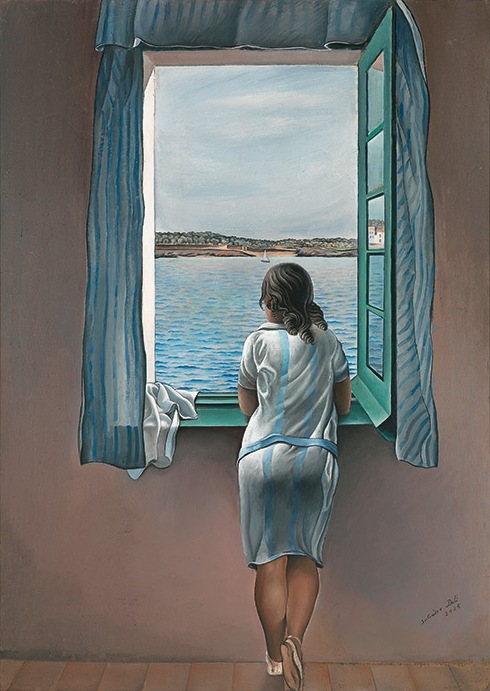
Elena Ivanovna Diakonova, otherwise known as Gala Diakonova, was a muse for her first husband Paul Éluard, Max Ernst and André Breton and finally for Salvador Dalí, also her husband. Gala posed for Dalí in works such as Portrait of Galarina, Leda Atomica, and Galatea of the Spheres. Gala appears in several other Dalí paintings and sculptures, notably The Madonna of Port Lligat (1949), Imperial Monument to the Child-Woman, Gala (1934) andThe Discovery of America by Christopher Columbus (1958–59).
Gala Diakonova
Portrait-de-femme-Dora Maar
Leda Atomica, 1949 by Salvador Dali
Galatea of the Spheres, 1952 by Salvador Dali
Salvador Dalí, Portrait of Galarina (1940–45).
Salvador Dali,Imperial Monument to the Child Woman,1929
Salvador Dali-Gala leaning out the window
The Madonna of Port Lligat, Salvadore Dali
The Discovery of America by Christopher Columbus, Dali
Helga Testorf (born c.1933 or c.1939)
The muse of the American artist Andrew Wyeth was a German model Helga Testorf. For fifteen years, he worked on The Helga Pictures, a series of more than 240 drawings and paintings of the model. Helga was Wyeth’s neighbor, and the artist depicted her in various poses indoors and out of doors, nude and clothed. Interestingly, the sessions were a secret even to their spouses, and the works were located at the home of Frolic Weymouth who was his student, neighbor, and a good friend.
Andrew Wyeth – Braids (Helga Testorf), 1979. Dry-brush watercolor.
Edie Sedgwick (1943-1971)
The iconic 1960s figure Edie Sedgwick starred in several of Andy Warhol’s underground, experimental films such as Poor Little Rich Girl and Kitchen. Sedgwick was a fixture around Warhol’s iconic Factory, and stars in two screen tests and several films, including Beauty No. 2, Ciao! Manhattan and of course Poor Little Rich Girl. Warhol also painted Sedgwick multiple times. Sedgwick’s pedigree and iconic sense of style, which included a cropped haircut, dangling earrings, fur coats, and occasionally, no pants, enthralled the rather shy Pop artist.
Portrait of Edie Sedgwick
Andy Warhol and Edie Sedgwick
Ada Del Moro Katz (born 1928)
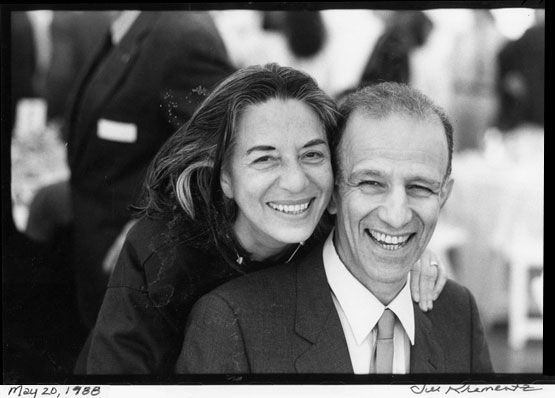
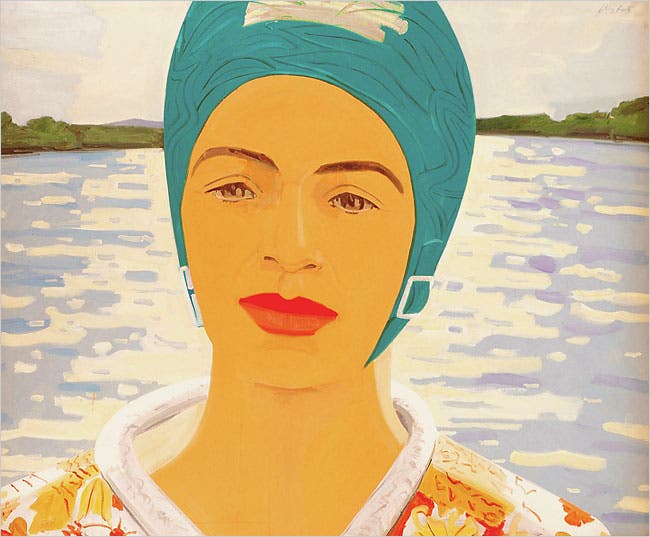
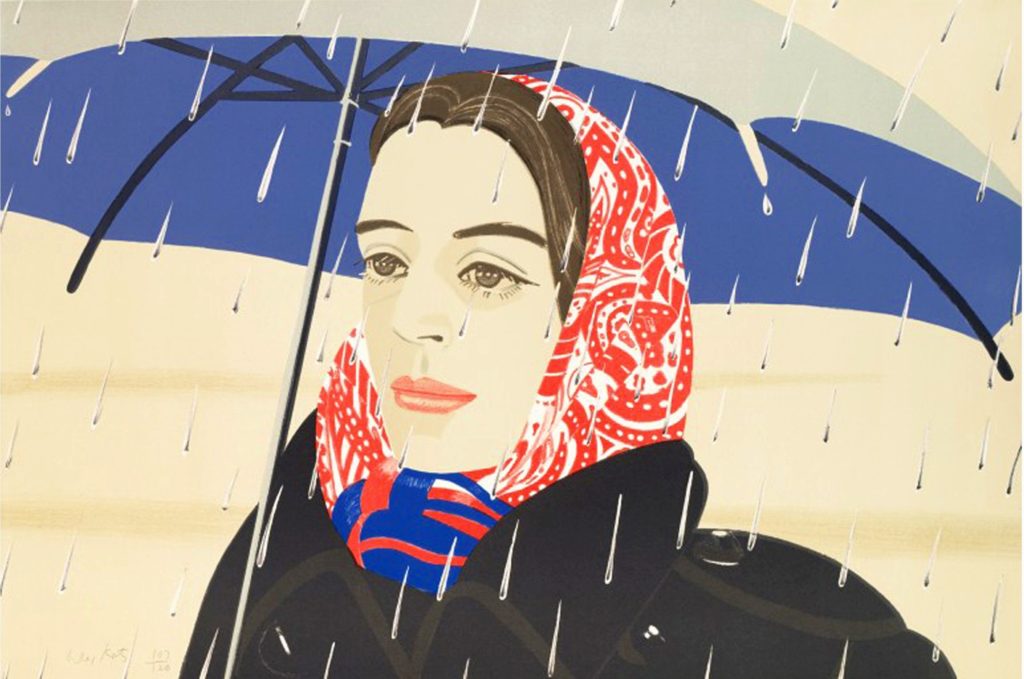
Ada Del Moro is the wife of painter Alex Katz, who has depicted her classic, dark-haired beauty in over 40 figurative works including The Black Dress (1960), Ada With Bathing Cap (1965), and Thered scarf (Ada in polo coat) (1976). Katz’s portraits of his wife tend to show her stylishly dressed and radiating positivity.
Ada Del Moro Katz
The Black Dress by Alex Katz
Ada With Bathing Cap (1965) by Alex Katz
The Red Scarf (Ada in Polo coat), Alex Katz, 1976
Katz-Blue Umbrella, 1979
Ilona Staller (born 1951)
Ilona Staller, also known as Cicciolina, married JeffKoons in 1991. He was inspired by the porn star and Italian politician to create the sexually-explicit “Made in Heaven” series, which featured both photographs and sculptures of the couple engaged in various stages of lovemaking.
“Made in Heaven” series
Jeff Koons and Ilona Staller
Sandra Bush
Not all muses are lovers. For Mickalene Thomas, her greatest inspiration has been her mother, Sandra Bush. Thomas has portrayed Bush, a former model, in several of her characteristically exuberant collage paintings as a quintessential 1970s babe complete with a massive afro and rhinestone-encrusted get-ups. In the 2012 filmHappy Birthday to a Beautiful Woman, Thomas shows a different side of Bush – an aging woman, ill with kidney disease, who narrates her own incredible life story through questions asked by Thomas, who remains off screen.
Mickalene Thomas, Dim All The Lights (2009)
It is evident that with time the female muse was no longer just a young, beautiful woman, groomed by the male artist and displayed to the world as his “find” or “trophy.” In today’s day and age, the art world has debunked and abandoned the traditional ideas of a female muse and successfully obliterated the line between an artist and the muse. Now, one can be the other or even both for that matter.
The quest for inspiration is a continuing process that changes, evolves, and matures with the artists themselves. If a male artist draws inspiration from a woman, he needs to honor not only the artist-muse relationship, but also the personal identity and public image of the woman. No matter what age, color, shape or size, she is an integral part of an artist’s creative universe. After all, in today’s “selfie” and “Me Too” age, who’s stopping a creative genius in the female form from tapping into her own inner muse? She is very much capable of romanticizing herself and does not need a man to do so.
DISCLAIMER – All the information, data and imagery in this blog post is for informational and educational purpose only. While there may be copyrighted material the use of which has not always been specifically authorized by the copyright owner, I have only made it available with the sole effort to stimulate creative progress and artistic enrichment. Some images may have been taken from the links included below and I give full credit to these websites/pages, thereby in no way claiming them to be my own. I have also used these links for reference purposes and collection of data; therefore I give full credit to the respective web pages. Most of the data in this post is based on my personal experiences and opinions and I am not responsible for any material that is found in the links at the end of this post.
“Without a muse, an artist is simply a madman shouting to the stars.” ~ Ross Baldwin.
For centuries, muses have been responsible for rekindling the creative spark in artists, inspiring them to paint and guiding them through their creative process. From mythical creatures to enchanting real life beauties, history has witnessed innumerable muses in the feminine form that have captured many an artist’s fancy. The muse has the ability to renew an artist’s passion for art, thereby helpinghim or her to create memorable masterpieces. It is the oxygen to the artistic soul without which it will breathe its last.
The word “muse” originates from Greek and Roman mythology, where it was used to describe goddesses presiding over artistic disciplines. But anything or anyone can serve as the artist’s source of inspiration. Even though many men have been known to provide inspiration, the female form continues to pose as a muse for most artists. From lovers to spouses to friends, inspiration can come in many moulds.
Looking back in history, Andrea del Sarto, an Italian painter born in 1486, was married to his muse, Lucrezia, whose features very closely resembled his ideal female figure at a time when most other painters were building their beautiful female images on the well-loved bodies of boys. Since then, artists of the likes of Rubens, Bonnard, Renoir, Charles Blackman and Brett Whiteley have painted their wives over and over again, but their wives were their subjects rather than their muses.
To commemorate Women’s Day and Women’s week, here’s the story of some of the most stunning female muses from history who have navigated artists towards becoming the architects of several great works of art. This post, which is first of a two part series, will cover the influential women who inspired art in the early part of the Modern Era.
Saskia van Uylenburgh (1612-1642)
Saskia van Uylenburgh was Rembrandt Harmensz van Rijn’s wife and muse. From drawings of Saskia lying in bed to allegorical paintings, he managed to show his love for his wife by depicting these works in tender, loving manners.
Rembrandt van Rijn, Saskia van Uylenburgh as Flora, 1641
Elizabeth Siddal (1829-1862)
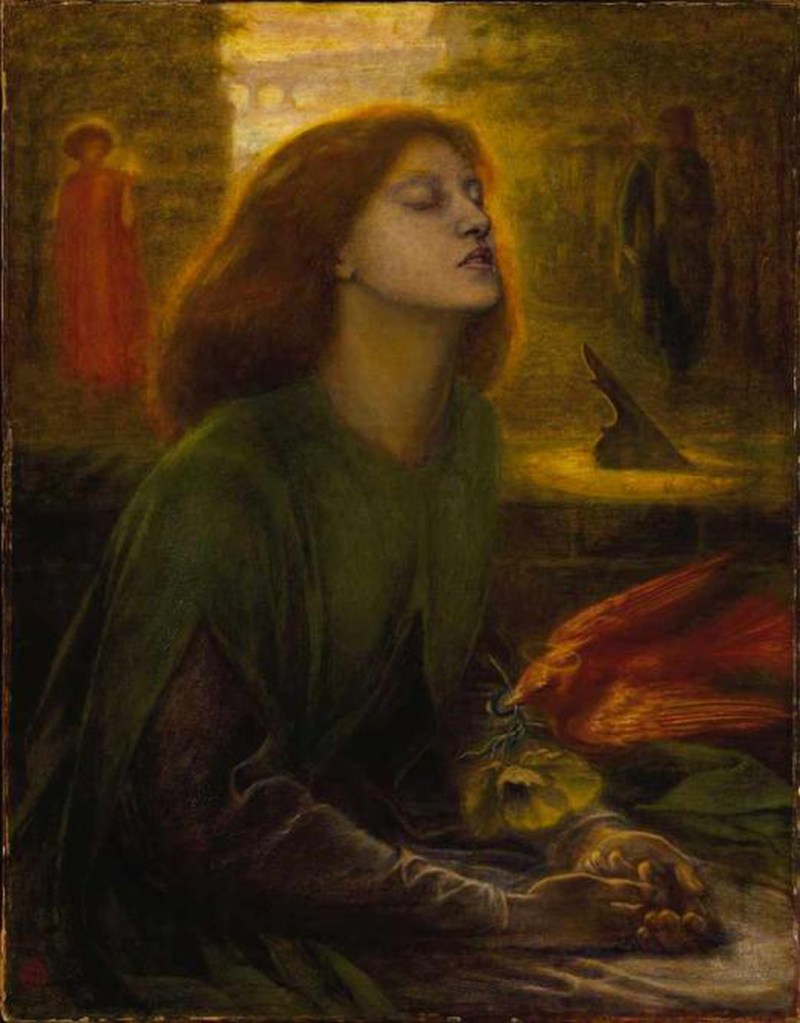
Elizabeth Siddal, commonly known as Lizzie, was also an artist. Inspiring many Pre-Raphaelites, including Walter Deverell, William Holman Hunt, and John Everett Millais, Lizzie truly inspired her husband,Dante Gabriel Rossetti. In one of his most famous paintings Beata Beatrix, created after Lizzie died, Rossetti modeled the character Beatrice Portinari after Lizzie as a tribute.
Dante Gabriel Rossetti’s Beata Beatrix, 1864-1870
Victorine Meurent (1844–1927)
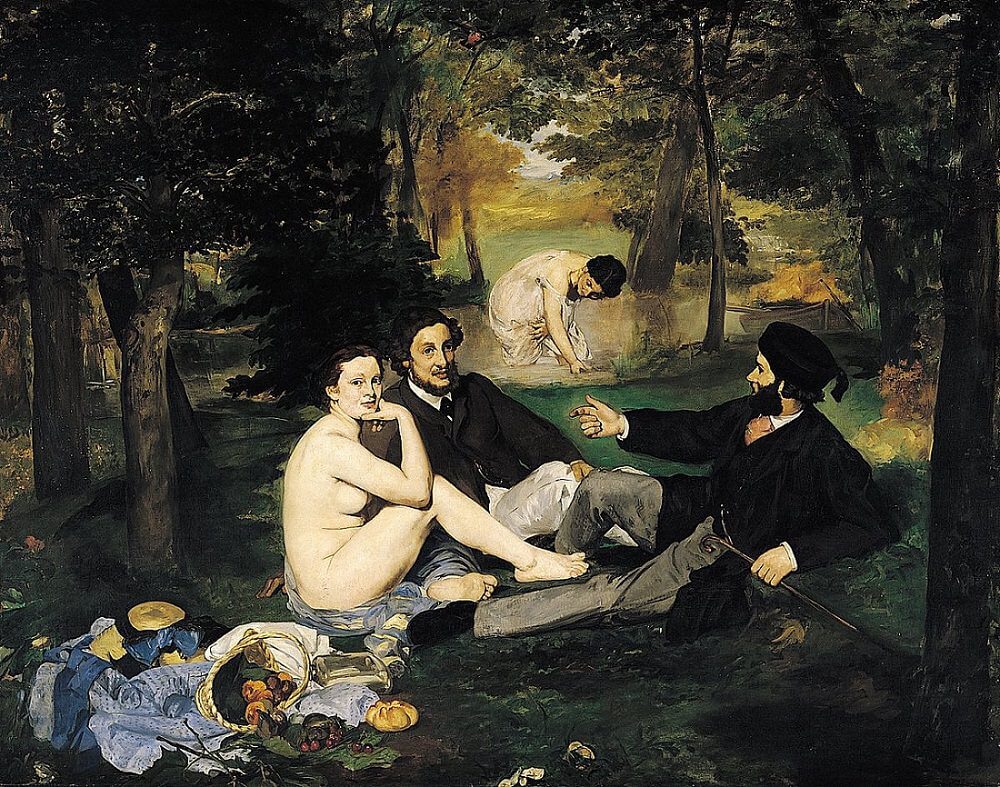
A painter herself, she modeled for several paintings by Édouard Manet. Among these, Manet’s Le Déjeuner sur L’Herbe (The Luncheon on the Grass) (1862–63) and Olympia feature a nude Victorine in a nonchalant manner, which was quite shocking for the time. His Olympia (1863) shows a nude white woman (recognizably Meurent) lying on a bed as a black servant brings her flowers. In Street Singer (1862), Meurent poses as a woman on the fringes of society, provocatively eating ripe cherries as she holds a guitar. This painting, which shows a hungry girl with dark shadows around her eyes, could represent later years of Meurent’s life when she fell into poverty, appealing in vain for funds from Manet’s widow. She also modeled for painters Edgar Degas and Alfred Stevens.
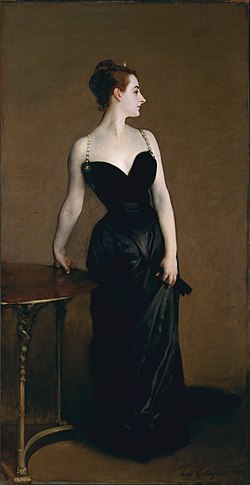
Parisian socialite and renowned beauty Amelie Gautreau was the ‘Madame X’ in John Singer Sargent’s iconic 1884 portrait of that name. The painting sparked a scandal as Gautreau’s clothing was considered “flagrantly insufficient”. She was a striking beauty famous for her unnaturally pale look which was attributed to consumption small amounts of arsenic. But it was later confirmed that she dusted herself with lavender-tinted rice powder. It is believed that in the painting Madame X, Gautreau’s exposed ear is pink because she rouged her ears to avoid “giving away the natural tone of her un-powdered, naked skin”.
Madame X by John Singer Sargent
Camille Claudel (1864-1943)
Camille Claudel was an important artist in her own right, but her work was often overshadowed by her relationship with her mentor, Auguste Rodin. Rodin made several sculptures depicting Claudel, including Portrait of Camille with a Bonnet(1886).
Camille Claudel
Francois Auguste Rene Rodin-Portrait of Camille Claudel with a Bonnet
Emilie Louise Flöge (1874-1952)
Emilie Louise Flöge was an Austrian fashion designer, and businesswoman, as well as a partner of Gustav Klimt. She is shown in his 1908 masterwork The Kiss,which portrays the couple as lovers ensconced in glimmering gold.
Klimt also depicted her in a 1902 painting titled Emilie Flöge.Flöge’s pointed features and flat virgin body are encountered often in Klimt’s pseudo-erotic paintings tantalizingly glimpsed through elaborate surface patterning.
Hers is the blank mask at the centre of his 1913 picture, The Virgin. As often with Klimt, the unconscious face is set at right angles to the neck, as if the model had been hanged. On her pedestal, swathed in fabric designed by the master, Flöge is a debased version of the muse as a fashionista.
The Kiss by Gustav Klimt
Gustav Klimt-Portrait of Emilie Louise Floge
The Virgin by Gustav Klimt
Audrey Munson (1891–1996)
Known as ‘Miss Manhattan’ and the ‘Panama-Pacific girl,’ Munson was the most popular model of her day. ‘Discovered’ when she was 15 years old, Munson first posed for sculptorIsidore Konti and became Alexander Stirling Calder’s preferred model. In 1915 Munson provoked a crisis among the censors of the American film industry when she played an artist’s muse in Inspiration – becoming the first woman to appear fully nude in a (non-pornographic) motion picture.
Audrey Munson in her role as an artist’s model in the film Inspiration, 1915. Photo via Wikimedia Commons.
Alexander Stirling Calder working on a sculpture for the Panama-Pacific International Exposition in San Francisco in 1913.
Three Graces by Isidore Konti-all three modelled after Audrey Munson
The female muse is one of the most romanticized figures in art history and in the past, male artists have predominantly hogged the creative limelight at their expense. During Renaissance and the period of Romanticism, muses were represented sensually and quite often erotically, thereby objectifying them to a large extent and reducing their role to a mere physical level.
Famous artist-muse couples like Picasso and Marie-Thérèse, Camille Claudel and Rodin are etched in art history, but we usually overlook these women as artists in their own right, not to mention human beings with their own identity. Sadly enough, they are remembered merely as models, lovers and muses.
However, with time, the once objectified female muse transformed into a strong, fierce woman who stood up for her rights and honor against the oppression of the society. Modern art is marked with such bold and emancipated figures that have made a place for themselves in the male dominated world. More about them in the second part of this post, so stay tuned!
DISCLAIMER – All the information, data and imagery in this blog post is for informational and educational purpose only. While there may be copyrighted material the use of which has not always been specifically authorized by the copyright owner, I have only made it available with the sole effort to stimulate creative progress and artistic enrichment. Some images may have been taken from the links included below and I give full credit to these websites/pages, thereby in no way claiming them to be my own. I have also used these links for reference purposes and collection of data; therefore I give full credit to the respective web pages. Most of the data in this post is based on my personal experiences and opinions and I am not responsible for any material that is found in the links at the end of this post.
A woman is a special being that possesses the miraculous power of creation itself. Being the harbinger of life, creativity comes naturally to her and she is born with it. Just as she conceives life inside her body, nurtures it and finally brings it into the world, she can also spawn beautiful ideas in the womb of her intellect, cultivate them and eventually deliver them to one and all.
This post is a celebration of feminine creativity and is especially dedicated to all my fellow women artists out there. Why? Because it’s International Women’s Day of course! So here’s wishing all those wonderful ladies that hold the power of creation in their hands, a Very Happy Women’s Day!!
A woman is a receptacle of limitless talent. Throughout history, there has been many a women artist who has created outstanding works of art, be it in the form of paintings, photographs, sculpture or motion picture. Artists like Mary Beal, Gwen John, Lee Krasner, Eileen Aigar and Frida Kahlo to name a few have made some of the most distinguished contributions towards the field of fine art in particular.
Inspite of facing constant opposition from their male counterparts, women artists have outdone themselves and stood the test of time. Today they are as integral a part of the institution of art as their fellow male artists and walk hand in hand with them, their heads held up high.
One of the greatest gifts a woman possesses is her power to express and emote better than a man. It is this faculty that a women artist harnesses successfully and uses to its fullest potential in order to emote her thoughts to her viewers. This skill allows her to redefine and extend the boundaries of art thus making a mark for herself in the male-dominated world.
On the occasion of International Women’s Day and in celebration of Women’s Week, my next few posts will tell you the story of not only few of the amazing women who have played muse to artists or have inspired art in some way or the other, but also some well known women artists themselves in the field of fine art. So let me kick off the festivities with my personal ode to commemorate this celebration of femininity.
My tribute on Women’s Day
My artwork displayed above titled “Cheers to Womanhood!” has been inspired by the fabulous womankind that has held its ground with its never-say-die attitude. It is also a mark of respect to all my fellow women artists, in recognition of the remarkable work done by them in the past and looking up to them as a source of inspiration in the future.
This piece of art symbolizes the strength of a woman on the whole and how she is capable of carrying the weight of the entire world on her shoulders. For centuries, women have been marginalized and dominated by men, especially in my country, India. But things are changing now and women are no longer the oppressed sex of the society. For the Indian woman in particular, standing up for her rights against all the atrocities and hardships of the world is a feat in itself.
The veil of modesty that she drapes around her head in the artwork does not diminish her strength or abilities in any way, but only enhances their beauty and power furthermore. The “bindi” or red dot in the centre of her forehead is yet another symbol of her brute force and not just a mark of adornment. Through the expression on her face and the look in her eyes, I have tried to convey that she’s the epitome of power and she’s here to stay.
I have created this piece using prismacolor pencils, with a hint of brush markers for the subtle details. I tried out something new for the background of the veil around the woman’s face. I rendered it with water color pencils, giving it a soft water color wash using a brush dipped in water. Then I added a second layer of color on top, but this time with chalk pastels and once again gave it a wash with my moist brush. I am happy to say that the two shades of peach and pink that I used for the background blended in quite well to create a water color effect. Then I created the print of the fabric with consecutive layers of pencil colors, fine tip markers and rubber stamping with distress ink, thereby adding intricate details to the print. The face of the woman has been done with prismacolor pencils.
This artwork is not only my tribute to the feminine spirit but also a portrait of the artist in her who has been endowed with the ability to conceive and thereafter deliver her vision. I hope you like my rendition as well as celebration of feminality and you look forward to my upcoming posts in its honor.
Looking to reuse, recycle and revamp the junk lying around in your home or studio? Then this post is definitely for you, for today, I am going to talk about the decorative and extremely stylish craft of Decoupage which has been in vogue for centuries now. What makes this elegant craft fabulous as well as fun is the fact that it can be done by one and all, be it adults or kids. Many a fine artist has used a decoupage medium to create a unique piece.
I personally believe that decoupage is like a magic trick that an amateur artist hides up his or her sleeve to create the illusion of a painting and ingeniously dissuade his or her viewers into falling for it. What appears to be painted is nothing but paper cleverly glued into place. That’s why I call it “crafty” decoupage!
What Is Decoupage?
“Decoupage” actually comes from the French word “decouper,” which means to cut out or cut from something else.
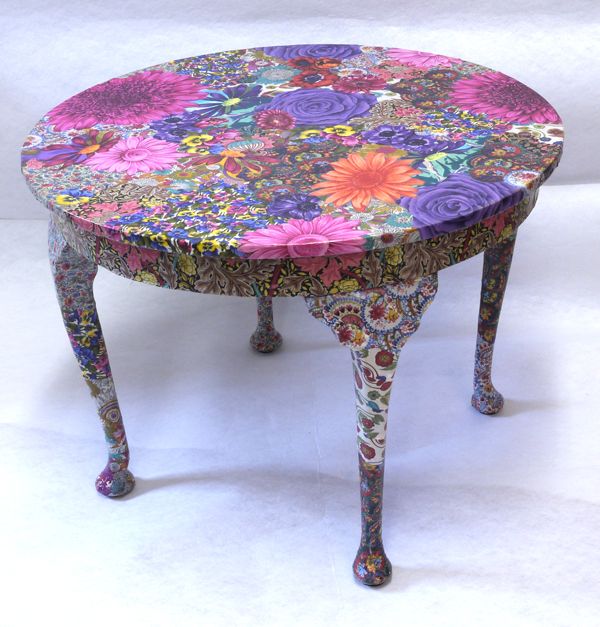
Decoupageis the art of decorating common objects like a small box or an item of furniture by gluing cutouts of colored paper, or paper with interesting patterns from magazines or special decoupage papers, in combination with special paint effects, gold leaf and other decorative elements. Thereafter, each layer is sealed with varnishes (often multiple coats) until the “stuck on” appearance disappears and the result looks like painting or inlay work. The traditional technique used 30 to 40 layers of varnish which were then sanded to a polished finish.
3D decoupage (sometimes also referred to simply as decoupage) is the art of creating a three-dimensional (3D) image by cutting out elements of varying sizes from a series of identical images and layering them on top of each other, usually with adhesive foam spacers between each layer to give the image more depth.
Pyramid decoupage (also called pyramage) is a process similar to 3D decoupage. In pyramid decoupage, a series of identical images are cut into progressively smaller, identical shapes which are layered and fixed with adhesive foam spacers to create 3D “pyramid” effect.
History of Découpage
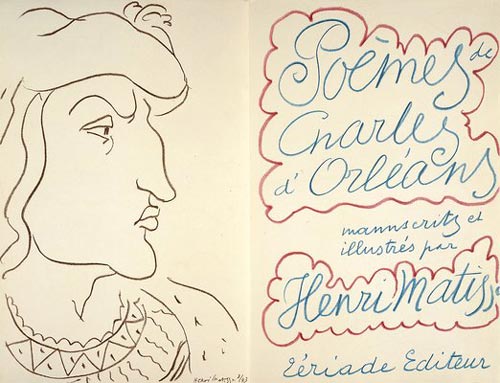
Decoupage is a very old, traditional paper craft. It has a long and fascinating history that can be traced back to a variety of styles from many distant countries. Over the centuries it boasts many famous practitioners including Marie Antoinette, Madame de Pompadour, Lord Byron, Beau Brummel and more recently, Matisse and Picasso. Today, decoupage remains a popular craft with many variations.
As far back as the 12th century, Chinese peasants were creating paper cutouts in vivid colors to decorate windows, lanterns, gift boxes and other objects. This Chinese practice and expertise with scissors is thought to have come from Eastern Siberia, where cutout felt figures and designs were decorating objects in the tombs of Siberian nomads. German and Polish artisans have also been using cut paper for decoration over several centuries. Polish women and children in particular, developed enormous skill with folded colored papers which they cut freehand into geometric shapes and stylized birds, animals and flowers.
12th Century Chinese Decoupage
However, it was the late 17th century lacquer work from the Far East, mostly in the form of furniture, which we tend to associate with today’s découpage. Oriental lacquered objects became fashionable in Europe and in no time demand exceeded supply. As a result, Venetian cabinet-makers and lacquerers (called depentore) began to produce fake lacquer work to keep up with the demand. This work was known as lacca contrafatta-counterfeit lacquer. Apprentices were employed by the artisans to hand-color the prints and engravings of leading artists. The wealthy classes were using master painters to paint their furniture and decorate their walls and ceilings. Thus, it became the poor man’s alternative to painted furniture in France in the 17th century.
Italian secretary desk at the Metropolitan Museum of Art, New York(17 century lacca contrafatta)
In time, because of excessive demand and the fact that many people could not afford the works of the masters, an alternative form of decoration developed. Drawings from the artists of the day were cut out, glued down and covered with lacquer to resemble original paintings. From this derivation came the alternative term l’arte del povero – poor man’s arts. During the 18th and 19th centuries this art form flourished throughout Europe. It even infiltrated the court of Louis XV. Ladies with an artistic bent snipped away at pictures and pasted them onto hatboxes, wig stands, fire screens and toiletry objects, keeping themselves amused for hours. This and the general skill of lacquering were known in England as Japanning. The works of Boucher, Watteau, Fragonard, Redoute, Pillement and many other distinguished artists came to this sticky end.
English Black Japanning
In 19th century England, during the Victorian era, hand coloring and intricate cutting out gave way to the more sentimental, florid collage-style of this art form. This coincided with the introduction of Valentine cards, decorative and embossed papers and braids to embellish surfaces such as screens, lamp bases, linen boxes and much more. While these découpage pieces lacked subtlety and skill, they made up for it with a certain bold and sentimental charm.
English 19th Century Decoupage Fish Chest of Drawers
With such a long and varied history, it is not surprising that découpage is still evolving with new styles. With its colorful origins and variety of techniques the possibilities for this fascinating art form are infinite, offering scopes for endless hours of creativity as well as enjoyment.
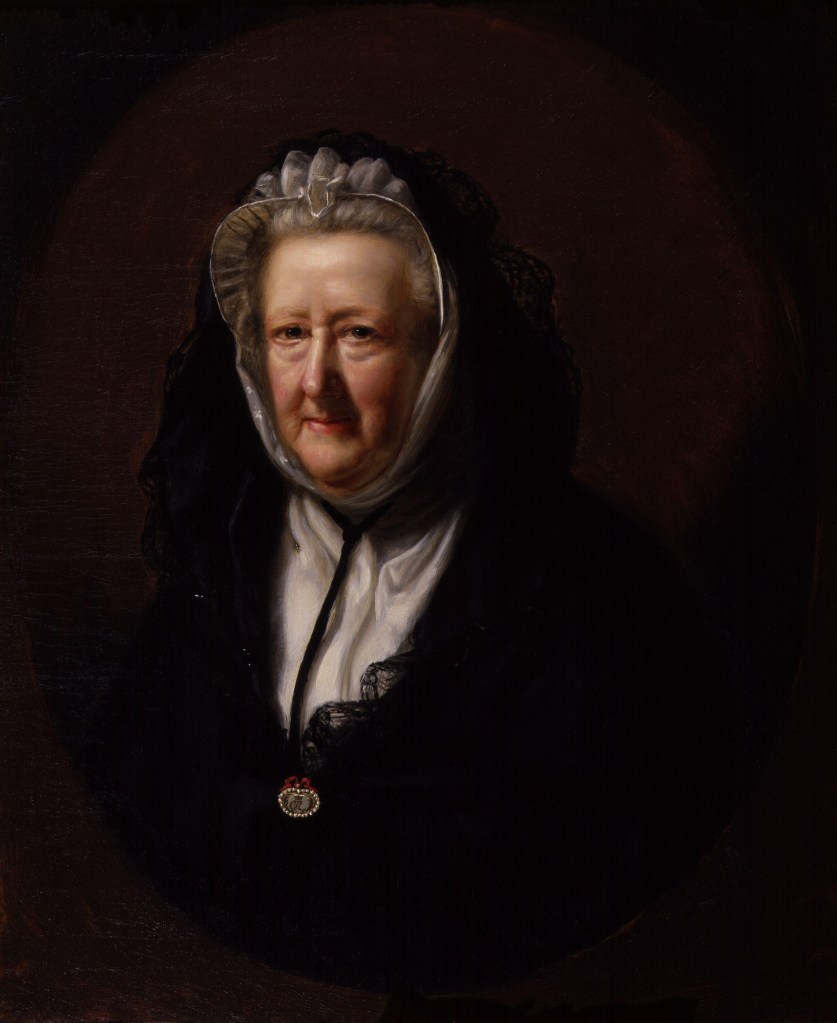
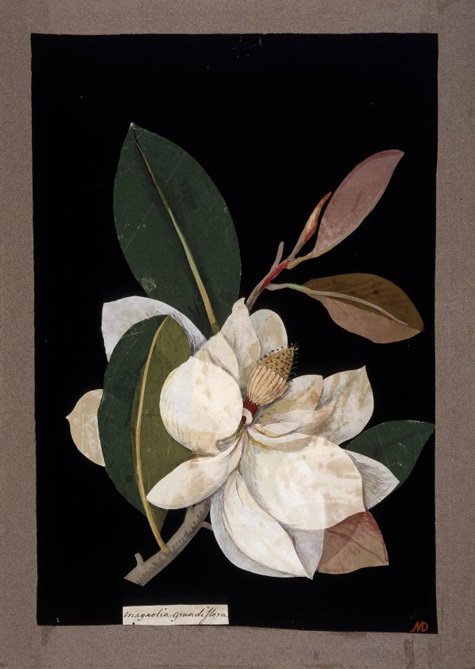
One who does decoupage is called a Decoupeur, or “cutter”. At the age of 71, Mary Delany achieved fame at the court of George III and Queen Charlotte of England thanks to the 18th-century decoupage craze. In 1771, she began to create cut-out paper artworks (decoupage) as was the fashion for ladies of the court. Her works were exceptionally detailed and botanically accurate depictions of plants. She used tissue paper and hand coloration to produce these pieces. She created 1,700 of these works, calling them her “Paper Mosaiks”, from the age of 71 to 88 when her eyesight failed her. They can still be seen in the Enlightenment Gallery at the British Museum of Art.
Mary Delany
Delany’s decoupage work
From the Mary Delany collection at the British Museum
Mary Delany collection at the British Museum
Magnolia from the Mary Delany Collection at the British Museum
Mary Delany’s “Paper Mosaiks”
Jay (Terry) Jones, a notable decoupeur from Waynesburg, Pennsylvania, holds multiple Guinness World records for his extensive decoupage collection.
Richard Basile, a well known New York art collector and entrepreneur, achieved notoriety as a decoupeur when his intricate floral decorative work was displayed at the Foire Internationale d’art contemporain festival in Paris in 2014. Basile had developed his collective works over more than a decade while working in the basement study of his parents’ New England home.
Uses of Decoupage
Traditionally, decoupage was most commonly used to decorate items of furniture and home accessories. There are many other ways that this versatile technique can be used and it is becoming increasingly popular with card makers and scrapbookers. The three-dimensional images created by decoupage add depth and interest to projects.
Just about every surface can be decoupaged, like wood, paper, fabric, glass, metal, tin, papier-mâché, terra cotta, MDF and many more. The only surface that really presents an issue is plastic, or other surfaces that are extremely slick (and possibly have a coating). The issue is that the glue doesn’t really work well with other polymers, so you would probably be able to pull whatever you Mod Podged off right after it dried. There are some options for decoupage on plastic, including keying up the surface with sandpaper or spray painting with plastic friendly spray paint first.
Materials for Decoupage
Decoupage Medium
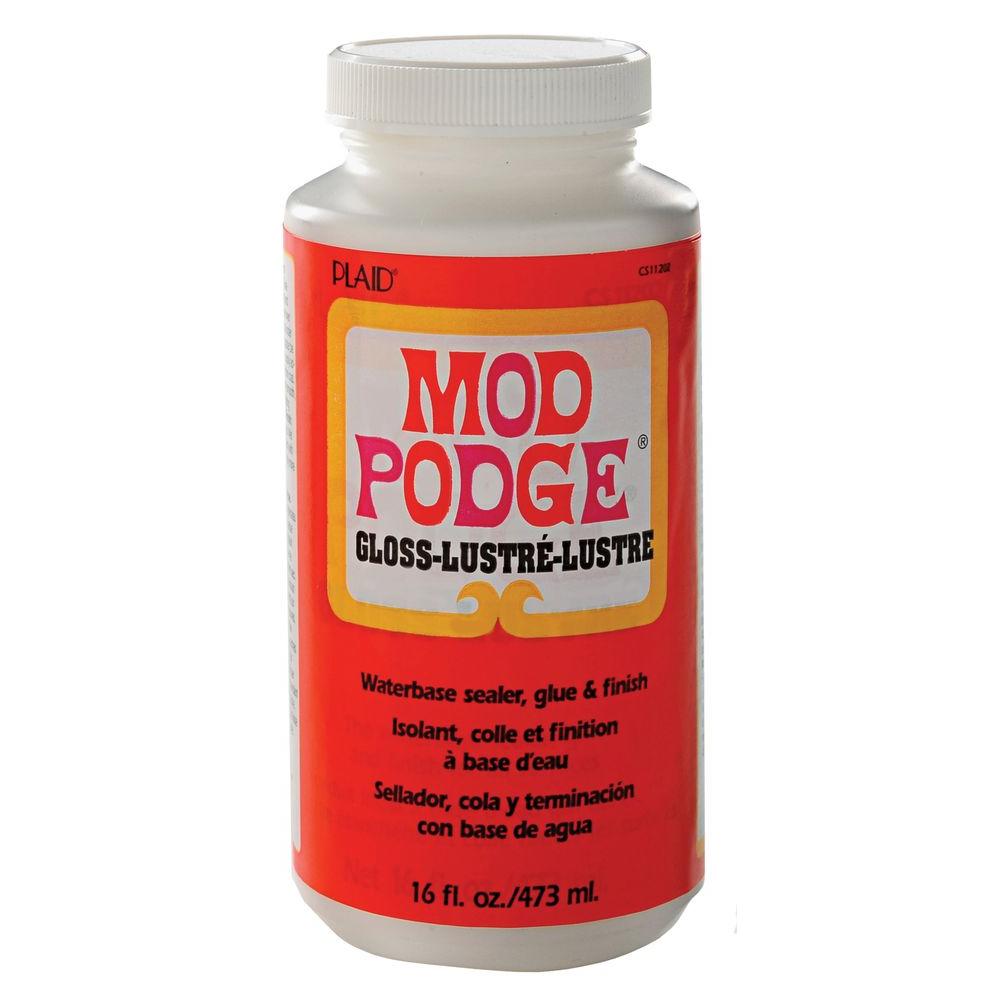
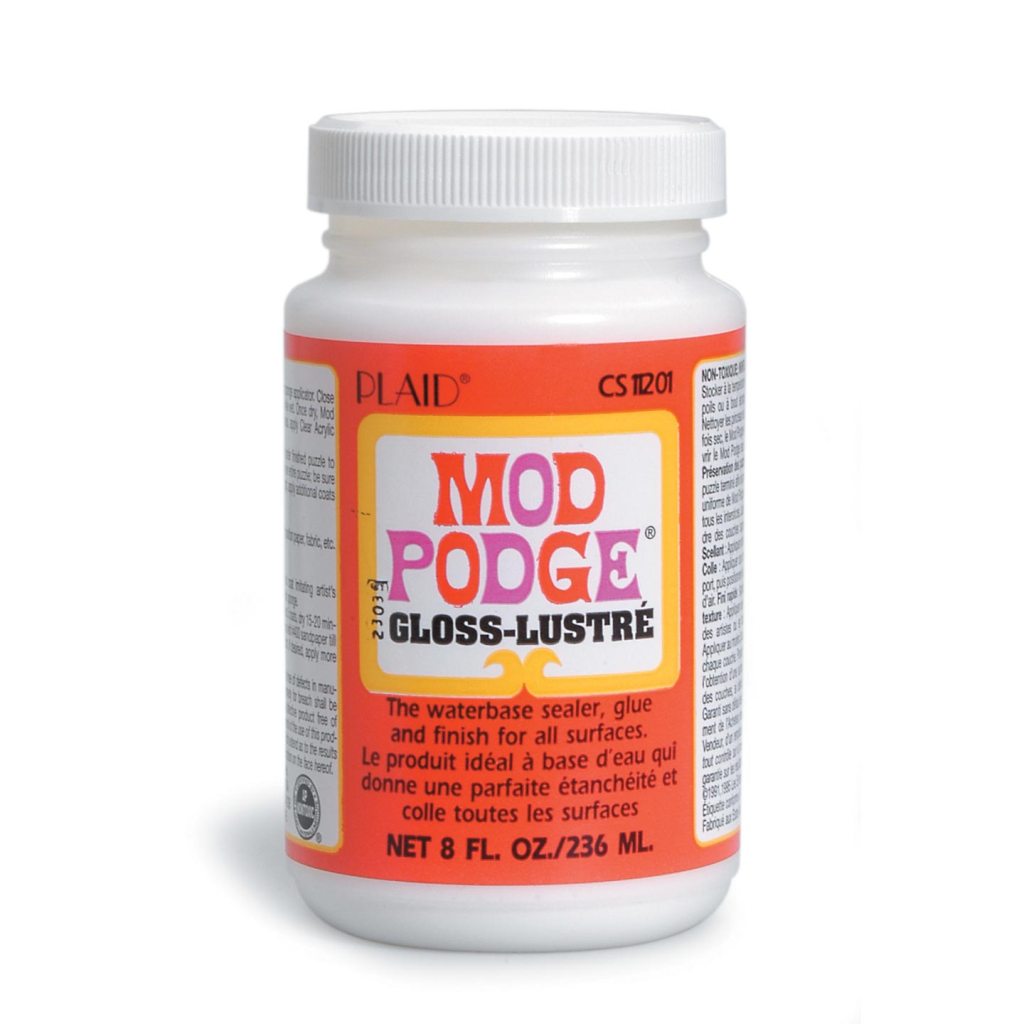
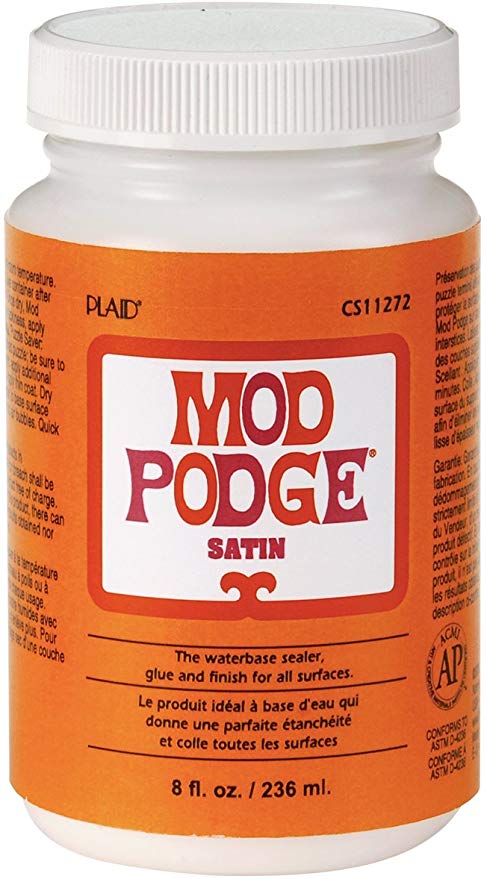
Decoupage medium is an all-in-one sealer, glue, and finish used for creating decoupaged works of art. It can be used on wood, fabric and other porous surfaces. It dries clear and holds glued-on paper cuts tight.There are many different types of decoupage glue. Almost any white glue (PVA, craft or school glue) can be diluted with water (three parts glue to one part water) to serve as decoupage medium. One can also add mica, pigment powders or even glitter to the diluted glue to achieve different effects. Mod Podge is a popular decoupage medium and is available in different sizes and with gloss or matte finishes.
Decoupage Mediums
Whether it is furniture, home decor or clothing, a decoupage medium is needed for all. There are several types of adhesives, each with their own benefits and drawbacks. The type of adhesive used can create different finishes on your product. Here are a few options:
Matte – This finish is flat rather than glossy. Using this finish will allow the decoupage to look more like paint and will create a more seamless design. Putting a matte finish will also help prevent any glare from lights that can be created when using a glossy finish, which will be more reflective.
Glossy – A glossy finish will give a shiny or lustrous effect. This is a great option when decoupaging photographs printed on glossy paper. It will not dim the photos, but add to the finish to give a professional look.
Satin – A satin finish is similar to a matte finish as it does not have a shine. This is another good product to use if you want to avoid the glare that can be caused by a more glossy finish. A satin finish is the recommended option for furniture you want to have a painted effect on. (IMAGE)
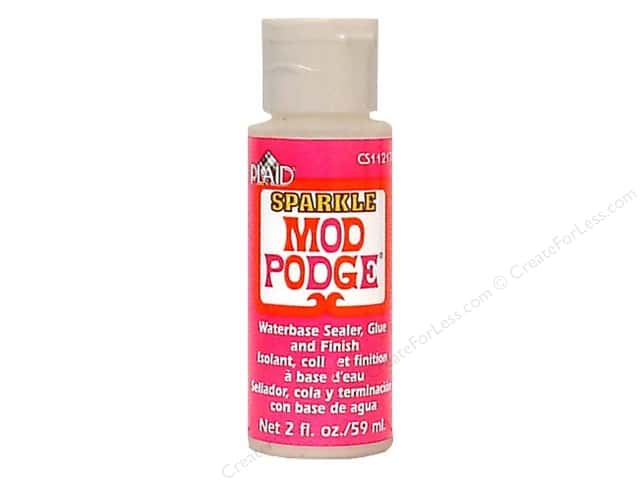
Sparkle – This finish will add a little extra sparkle and design. This is a great product if you are planning to decoupage an entire piece.
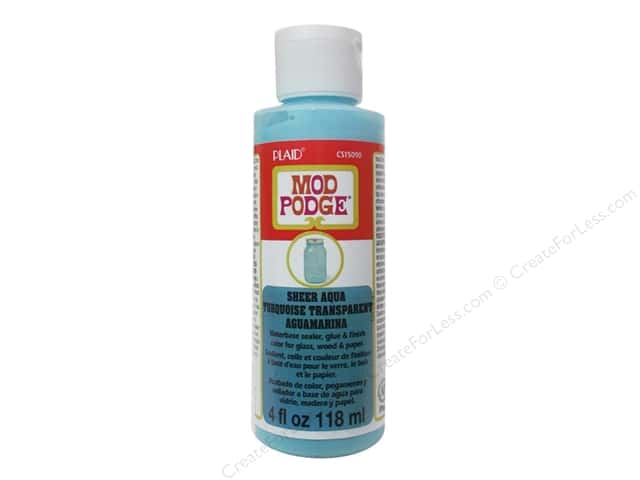
Colored Decoupage – Some decoupages come with a light tint of color. This is great for staining glass, wood, and metal. With a transparent color and the same application uses as all decoupage, it’s a great option for adding that extra bling to your design.
Decoupage for Furniture – This decoupage is great for more porous materials such as wood and fabric. When decoupaging furniture you will also want an adhesive that will not fade with wear and tear. This finish gives the strength and resistance needed for heavily used items.
Outdoor – Using outdoor decoupage will allow you to seal your project from outdoor elements causing less wear and tear than the average decoupage.
Making Your Own Decoupage – Another option could be creating your own decoupage with PVA glue and water. Though this may be a cheaper option, it is less strong and will hold for a shorter time. It will also be less water resistant.
Matte
Glossy
Satin
Sparkle
Colored
Furniture
Outdoor
Types of Decoupage Mediums
2. Paper for Decoupage
Almost any paper can be used for decoupage and the type of paper you are use depends mainly on what the project is and what is its purpose. For projects that will be used more, a stronger paper would be better and to personalize something you can use your own photos or cut out images from magazines.
A wide variety of special papers for decoupage are available today at almost all art and craft stores. These contain a number of images that have been selected specifically to suit the purpose of decoupage and provide contemporary as well as traditional designs. In addition to decoupage papers, pre-cut or die-cut decoupage kits are also available. These are a quick and convenient way to create decoupage designs. Here are some examples of paper you can use:
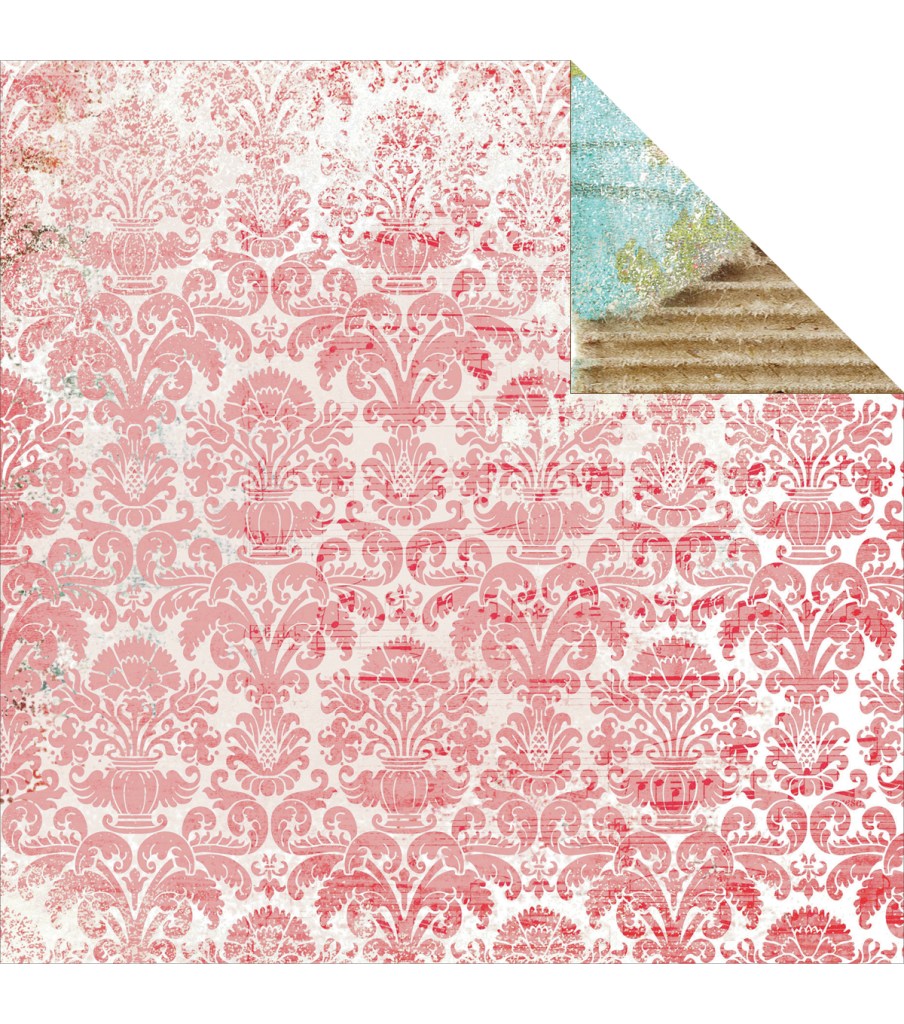
Decoupage Paper – These papers are made specifically for more intricate designs and decoupaging crafts.
Tissue paper – This paper is lighter and thinner so can easily bend around corners and is less likely to have a raised surface or bubble up. Due to its semi-opaque surface, it gives more of an effect like that of a painting than other papers.
Cardstock – Cardstock comes in many designs and colors making it a great option for mod podge. A heavier cardstock can be a good option for 3D decoupage as it will look thicker on your project.
Photos – Decoupage works perfectly with personal photos. Just add decoupage glue/medium to the surface, stick your photo firmly and then add more adhesive on top to smooth the photo down. You can also use decoupage to transfer a photo to a different surface. When decoupaging with photos make sure they are from a laser printer rather than an ink-jet printer as a photo from an ink-jet printer can smudge with the decoupage application. If you use inkjet-printed images on your surface to be decoupaged, let the ink dry, and then spray it with hairspray. It sets the ink and then you can use the print. Make sure both are completely dry before applying your medium.
Fabric – A lighter fabric will work better as it will allow the decoupage to seep in and seal it. To ensure fewer wrinkles, ensure that the fabric is taught and press it onto your surface a little bit at a time. Make sure that you seal your fabric with a polyurethane and sealer.
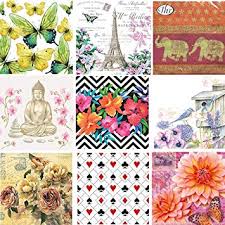
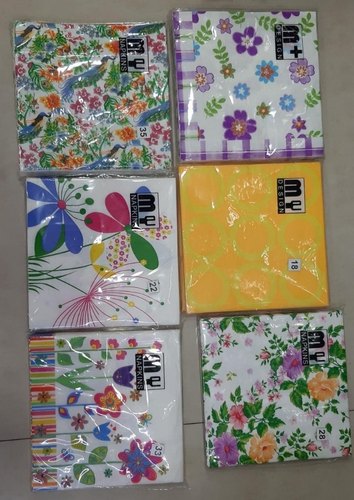
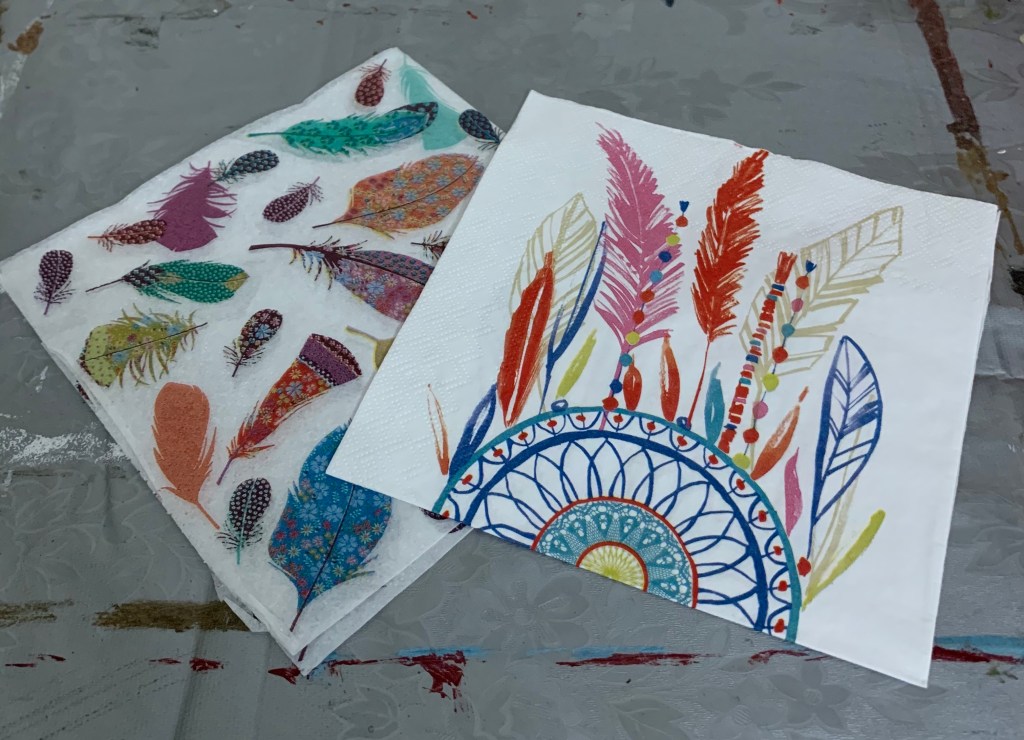
Napkins – Napkins are a great option for decoupage owing to their wide range of designs their lighter nature. Cut out the design before taking apart the layers of the napkins and then use a single layer for the decoupage.
Decoupage Paper
Decoupage Tissue Paper
Decoupage Cardstock
Decoupage with Fabric
Decoupage Napkins
3. Decoupage Adhesive Pads
Decoupage is given the three dimensional, raised effect with the help of a thick double-sided tape or self-adhesive pads. Different effects can be achieved by using different thicknesses of the adhesive pad. When layers are built up using glue without the added depth of a glue pad or tape a more subtle effect is produced. This is similar to paper piecing.
Decoupage Adhesive Foam Pads
4. Rubber Stamping and Decoupage
Rubber stamping and decoupage are complementary crafts. Decoupage can be used in rubber stamping projects and vice versa. Rubber stamping can also be used as the images for decoupage. This wide range of options makes rubber stamping and decoupage a perfect match.
Rubber Stamp for Decoupage
The above are the essential supplies needed for decoupage, but here are a few other items that might come in handy:
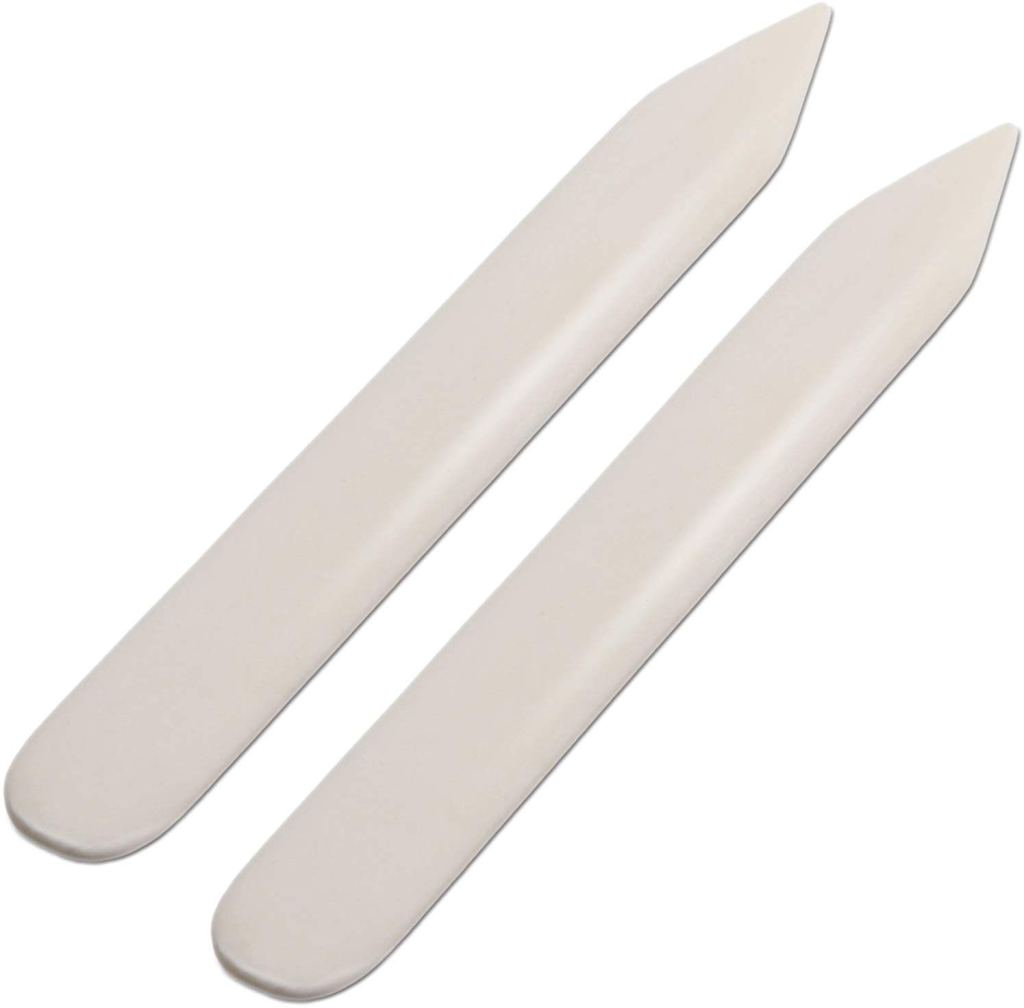
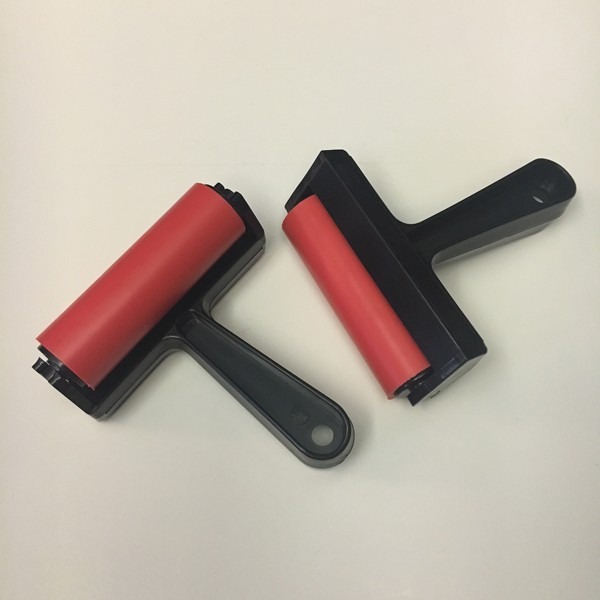
Bone folder – This can help smooth out wrinkles and remove excess glue. A tool made especially for this, called a brayer is also available.
Bone Folders
Brayers
Foam brush – This is useful for spreading the decoupage medium or glue onto the object to be decoupaged. An ordinary paintbrush or even a cotton swab can be used for this purpose but these are not as effective.
Foam Brushes
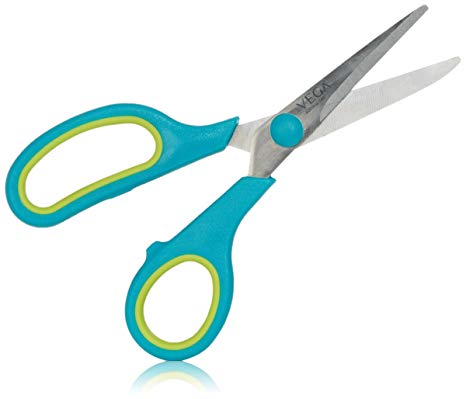
Scissors – Used to cut out the pictures and other items to be decoupaged. A pair of scissors with small blades or a utility knife can be used to cut decorative paper with a lot of intricate details.
Scissors
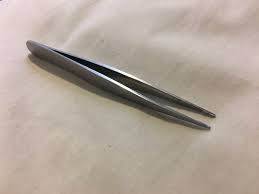
Tweezers – Tweezers are sometimes great help when it comes to positioning small pictures.
Tweezers
Damp rag – Keep one handy to wipe off excess glue and to clean up. Ensure the rag is damp and not soaking wet when using it to remove excess decoupage medium from your glued papers. A damp rag also helps to keep your hands clean while working with glue.
Damp Rag
All about Mod Podge
Since my medium of choice is Mod Podge, I feel it deserves a special mention in my post. Not only is it a medium, it is also an adhesive/sealer and provides a finish as well. Mod Podge has additional properties that make it better than the regular school or craft glue, thus increasing the longevity of decoupage crafts that are made using it.
The original inventor of Mod Podge was Jan Wetstone, an Atlanta housewife, who in 1967 invented Mod Podge while experimenting with short-cuts to decoupage in her antique shop. It proved to be one of the most enduring successes in the history of the craft industry. Jan secured two patents, one for Mod Podge and one for a molded frame-maker kit.
Jan Wetstone
Here are some of the common surfaces that can be used for decoupage with Mod Podge:
Wood
Tin
Glass
Ceramic
Metal
Fabric (including clothing and shoes)
Terra Cotta
Here’s a list of materials that can adhere to the surface using Mod Podge:
Paper
Fabric
Tissue Paper
Napkins
Stickers
Wrapping Paper
My Decoupage Project
I have this habit of scribbling down my thoughts and making “To Do” lists in my daily planner at the end of each day. Moreover, when I come across a new art form or bump into a new craft, out comes my diary and I quickly jot down what I saw so that it is preserved for posterity. Thereafter, I plan out how to go about making this new technique part of my own art. This is where my “To Do” list comes in handy.
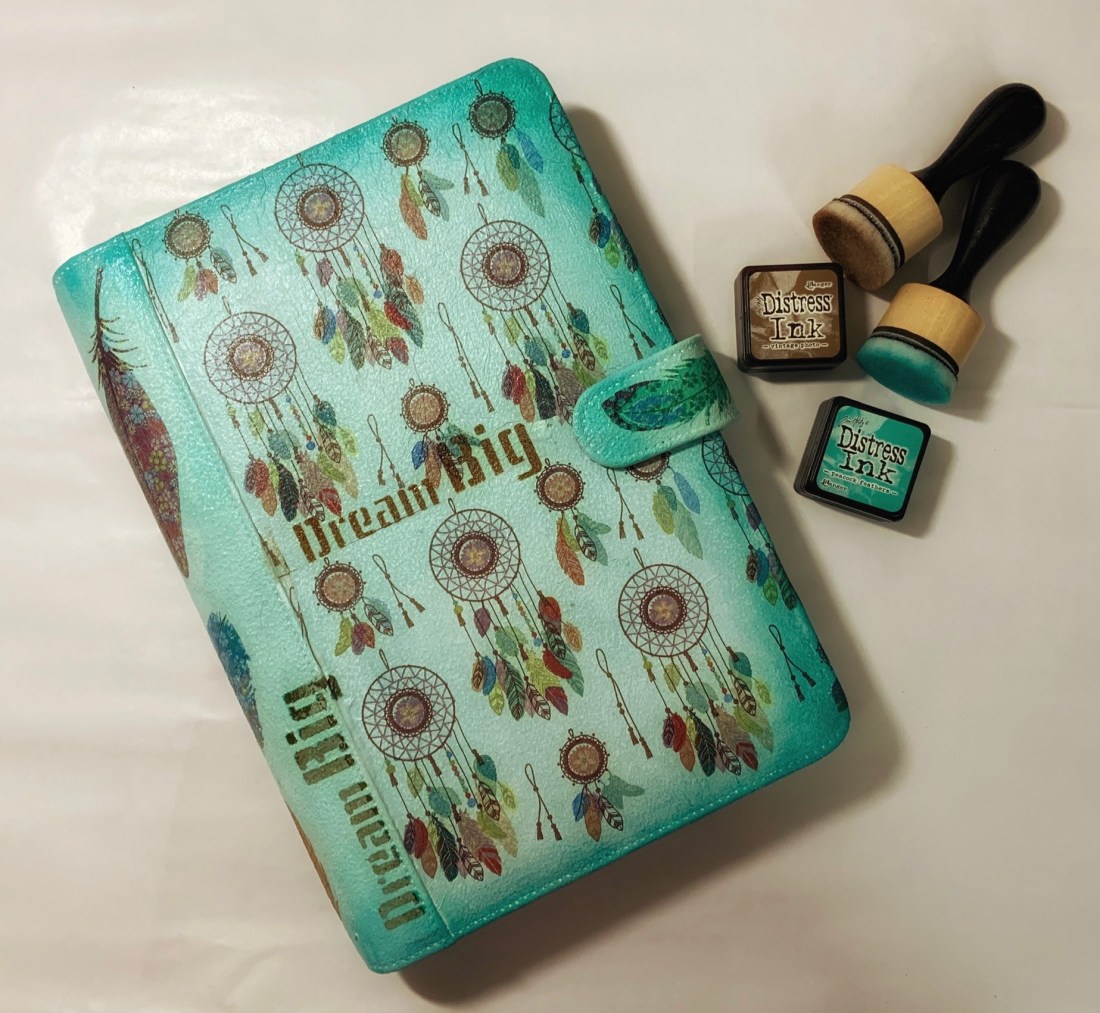
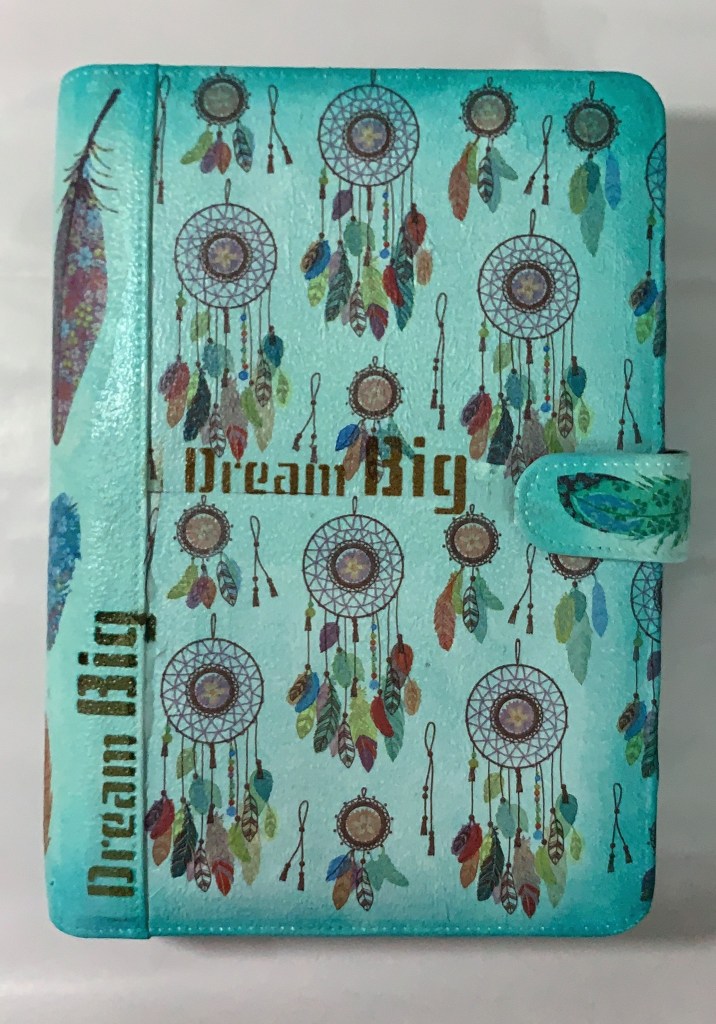
Every year, I invest in a good planner which for all practical purposes does what it is meant to do. One fine day, I asked myself, why does an artist’s planner have to be just a plain looking executive diary? Why should it be any less artistic or creative than the art itself? So I decided to upcycle my old planner into a work of art. And what better way to do this than with the lovely craft of decoupage! Well, here it is then, the story of my daily planner and how I transformed it from an ordinary diary into the memoir of my dreams.
Since the craft of decoupage was new to me, I had to do a lot of research on what all it requires and how it is done. Having done that, I gathered all the supplies and followed the directions that I had read up. For all those who wish to do try it out, here’s how I went about it, along with a few of my personal tips and tricks that eased the process for me.
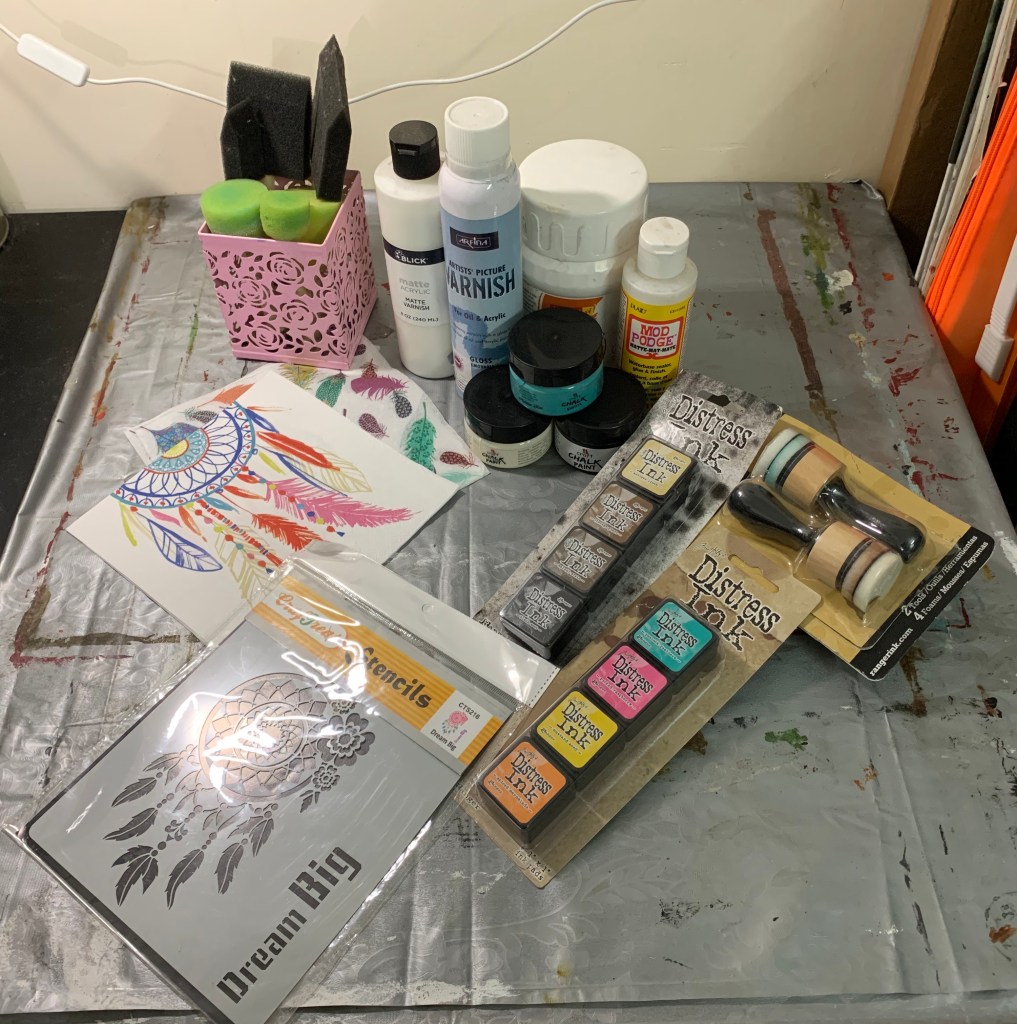
Materials I used –
Surface/Object of your choice (In my case, my faux leather planner).
Gesso to provide a base coat to the surface/object before the next layer of paint. This ensures that the paint is not patchy and the original surface does not peek here and there through the paint.
Decoupage Medium (I swear by Mod Podge!)
Decoupage paper (I went for decoupage napkins due to advantages I have stated above).
Acrylic/Chalk paints (I went for the latter as they are a better option for decoupaging, specifically on surfaces like leather. The former tends to peel off as an entire layer once dry). Tip –Make sure the paint you use is appropriate for the object you intend to decoupage.
Distress inks for enhancing as well as blending the painted corners and sides of my planner with the decoupaged paper (This is optional but I would recommend it for a more finished look).
Ink Blending Tool for blending in the distress ink uniformly with background.
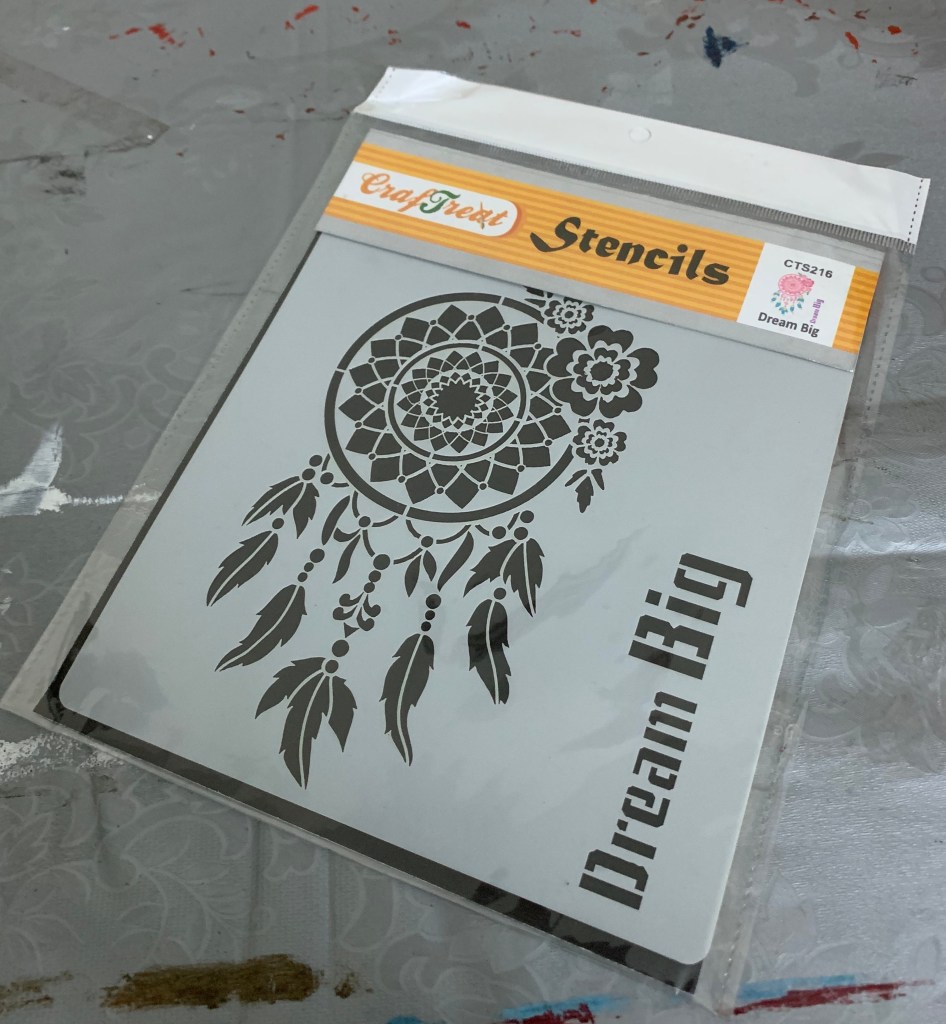
Stencils of text/patterns to add on to your design (again optional).
Gloss Varnish to give my cover a glossy shine as well as seal and protect the decoupage work. I would recommend multiple coats. (You can opt for a matte varnish if gloss is not your thing).
Tools I used –
Sponge dauber for applying the chalk paint evenly. You can use a paintbrush as well but the brush lines will be visible after the paint dries.
Scissors to cut out the decoupage napkin or specific shapes/motifs from it.
Craft/X-Acto knife and mat (optional, in case you want finely cut designs).
Foam brush for uniform application of the varnish.
My Decoupage bootie!
Gesso (This brand is only available in my country)
Decoupage Medium
Chalk Paints
Distress Inks
Glossy and Matte Varnish
Stencil I used
Decoupage Napkins
Sponge Daubers
Foam Brushes
Ink Blending Tool
Extra sponges for Ink Blending Tool
The Process –
1. The first step towards decoupaging isto make sure that the surface/object to be decoupaged is clean, dry and free from any dust or dirt. So I wiped my planner cover with a soft cloth.
2. Next, I prepared the surface. I did this by applying a basecoat of gesso onto the planner using my sponge dauber and once it was completely dry (which takes about 24 hours), I covered it with a layer of chalk paint with the help of the dauber once again. Tip – the paint should be totally dry before you start decoupaging.
3. Then I prepare the items to be Mod Podged by cutting out the decoupage napkin which was a beautiful dream catcher print, in the requisite size as well as specific shapes (in this case feathers) that I wanted to decoupage individually. This involved lot of experimentation with various patterns and prints until I came up with the perfect combination and layout for the planner. Tip – Beforeapplying mod podge, arrange the decoupage paper/cuttings/ images onto the object and decide on the final placement.
4. Next, I applied a thin coat of Mod Podge with my foam brush little by little, each time placing the decoupage napkin layer carefully on top and gently pressing it down to stick it. Working in small sections at a time, I kept lifting the paper to apply a generous layer of decoupage medium onto the planner cover. I kept alternating between applying Mod Podge and placing the napkin on top until the entire sheet was adhered well. Once this was done, I smoothed out any bumps or air bubbles that might have formed during the application. This step requires a bone folder or brayer but since I didn’t have either, I simply placed a ziplock bag on top of the stuck on paper and smoothed it out with my palm. I kept smoothing until all of the bubbles were removed. I followed the same steps for the feathers that I had cut out. Tip – I let the project dry for at least 15 – 20 minutes.
5. Once dry, I added a protective coat of Mod Podge to the planner cover using my foam brush. I allowed it to dry fully once again. Tip– Do not apply a very thick coat of Mod Podge as it tends to show up as white patches once dried.
6. The next step was to blend-in the entire design. I did this by applied distress ink (same as my base color) along the edges and corners of the planner. This gave a smoother and finished look to the entire design.
7. To further add interest to my planner I applied text using a stencil and distress ink in a different color.
8. Last but not the least, I varnished the planner cover with multiple coats of glossy varnish, taking care that each coat had dried completely before I applied the next one.
So there you have it! My very own, custom-made, DIY decoupage possession and I just love it!
The Final Product – My Decoupage Daily Planner
Decoupage truly is an art form and many a fine artist has used the craft to create some unique pieces. It is a misleadingly easy craft to execute and though decoupage items may look like painted masterpieces, in reality, they are just pre-printed images on paper seamlessly adhered to a surface with a medium. Decoupage is an act of designing items by innovatively combining different papers and different techniques. It’s all about creativity and experimentation. It is the art of cycling something you already own and personalizing it as your heart desires. I like to attribute this crafty affair with three R’s of its own – Reuse, Recycle and Revamp!
DISCLAIMER – All the information, data and imagery in this blog post is for informational and educational purpose only. While there may be copyrighted material the use of which has not always been specifically authorized by the copyright owner, I have only made it available with the sole effort to stimulate creative progress and artistic enrichment. Some images may have been taken from the links included below and I give full credit to these websites/pages, thereby in no way claiming them to be my own. I have also used these links for reference purposes and collection of data; therefore I give full credit to the respective web pages. Most of the data in this post is based on my personal experiences and opinions and I am not responsible for any material that is found in the links at the end of this post.
“Gather and hoard your inspirations as you live, then recapture them as needed in the studio” – Nita Engle (American Illustrator).
As artists, developing our artistic style is quite a demanding task and we will do whatever it takes to fine tune our skills. One of the most important aspects of creating art is the thinking process, but sometimes our aggressive brainstorming tendencies get the better of us and our struggle to attain perfection makes us over think. Very often our surroundings can play an important role in boosting our creativity. This includes our workspace or studio which can be a major contributing factor towards attaining ultimate creativity.
I have found that most artists can paint almost anywhere. Armed with an easel and their art supplies, they can create great works of art out in the garden, while on the move in a bus and even in the smallest nook or corner they can find. Once they are engrossed in the art, their surroundings fade away. But having a space we can call our own can make that much more difference. Most artists find cheap spaces like abandoned warehouses or even their own garages and attics to innovatively transform them to suit their creative requirements. Not only are they cheap, but are also spacious and provide the artist the freedom of being messy. As someone rightly said, all good art comes out of creating a mess!
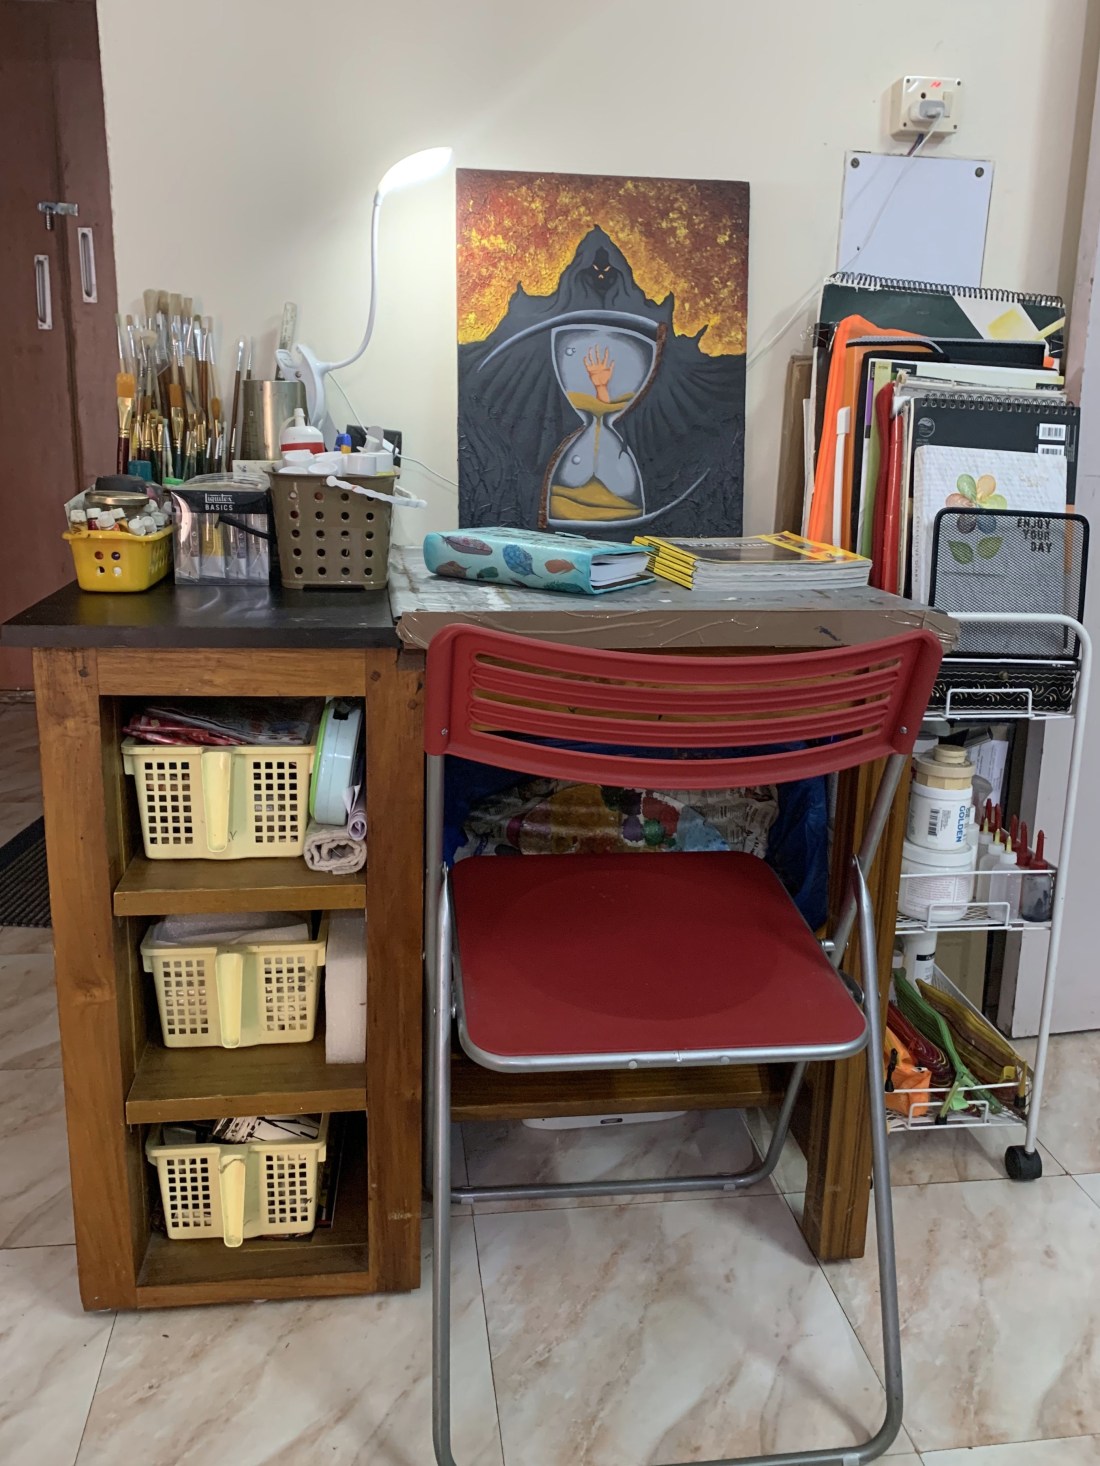
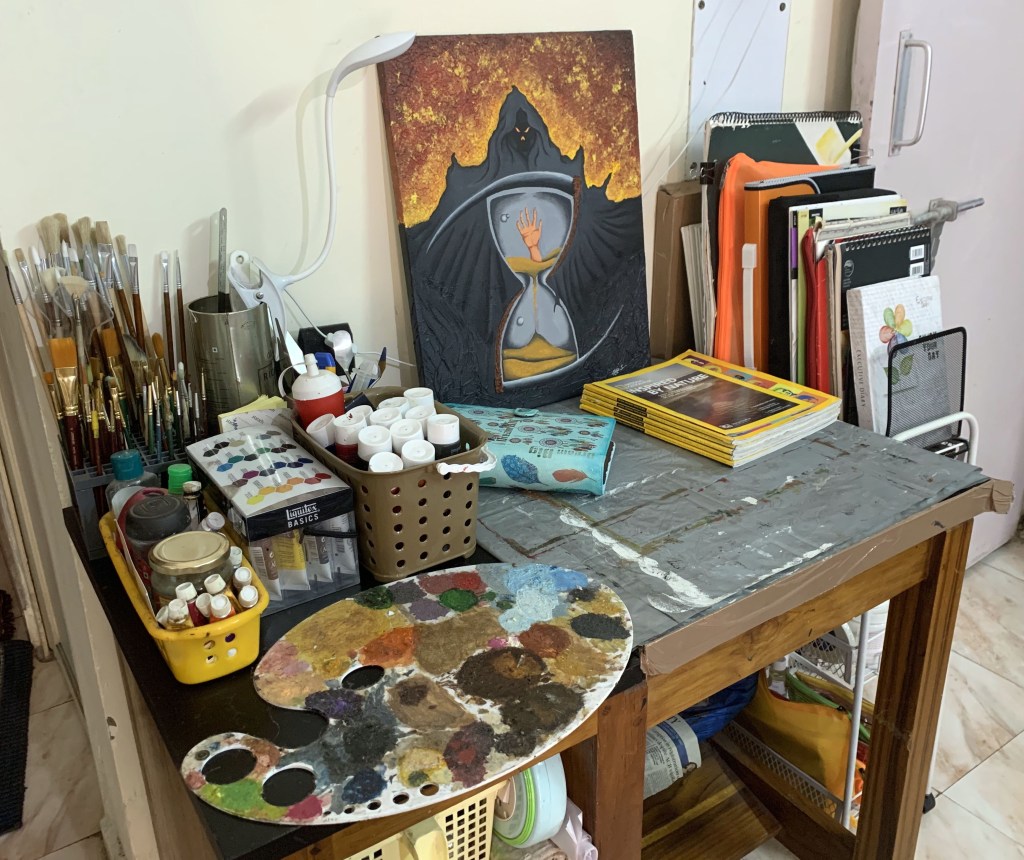
My most innovative concepts also take shape intuitively when I am where I love being the most – myArt Station. I call it my art station and not my studio because it is not an entire room that I have dedicated to my art, but just a small, comfy and cozy corner in my bedroom where I can embark on artistic pursuits, oblivious to the world around me. For me, just spending a few moments silently in my creative corner can give birth to my next innovative idea.
Even though I am an amateur artist who is not associated with any art galleries or working in a shared space, I still spend a lot of time alone in my art station. In this post, I’ll let you in on my personal creative space and how I let it grow and mature to keep up with the demands of my work.
When I had just started painting, I didn’t think I deserved a separate art area, let alone a studio. I would just set up my easel, paints and other art materials wherever I found space, even if it was on the dining table or the bed. But soon enough, I realized that not only did it take up a lot of my time setting up, but also clearing up once I was done painting ate away into those precious moments that I could have added on to actually creating the artwork itself. So the dining table and the bed were just not working for me!
Having realized that, I started looking for small spaces in my home to designate as my art area, where I had all my art supplies at my disposal anytime and every time. Eventually I cordoned off an area in my bedroom that served as my art station. Here, I can paint whenever my heart desires, without going through the hassle of setting up or worrying about cleaning the mess after I am done. I can just leave it all as it is and pick up again the next day from where I had left! I love my art station and everything in it.
Creating as Art Studio in Your Home
So what does it take to create a work space for your art? For one, it is not the size of your creative space but its feasibility with respect to your work that matters. What I mean is that not only should your work station or studio space permit you to leave things as they are while the work is in progress but also fulfill all other requirements of your creative process.
Since size is not the primary criteria, your creative space can be an area of your bedroom, like mine is, a storage area or attic that can be converted into a creative space, or even your basement or garage for that matter. You could section off part of a larger room also using a folding screen or a curtain. Once this is taken care of, you can personalize your creative space with whatever inspires you. This will make the space inviting and you will be motivated to spend more time there doing what you love doing the most – creating art!
Here are a few tips for sculpting your very own art retreat at home:
Decide on a spot – The first step towards creating the ultimate creative area for your art is chalking out the physical space. This will be your creative haven, so put in all the love and care into it.
Surround yourself with what inspires you – Fill your creative space with objects and images that inspire and motivate you to make art. You can do this by pinning or sticking them up on a display board on the wall, something like an inspiration board. Not only is it always in front of your eyes, but also every time you find something visually exciting, you can simply tack it to this board. It’s that simple!
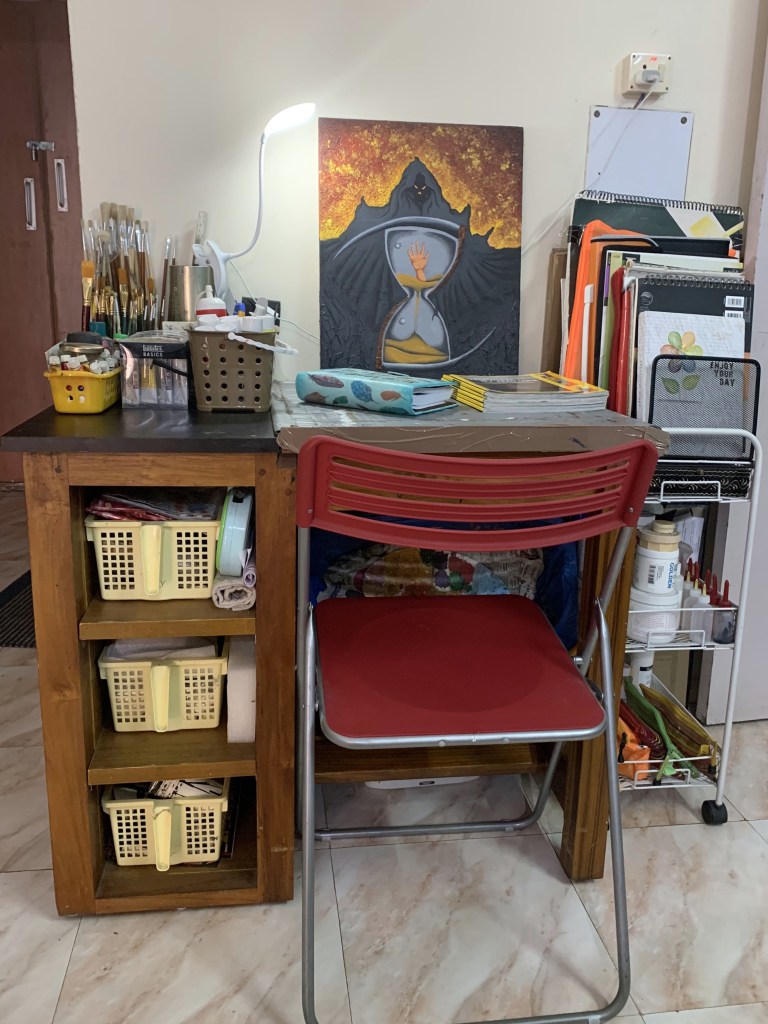
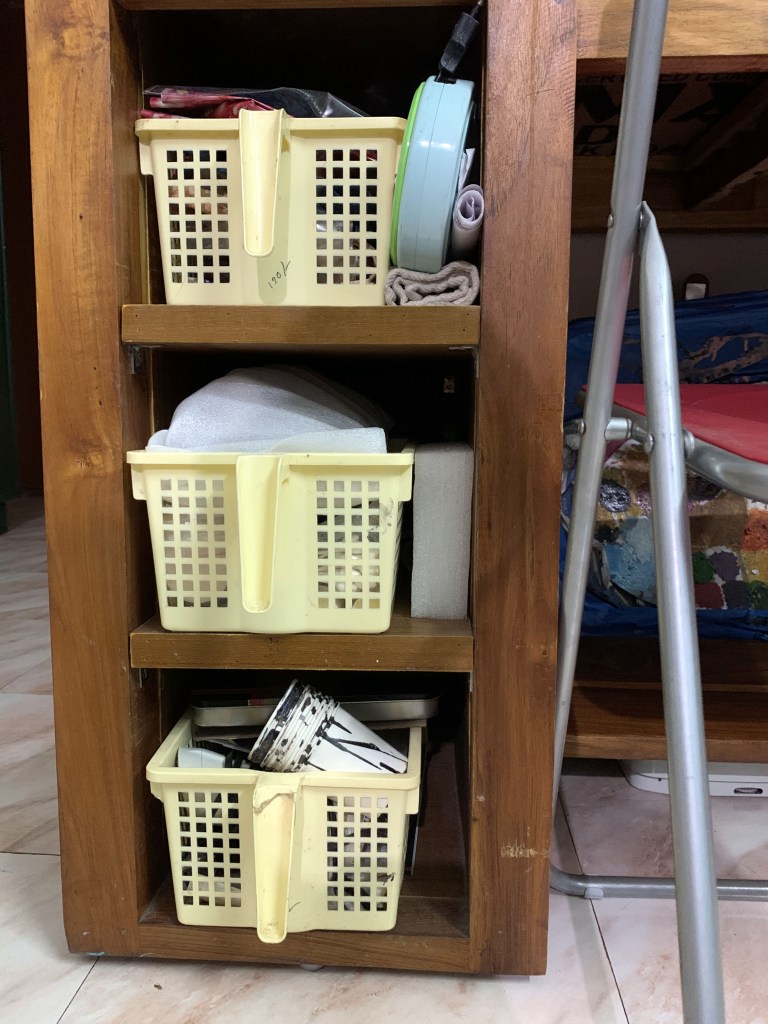
Dedicate a corner in a room of your choice for an art area. Use shelves, tables, racks etc., to separate out your art area in this room. For my art station, I got an art table custom made to my requirements with adequate shelving to hold baskets of my art materials. I got this table ergonomically designed keeping in mind the fact that I suffer from cervical spondylitis. So to ensure that my neck is not strained while I paint, the table top can be inclined vertically at various angles to suit my comfort. Another modification I made to my table was that I got the shelves made towards the left as I am left handed. Even my work area where I place my paints and color palette are towards the left. So there’s a custom made art table for all you lefties like me!
Another good option for an art space is a closet or clothing rack, if you have one to spare. All you need to do is clear some shelves to store your art supplies with a small table, chair in front of it and Voila! Your little art studio is ready!
Keep a fold-down table or chair handy. I have a couple of folding chairs which I use not just for sitting while I paint, but also for keeping my laptop, iPad and other knick knacks.
The garage,attic or basement are some more options for art studio spaces, provided you take care of the heating, cooling and humidity issues. This is crucial not just for protecting your art but also to make you comfortable while you work. Trust me, it’s no fun painting when you are sweating like a pig or freezing to death!
Get an art caddy with wheels. Even though I had this amazing custom made art table with adequate shelves to store my art supplies, after a while it was just not enough! So I invested in a cart with shelves that could be rolled on wheels. Not only did this sort out my storage woes, but also provided me with mobility and easier access to my art materials, without coming in the way of other things in my bedroom.
My ergonomic Art Table
Here are a few ways I have personalized my creative space (while some of them I have already done, others are still part of my wish list!):
A display board where I can pin up anything and everything that inspires me be it images, quotes or my random doodles and scribbles.
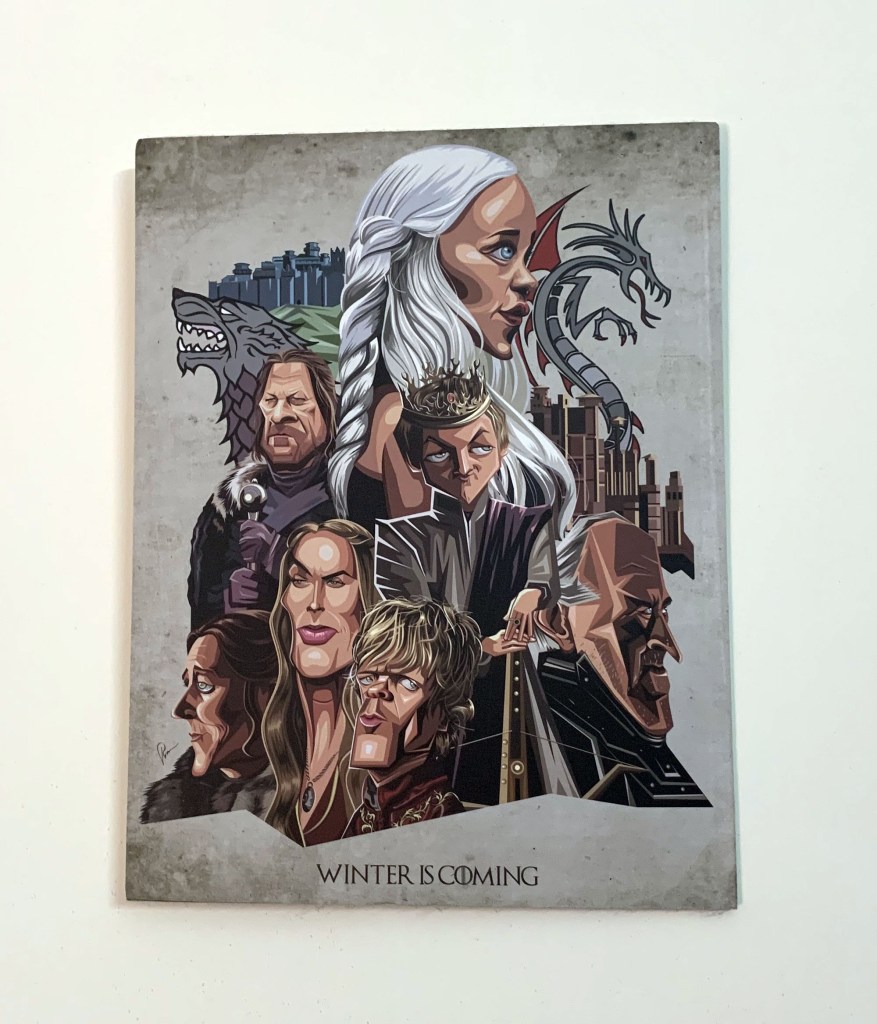
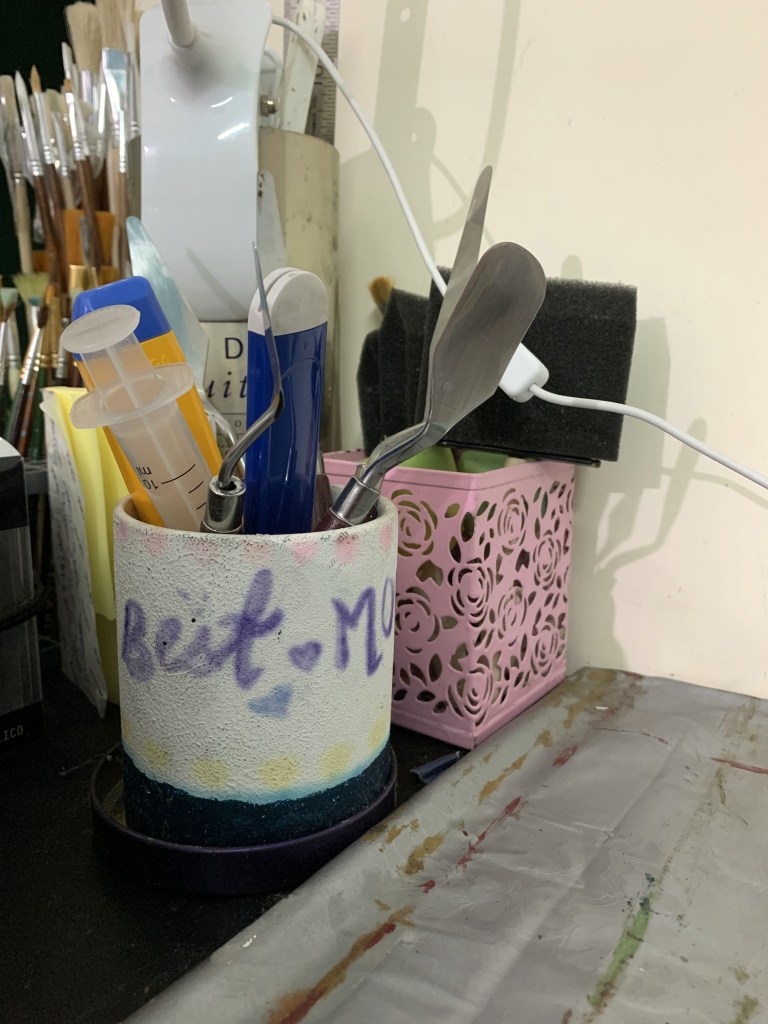
A collection of objects that I love or I am sentimentally attached to. For instance, my daughter gifted me a hand painted coffee mug on Mother’s Day and this has become a holder for my palette knives! A caricature artwork of Game of Throne characters adorns the wall just above my art table. I fell in love with it not just because I am a GOT fan, but also because it inspires me artistically.
The Gor artwork on my wall
My daughter’s Mother’s Day gift turned into a stand for my palette knives!
My personalized additions to my art station
A list of my goals and challenges. These are listed out in my planner.
A calendar and planner to track my progress (once again part of my planner diary).
My planner and calendar diary
Images of my favorite projects and published or commissioned works which I keep in folders (I am obsessed with being organized!)
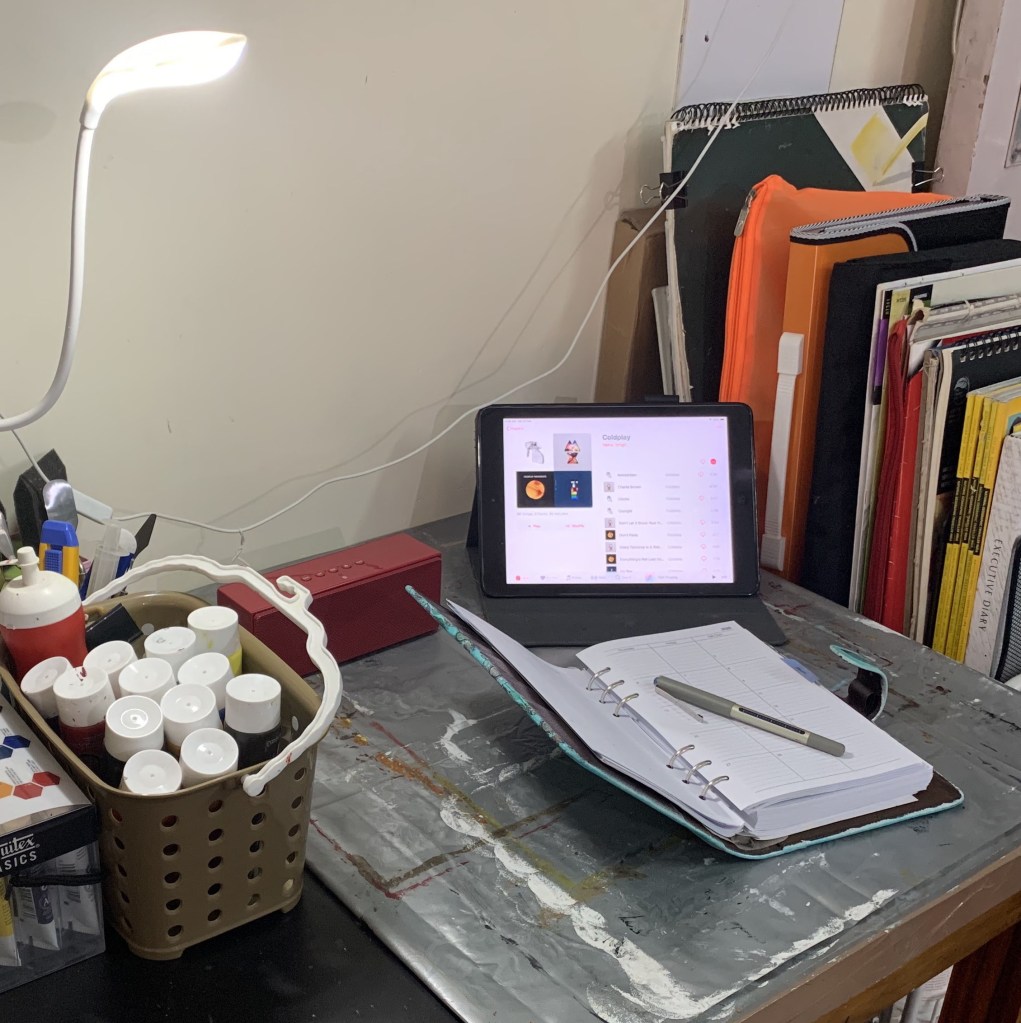
A small sound system to play my favorite music while I work (Usually my iPad and Bluetooth speaker).
My music buddies
While I’m still far from creating a gorgeous studio like the ones owned by seasoned artists, I am totally in love with this little personal corner that is solely dedicated to my art. I believe that if art is all you really live for, even the smallest space can be transformed into a creative haven. It’s about making your art a priority.
Apart from these, here’s a list of supplies and essentials that I keep in my art station:
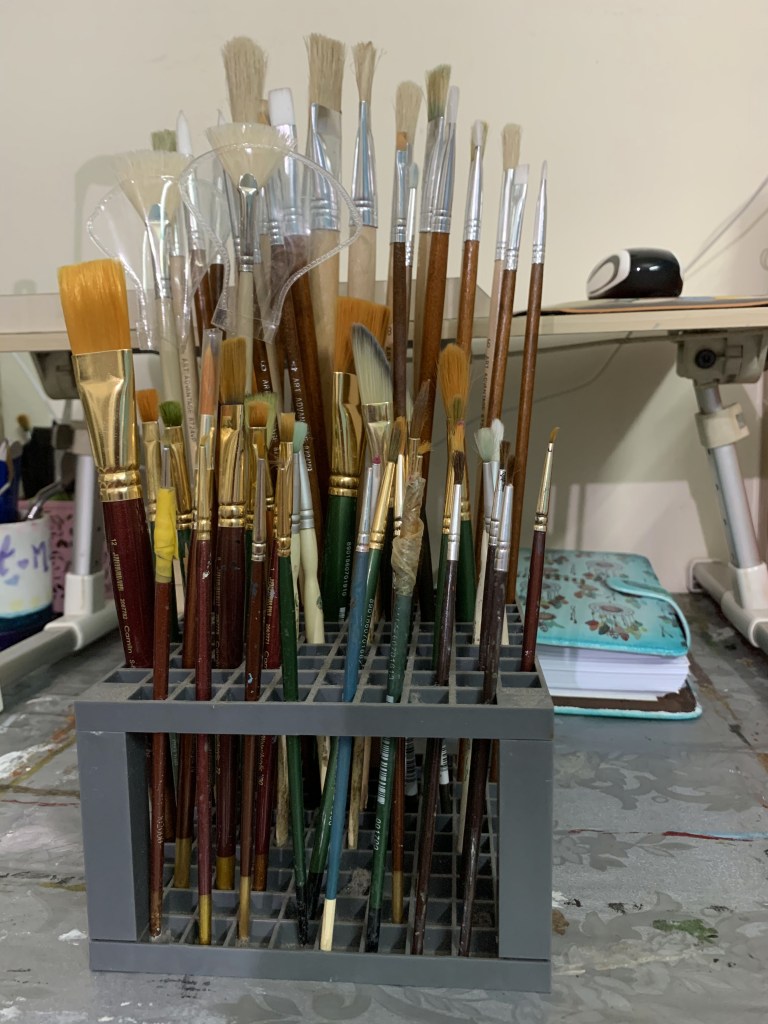
Paint Brush Holder – This is basically a functional organizer with slots of different sizes to hold my assortment of paint brushes. You can even use it to store other things like pens, markers, pencils etc. These can be found in any good art store or online stores.
Paints, Brushes, Pencil Colors, Pens, Markers – As an artist, these are obviously a must. How you store them, is entirely up to you. I like to store them separately in baskets that I keep in the shelves of my table (OCD for being organized yet again!)
My paint brush holder
Easels – I have a couple of easels, one large and the other small that I can use for bigger and smaller canvases respectively.
Seating Arrangement –Having a chair to work on is a lifesaver when my back starts to give up on me. A comfortable chair also gives me a chance to sit back and review my work critically as I paint.
My comfy chair
Laptop – I often use photographs and computer images as a reference point for my art so having my laptop at close quarters comes in handy.
My digital companion always by my side
Music – I love to have music playing in the background while I paint. So I have my iPad connected to my blue tooth speaker playing my favorite tracks to lift my spirits.
My iPad and Bluetooth speaker to play my favorite tunes
Storage – As mentioned earlier, I have sufficient storage space in the form of the inbuilt shelves of my art table, my mobile art caddy and my assortment of baskets and organizers for my art supplies. The only thing I am lacking now is an arrangement for storing my painted as well as unpainted canvases safely. So even though presently I just line them up on top of tables, stools, cupboards or practically wherever I find the space, I am working on this project!
Storage units on my table
Inbuilt shelves
My baskets for my paints etc.
My mobile art caddy
My art supplies
My storage arrangements
Art Books – I am pretty proud of my small yet valuable collection of art books. I look up to them for inspiration whenever I am struggling with an idea or a technique for a particular painting or may just read up on the great masters of art with the hope of magically imbibing some of their talent!
Inspiration Board – This one I am yet to get! I have so many pictures and photographs that I have collected from various sources like magazines, journals, newspapers etc., but most of them are lying tucked away inside some file or folder. Guess it’s time for me to dish them out and tack them up on the wall!
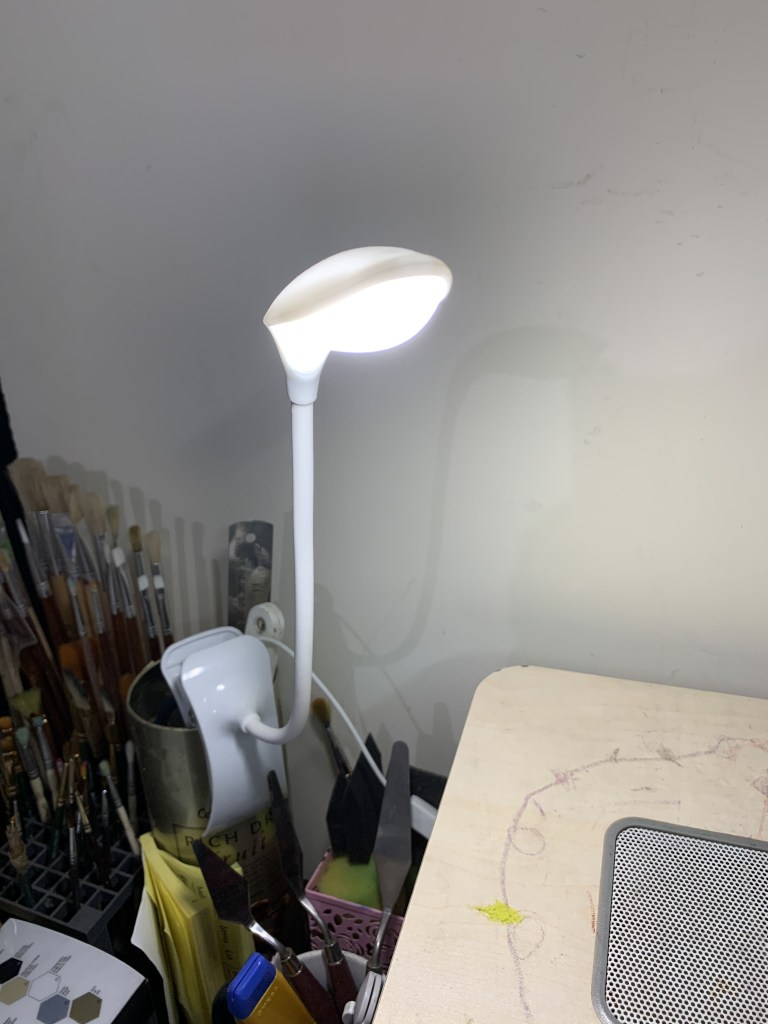
Good Lighting – Now this is THE most essential thing to have for an artist! Although natural light is the best, but owing to space constraints, I had to place my art station at a spot which does not get any. So I have to make do with a portable clip-on lamp that focuses light directly onto my canvas. It may not be as good as natural light but it gives me a good enough idea of the values of colors I am using.
My lighting arrangement
My portable clip on lamp up close
Let there be light!
As I said, the biggest advantage of having a personal space for creating your art is that you can leave things as they are while the work is in progress. This will give you extra bits of time that can be put to effective use towards creating or even fine tuning the artwork itself. These added moments will not only give you a chance to improve on your art but also help you finish it well before your intended target.
The entire process of assigning a creative space not only improves productivity, but also provides you with a feeling of joy and contentment. Your confidence levels get a major boost when you are in your personal creative space and your aspirations get renewed too.
The best part about being an artist is that you don’t need a testament to prove you are one. How you see and experience the world around you is totally up to you. Having a studio or a creative area doesn’t mean that you are limited by its physical space and neither do the things inside it determine what kind of work will sell and what will not. For us artists there are no limits. Don’t smother your creativity by walking into your studio each day thinking what you should make that will be liked or that will sell. Just have fun creating art. Very often people fail to make this small but significant commitment. Have a place to work where you can give your thoughts wings and soar away into the vast expanses of creativity.
I hope this motivates you to start looking around your house for potential areas that you could turn into your art space. Paint it a different color from the rest of the room. Add some interesting as well as functional furniture. Put some items that are close to your heart. Stock up on all your necessary supplies that you would like to keep in your art space. Maybe even christen it with a special name! Let the space speak to you and let it grow with your work.
I’d love to hear about your creative space. What are your essentials for your workspace and how have you personalized it? What are your trade secrets for storage? Do let me in on your own creative corners!
DISCLAIMER – All the information, data and imagery in this blog post is for informational and educational purpose only. While there may be copyrighted material the use of which has not always been specifically authorized by the copyright owner, I have only made it available with the sole effort to stimulate creative progress and artistic enrichment.Some images may have been taken from the links included below and I give full credit to these websites/pages, thereby in no way claiming them to be my own. I have also used these links for reference purposes and collection of data; therefore I give full credit to the respective web pages. Most of the data in this post is based on my personal experiences and opinions and I am not responsible for any material that is found in the links at the end of this post.
“The human mind works in a peculiar way: we tend to cling to the past and be overcritical about the present. That’s why modern art often comes under attack. We compare new creations with classic masterpieces and seek out the smallest flaws. Perhaps the grass used to be greener a few centuries but it doesn’t mean that talented people stopped being born in our lifetime! Here is a living illustration.” – Leonid Afremov.
I might have mentioned the name Leonid Afremov before in several of my earlier posts. Not only is he my all time favorite artist, but also my source of inspiration. I more or less idealize him when it comes to art several of my works are influenced by his style and technique. In today’s post, I will talk about what it is that got me hooked on to his work and how I have attempted to incorporate his iconic style in my own art.
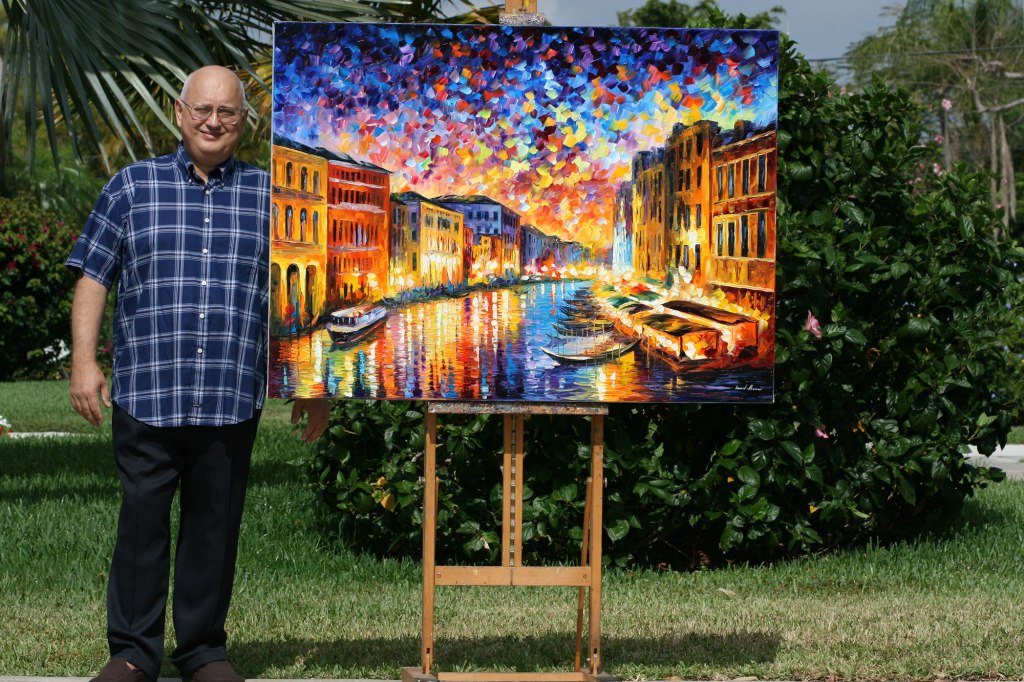
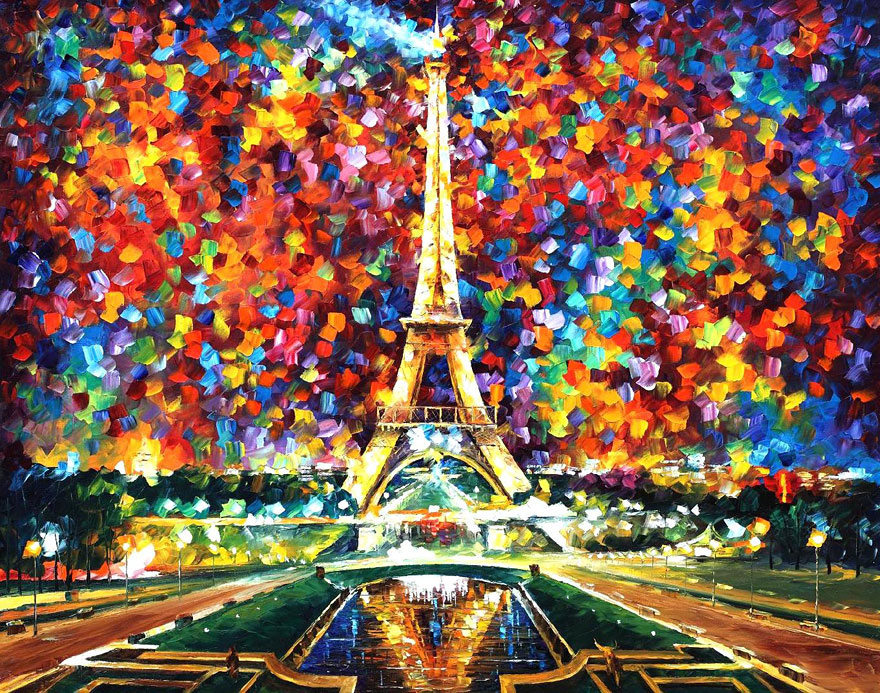
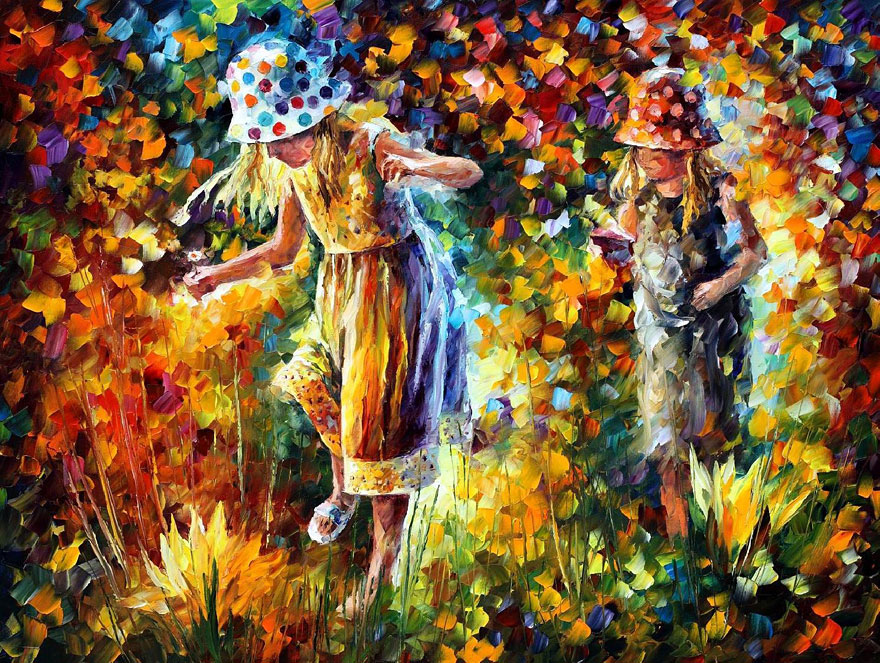
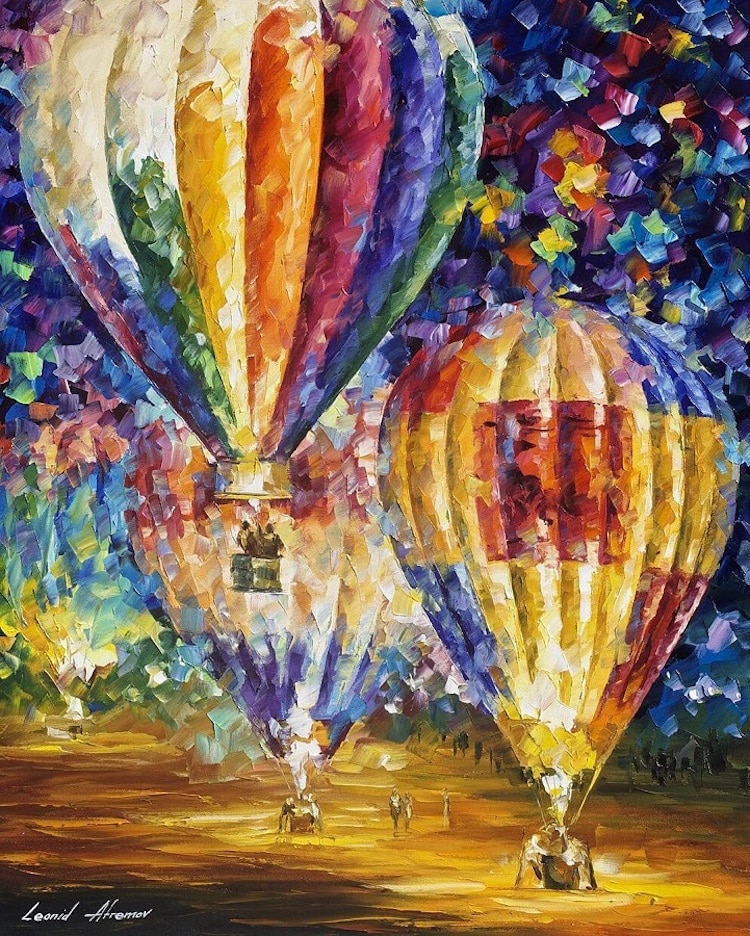
Leonid Afremov was a Russian–Israeli modern impressionistic artist who worked with palette knives and oils to produce some bright and cheerful art. Over the last 25 years, he developed his own personal style and technique which differentiated him from other artists. He mainly painted landscapes, city scenes, vintage cars, seascapes, cats playing jazz and flowers. He formed distinctive pieces with bold knife cuts and color contrasts that conveyed a wide range of jubilant emotions.
Leonid Afremov
Afremov generally worked with photographs taken from his world travels, which he used as a reference point for most of his paintings. His work reflected a personal memory or emotion, focusing on a feeling rather than a story. He skillfully combined the palette knife with bright colors to produce a positive reflection of his surroundings, thus making each artwork as attractive as the next. This unusual yet unique technique of painting where he uses only oils, canvas, and the palette-knifeappealed to anyone and everyone, regardless of their age, social or ethnic background. The elegant play of the vibrant colors in Afremov’s paintings gives art lovers a nostalgic feel of luxurious autumnal cities. His pictures seem to slow down time, letting us enjoy the precious details of these brisk and luminous landscapes.
Leonid Afremov was one of the greatest and best-known modern art impressionists of our time. He was and still is highly respected among art critics and collectors. His beautiful paintings have made their way to private houses and galleries in the USA, Canada, New Zealand, Australia, Israel, France, Spain, and many other countries. This is even more admirable knowing that the artist was self-representing and all of his promoting and selling processes were only held on the Internet with very few exhibitions and very little involvement of dealers and galleries. His self-developed technique and style is unmistakable and cannot be confused with other artists. Most of his work is considered very politically neutral.
Afremov was born on 12 July 1955 in Vitebsk, Belarus and passed away on 19 August 2019 at Playa Del Carmen, Quintana Roo, Mexico due to cardiac arrest. Before the advancement of online sales and eBay, Afremov was a struggling artist. He lived in Vitebsk, Belarus until 1990. Between 1990 and 2002 he lived in Israel and from 2002 to 2010 in Boca Raton, Florida.
Afremov was born to Jewish parents Bella Afremova and Arkadiy Afremov. His father was a shoe designer and shoemaker. His mother worked in a metal factory in Vitebsk. He was born in the same town as Marc Chagall, who later became a significant role model to Afremov.
In 1973 Leonid Afremov graduated with honors from his high school in Vitebsk and was admitted to the Vitebsk Education Institute where he studied in the arts and graphics department. During his years in college, Afremov was introduced to the work of Marc Chagall, Picasso, Dali, Modigliani and the 19th century French Impressionism. His early artistic work was greatly influenced by Chagall and Modigliani. During his years in college, Afremov participated in various school exhibitions and even sold some paintings. In 1978 Afremov graduated from the Vitebsk Art School as one of their elite members. After that he took private lessons from local famous artist Barowski who was teaching art when Marc Chagall was still living in Vitebsk.
Life and career in Soviet Russia from 1976 to 1990
After graduating from college, Afremov worked as a label designer in a local beer and liquor factory. Then he briefly worked in a local theater as a set designer.
In the early 1980’s he started doing freelance work for communal farms and schools, designing and making various propaganda posters, themed rooms and walls for certain communist events and holidays. He was also doing template sculptures of Lenin from plaster. He had a very good reputation in that field and was invited back by many farms and schools. This type of work was available only during the summer and spring.
During the cold Russian winter, Afremov stayed at home painting. He was not allowed to participate in government exhibitions because of his Jewish roots and was not allowed to be a member of the local art associations. His early work was sold privately via family and friends and was not seen by many people. A lot of his work in the 1980’s was just given away for free. He did not keep records of his work then and not much of it survived.
In 1986 the Chernobyl disaster happened. Vitebsk was only a few hundred kilometers from Chernobyl, close enough for radiation to travel with the wind and rain. The ecological situation in the area worsened, with the local crops and water becoming contaminated with radioactive fallout. Small children were affected severely, including Afremov’s two year old son. At the same time Leonid Afremov was experiencing serious discrimination for his Jewish heritage. The liberal politics of Mikhail Gorbachev allowed Jewish soviet citizens to migrate to Israel in the late 1980s. Fed up with anti-semitism and problems caused by radiation, Leonid decided to move to Israel without hesitation as soon as the doors were opened.
Life and career in Israel from 1990 to 2002
A few weeks after moving to Israel, Leonid Afremov found a job in an advertisement agency making signs and posters. After working in an advertisement agency, he worked in a gallery shop where he learned to make frames, being introduced to the palette knife for the first time.
Being a recent Russian immigrant, his work was not considered to be of great value by the locals. Galleries took paintings for 50 shekels (15USD) and were reselling them for 500 to 5000 shekels. The galleries refused to sell his work for percentage commissions just because he was a Russian immigrant. He was only given the option of a pittance for each painting which took a day to make. Afremov felt exploited and discriminated by the galleries and the Israeli society just like he was by the Soviet Government. He attempted to sell his art at street fairs and exhibitions in local social clubs. However, it was difficult because of the social stigma of Russian immigrants.
During the early 1990s, Leonid Afremov was mainly working with watercolors and acrylic. He was experimenting very little with usage of the palette knife. He painted what people were buying, with very little artistic freedom. In 1994, out of extreme desperation, his 16-year-old son Dmitry tried to sell Leonid’s paintings door to door around the neighborhood, This practice proved itself very effective, and Afremov suddenly started selling many pieces he painted and was getting slightly better prices than from selling directly to galleries. Dmitry proved himself to be a good door-to-door salesman. He was selling Leonid’s paintings in the new neighborhoods where recent Russian Immigrants were living.
In 1995, Leonid acquired enough funds to open his own gallery and frame shop in Ashdod. The gallery was not popular among local Israelis; it was mainly visited by fellow Russian immigrants. The gallery was vandalized and broken into on several occasions. The local Israeli newspapers were refusing to publish advertisements for Afremov’s Gallery, and he was mainly advertising via Russian immigrant press and radio station. However, artistic freedom could not be achieved completely.
Around 1999, Leonid became friends with Russian-speaking Israeli jazz musician Leonid Ptashka, who inspired Afremov to paint a collection of portraits of popular jazz musicians and helped him secure a successful exhibition in the International Jazz Festival in Ashdod. Since then, Leonid Afremov has painted dozens of his favorite musicians.
In March 2001, Afremov’s gallery was completely vandalized. Dozens of paintings were destroyed, the artistic equipment stolen and the facility turned into rubble. Then Leonid decided it was time to move somewhere else where he would be treated with respect, eventually moving to the USA in January 2002.
Life and career in USA from 2002 to 2010
Leonid Afremov prepared for his move to USA very carefully. For several months he did not sell any paintings and sent everything he painted to his sister in Brooklyn. When he arrived in the US in January 2002, he had more than one hundred paintings at his disposal. Along with his son, he visited several galleries in New York. Some of these liked and purchased his paintings, however they only picked up Judaic themes and musician portraits. This forced Afremov to paint only limited themes and subjects in order to make a living.
Leonid had good opportunities in New York but the cold climate affected his health. He was constantly struggling with arthritis and muscular pain caused by drastic temperature changes. Thus he moved to Fort Lauderdale in April 2002. In Florida, Afremov faced the same changeless like in New York, selling only certain themes and subjects that the galleries wanted and were able to sell.
In 2004, after graduating from high school, Leonid’s son Boris was introduced to eBay by his friends. They tried to auction some of Leonid’s paintings with positive results. Paintings were sold for hundreds and sometimes thousands of dollars and everything sold without exception. For the first time Afremov was given the opportunity to paint what he really wanted. This was when his real artistic journey began. He started painting what he really wanted from his personal inspirations and was finally able to explore his artistic vision and abilities all the way.
The exposure on eBay gave him opportunities for commission orders and access to different galleries. However, because of past bitter experiences with galleries, Leonid preferred to sell directly to the collector. Thanks to the internet exposure, Afremov participated in various local TV shows around the USA.
In 2007 with the help of his sons Leonid launched his own personal site where he began selling giclees, prints and original painting, eventually moving all the business and attention to his personal site. Two years later Leonid underwent heart bypass procedures. The doctors recommended Leonid to stay away from managing a business, keep a calm lifestyle and ultimately retire. It was then that his sons Boris and Dmitry started handling his sales, customer service and shipping.
Recent life and career in Mexico
In 2005 Leonid Afremov vacationed in Playa del Carmen and Cancun for the first time. Thereafter he visited the Mexican Caribbean 2 to 3 times in a year and completely fell in love with the place. Eventually in March 2010 Leonid decided to take on early retirement recommended by his doctors and moved to Playa del Carmen, a popular resort town near Cancun. By now his children were so involved in his business that they had to move to Mexico as well and managed his virtual gallery and shipping office in Playa del Carmen. The Afremovs also have locations in Cancun and Cozumel where they sell art during the busy tourist season in the winter. Leonid found Caribbean Mexico very relaxing and stress free. In 2011 Leonid sponsored the construction of his own personal ranch near Puerto Morelos where he spent much of his time.
Afremov’s Artistic Philosophy
Leonid Afremov kept majority of his art politically neutral. His paintings are not offensive to anyone nor send any hidden messages. They usually reflect certain personal memories and emotions. Afremov tried to draw the viewer’s attention towards a certain feeling rather than tell a story through his painting. He wanted his viewers to see the world through his eyes. The neutral attributes of Afremov’s art make the paintings appealing to almost all strata of society. He travelled quite extensively and took many photographs of different scenes that he later painted. Almost every painting he painted has a very personal inspiration. His art can be reflected as very positive through the bright colors he used. In fact, it was declared very relaxing and calming by notable psychologists and psychiatrists who make use of his painting in various psychological and psychiatric therapy procedures. Afremov’s paintings were published not only in art magazines but also in various medical and health magazines as examples of stress reducing paintings.
Afremov loved cats and other animals, hence painted many with cats, dogs, horses, tigers and even giraffes. The only political paintings he did were of bull-fighting, where he tried to show the viewer the cruel nature of the sport and discourage people from liking it.
After reading Leonid Afremov’s bio, one can understand how he attained success. Struggling for his individuality and artistic freedom, he managed to create his own style based on the experiences of the most outstanding artists. While Afremov’s early works were influenced by the masterpieces of older painters, his later artworks are very unique and recognizable.
According to Mr. Afremov, art is not something elite, understandable for a small circle of intellectuals only. He didn’t want to put any complicated hidden messages into his work – on the contrary, he wants his paintings to be intuitively close to everyone. When one looks at those autumn parks, lantern-lit alleys and vibrant cityscapes, the idea is rather clear. The artist invites his viewers to the world of simple beauty all around, but we are all too busy to stop for a moment and enjoy it. If an artist can open his viewers’ eyes to that, then his creations are not in vain.
Afremov proved that elegance and delicacy are elements of art that are still alive. While many artists try to shock the public with something slangy, this painter respected traditions. He didn’t follow them automatically but took the best from every style. Modern art need not be incomprehensible. It can be meaningful and clear – that’s the idea behind his paintings.
Here’s a collection of his paintings that are my personal favorites:
Afremov’s paintings
Afremov’s Technique
Using his unique knife painting technique and unmistakable style, Afremov created paintings that seem to explode in millions of bright colors. Focusing primarily on land and seascapes, he formed distinctive pieces with bold knife cuts and colour contrasts that conveyed a range of jubilant emotions. His artistic philosophy rests on the idea that art is not only for elite, but rather something that everyone should have the opportunity to appreciate. His pieces maintain a characteristic ebb and flow, with colours and textures woven together to form an emotive gradient that captures one’s attention, first with bright colours and then with the technique.
Joyful and radiant, Afremov’s animated artwork achieve an emotional connection that personally touches those who respond to his talent. Afremov had the ability to touch a wide audience by focusing on keeping his artwork simple and politically neutral. The artist’s work doesn’t aim to offend anyone or reveal any deeper messages, but seeks to speak for itself by reflecting memories and emotions that are universally relateable.
My Art Inspired by Afremov
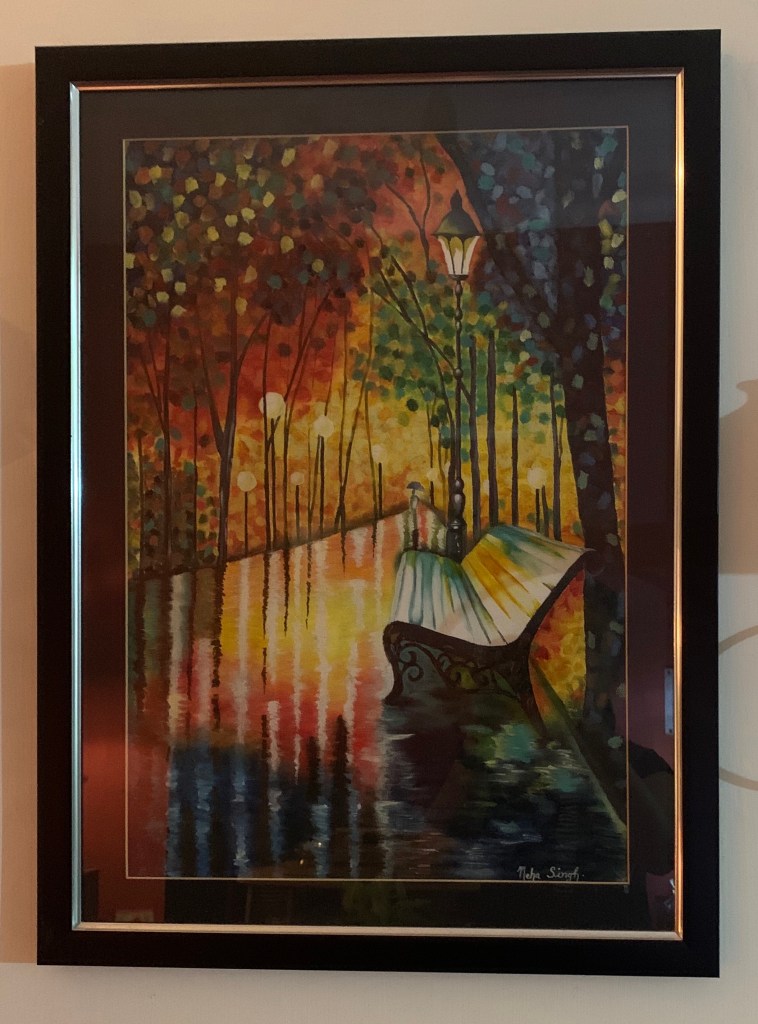
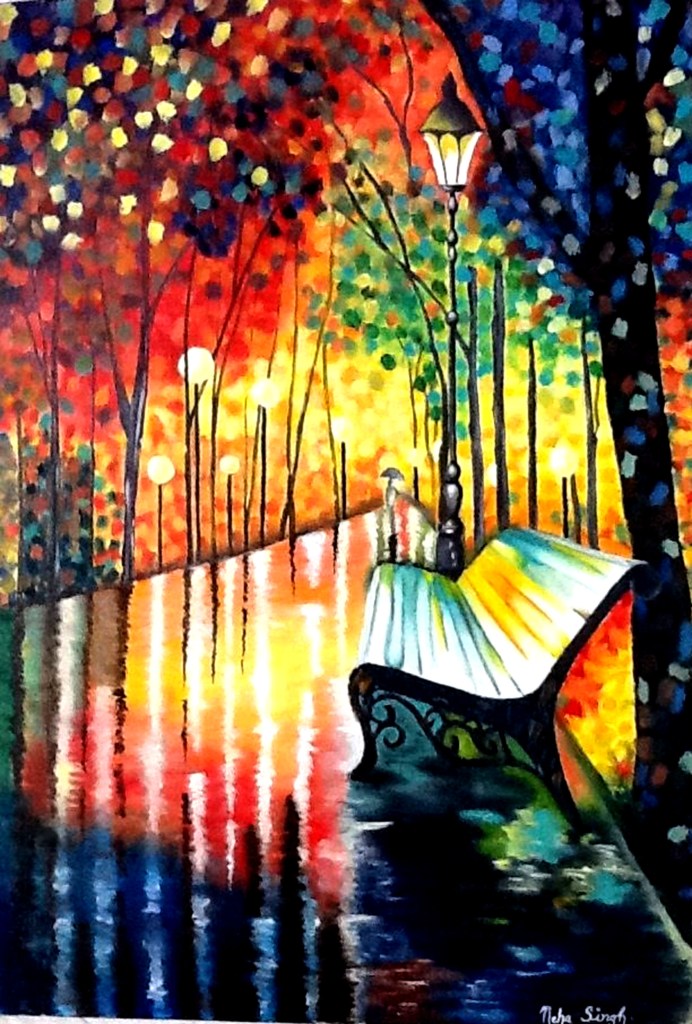
Besides being greatly influenced by the distinct and trademark style of Afremov, I was also drawn towards the vibrant color palette that he uses for his paintings. I believe it is these two features about his art that appeal to me the most. It is my constant endeavor to incorporate his technique as well as his exuberant colors and textures into my work. Having said that, I try to cautious not to mimic or clone his style and produce identical replicas of his work. My objective is only to apply the best of his skills to further enhance mine.
Keeping this in mind, I have attempted to add my own little twist to his palette knife technique. Instead of applying paint in thick daubs with a palette knife, I tried doing so with a paint brush, while keeping the thickness of the paint intact. Even though the effects were not the same as those achieved by Afremov with his method, what I got was pretty close, yet different enough. In order to polish up my technique, I first experimented with a couple of Afremov’s paintings themselves as part of a process of their recreation, but in my own unique way.
Quite often I mix my paints with modeling paste or a similar thickening agent in order to attain specific textural effects in my artworks. This is another special touch that I have added to further enhance my version of Afremov’s style of painting, thereby aiming to acquire similar results. It was a learning experience that has paved the path towards developing my individualistic signature style which I applied to several of my paintings later on.
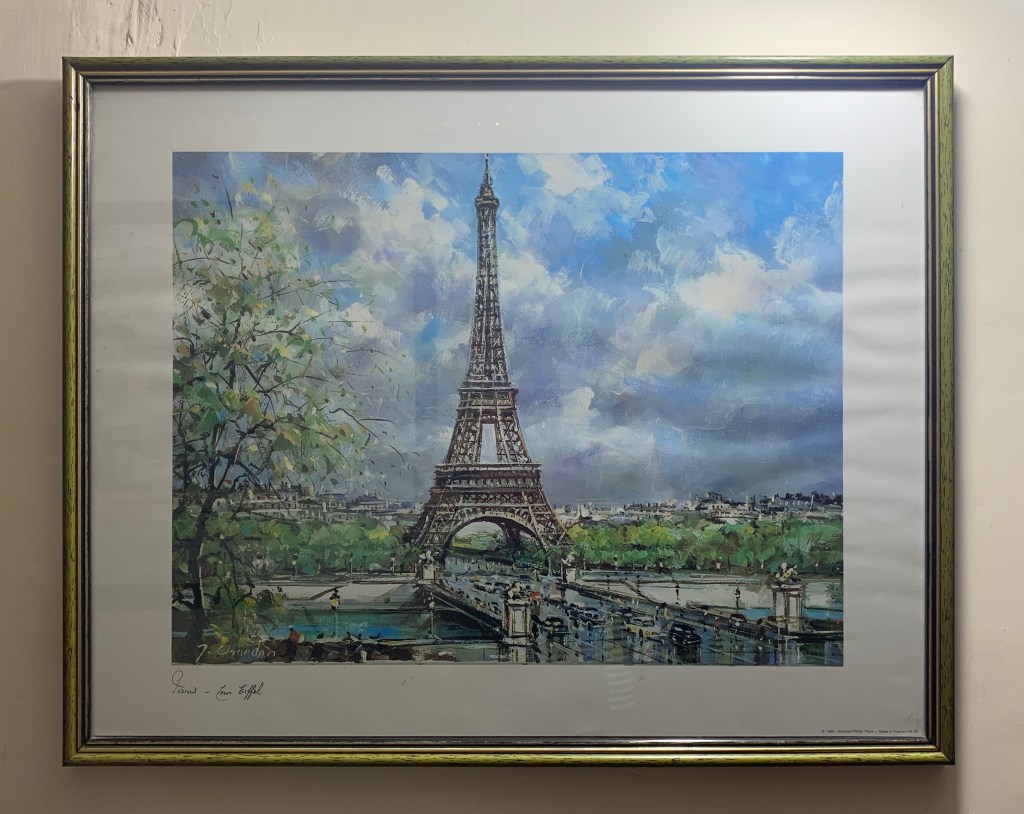
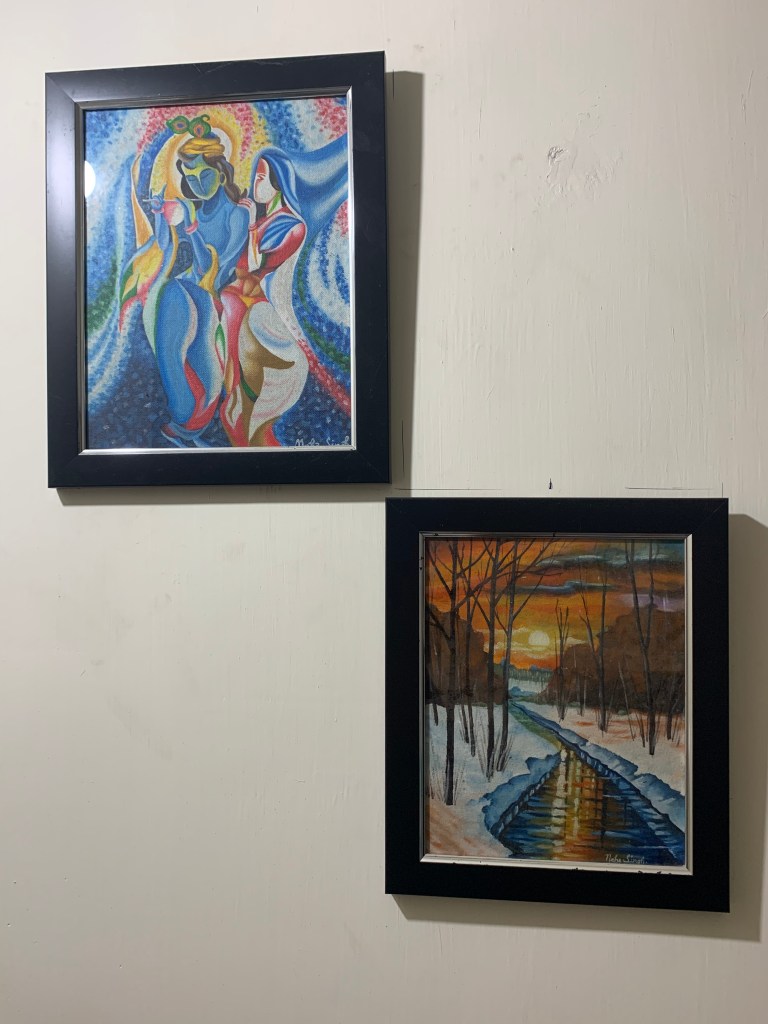
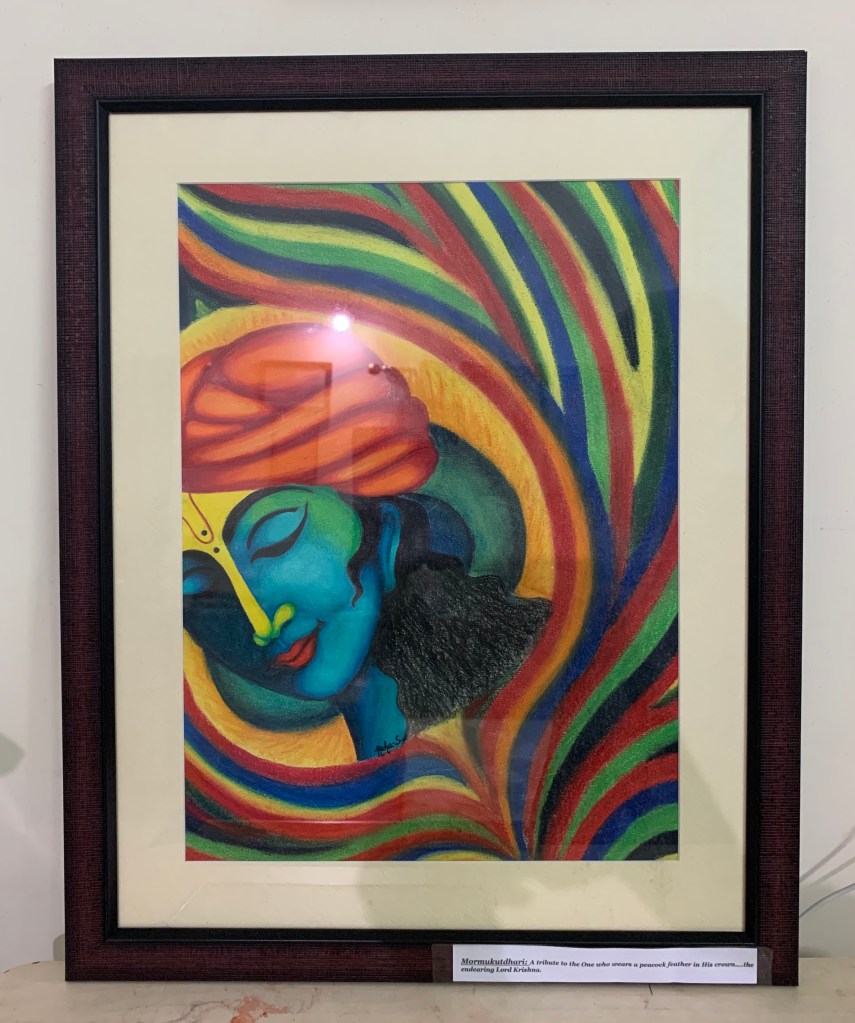
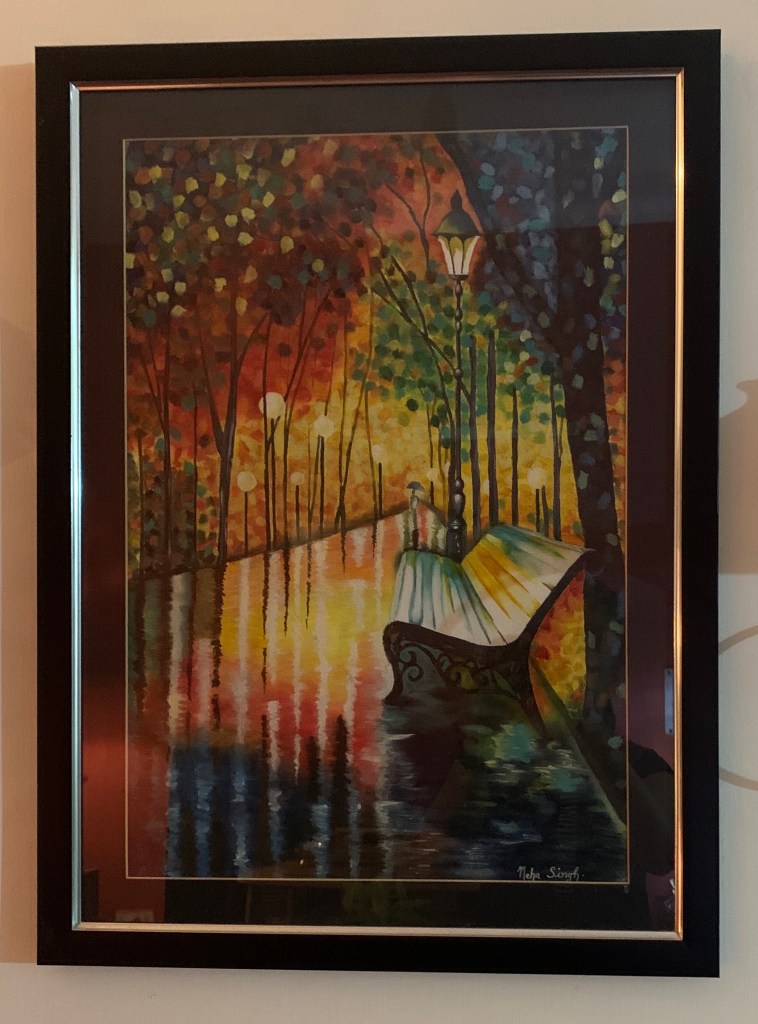
Here are some visuals of the works I did with my favorite artist’s paintings in order to fine tune my process followed by artworks that were inspired by his technique. Hope you all enjoy looking at them as much as I enjoyed painting them!
My Early Experiments with Afremov’s paintings (Recreations)
My artworks inspired by Afremov
DISCLAIMER – All the information, data and imagery in this blog post is for informational and educational purpose only. While there may be copyrighted material the use of which has not always been specifically authorized by the copyright owner, I have only made it available with the sole effort to stimulate creative progress and artistic enrichment.Some images may have been taken from the links included below and I give full credit to these websites/pages, thereby in no way claiming them to be my own. I have also used these links for reference purposes and collection of data; therefore I give full credit to the respective web pages. Most of the data in this post is based on my personal experiences and opinions and I am not responsible for any material that is found in the links at the end of this post.
Ever come across magazine covers designed by famous artists of the likes of Da Vinci, Van Gogh or Picasso? If you haven’t, then read on!
You’ll be pleasantly surprised to know that many famous masters of art have contributed their artistic prowess towards the creation of some of the most innovative and awe-inspiring covers for these periodical publications.
Here’s a blast from the past of a few acclaimed works of distinguished artists featured in some of the most well-known and historical magazines known to man.
Works of Henri Matisse
The renowned artist Henri Matisse was hired by the publisher George Macy to illustrate a limited edition of 1500 of James Joyce’sUlysses, concurrent with the book’s initial mid-1930s publication. But, Matisse chose to illustrate Homer’s Odyssey instead. The leather bound foil stamped case cover was unlike anything created by this artist before.
Matisse also designed the cover for his own book of paper collages, Jazz and very often also designed covers for other authors and magazines. One such case is his cover for photographer Henri Cartier Bresson’s 1952 book The Decisive Moment. This solely displays his own art and hand-lettering.
Other covers designed by him include the 1946 edition Lettres Portugaises (Portuguese Letters), credited to the 17th-century Franciscan nun Mariana Alcoforado, and the 1952 biography of French poet Guillaume Apollinaire, for a limited edition of 380 copies. It also included 8 original lithos, two as the endpapers and the other six within the interior. Two years prior he designed a limited edition of the fifteenth century French poet Charles d’Orléans, a work Matisse began in 1943, interrupted by the war. All limited editions of 1200 were signed and numbered by Matisse in pencil on the frontpiece lithograph.
He also designed several posters throughout his career for which he would usually leave space for others to place set type. However, there are some that feature his distinctive hand-lettering.
Cover for James Joyce’s Ulysses,1935 by Matisse
Dustcover, 1947 by Matisse
Exhibition catalog cover by Matisse
Matisse Casecover
Matisse’s cover, VERVE The French Review of Art Volume 2, Number 8, Sept-Nov 1940
Poems by Charles Orrleans Matisse
Slipcase, 1947 by Matisse
Magazine Covers and Posters by Henri Matisse
Works of Pablo Picasso
Besides Henri Matisse, Pablo Picasso is regarded as one of the most influential artists of the 20th century. Known as the father of the Cubist movement (alongside Frenchman Georges Braque and fellow Spaniard Juan Gris) he is also credited with the co-creation of collage (with Braque); the invention of constructed sculpture; as well as myriad printmaking, ceramics, stage design and painting periods and styles throughout his long career.
His experiments with graphic design led to exhibition posters for his own work; however there were magazine and book covers as well. There were also commissioned posters for the French Alps town of Vallauris, to promote their area as a perfume and pottery center of production following World War II. Picasso lived there beginning in 1948, and designed and illustrated these posters through the 1960s.
Of particular interest in these works is his approach to designing typography. In addition, reoccurring themes appear, similar to his other work, such as goats, bulls, doves and the human face. Along with the exhibition posters he also designed peace posters. He was a member of the Communist Party throughout his adult life, and remained neutral during both world wars and the Spanish Civil War, strongly advocating peace.
A poster for film “The Battle on the River Neretva” (1969) was made by Pablo Picasso, and it was only one of two movie posters that he made. He did it as a great fan of Yugoslavian movies and, according to people who were involved in filming, he did not ask for money for the poster–all he wanted was a case of Yugoslavia’s finest wines. This special poster was printed in only 80 editions.
Vallauris Exhibition, 1962
Book cover for “The Song of the Dead” a book of poetry by Pierre Reverdy, 1948
Book spread for “The Song of the Dead” a book of poetry by Pierre Reverdy, 1948
Exhibit poster in Paris, 1957
Exhibition poster for the County Museum, Los Angeles. A rare work in English
Gallery show in Cannes, 1956
Picasso’s poster for Yugoslavian Movie
Pottery-Flowers-Perfume, 1948. Commissioned by the French town of Vallauris to promote itself as a resort town and center for perfume and pottery production
As evident above, in the early 20th century, the line between fine art and graphic design began to fade, which eventually became clear in the design work of Henri Matisse and Pablo Picasso. Here are some more captivating magazine covers by the likes of Dali, Matisse, Picasso, Braque and other famous fine artists to further support this:
Salvador Dalí
The world of fashion in itself is surreal in nature thus making the father of Surrealism, Dalí and fashion magazine, Vogue a perfect match. He created many works for the magazine, one of his earliest being its April 1944 cover. The artist employed many of his usual concepts, from the open and accented perspective, to images of stones, insects and a horseman. Even his rendering of the magazine title is a surreal collage of images and textures.
Verve: The Ultimate Review of Art and Literature
During the twentieth century, there were two main publications that led the great masters to contribute cover designs as well as interior artwork. The first was Verve: The Ultimate Review of Art and Literature. Published in Paris by Teriafe, its inaugural issue on December 1937 featured a cover by Matisse. The publication continued until 1960, with 38 editions and featured the works and writings of Pierre Bonnard, Marc Chagall, Ernest Hemingway, James Joyce, Joan Miro, Man Ray, Jean-Paul Sartre, etc. A hard covered journal sporting a dust jacket included were tipped-in lithographs by the renowned artists. Covers also featured the likes of Bonnard, Francisco Bores, Georges Braque, Chagall, and several by Picasso.
Bonnard, 1937
Verve cover by Bonnard
Braque, 1938
Braque, 1952
Verve Cover by Chagall
First cover of Verve by Matisse, 1937
Henri Matisse – Verve
Another Verve Cover by Matisse
MATISSE – VERVE A4 SKETCHBOOK
Picasso, 1954
A Cover by Picasso
Picasso, 1948
Verve Marc Chagall
Vogue covers by Dalí
Works by Dali, Picasso, Braque & More
Broom: An International Magazine of the Arts
Preceding Verve was Broom, which was founded by Harold Loeb and Alfred Kreymborg and published in Europe. It premiered on November 1921 and lasted until January 1924. Loeb, related to the Guggenheims on his mother’s side, wished to bring the European avant-garde to the U.S. Among the artists included were Juan Gris, George Grosz, Matisse, Laslo Moholy-Nogy, Picasso, Man Ray and Joseph Stella. The magazine’s cover designers included Juan Gris, Fernand Léger, El Lissitzky, Man Ray as well as lesser known artistslike Enrico Prampolini, Ladislas Medgyes among others.Unlike the ostentatious Verve, Broom featured two-color paper covers and black and white interiors with tipped-in quality black and white prints of artwork and photography and occasional woodcuts.
El Lissitzky, 1923
El Lissitzky
Enrico Prampolini
Gris, 1922
Ladislas Medgyes
Leger 3rd issue Cover, 1922-1
Leger, 1923-1
Man Ray, 1923
Medgyes
Broom Covers by Various Artists
Vogue
Salvadore Dali, Man Ray and Juan Miro contributed several magazine covers for the fashion title Vogue in the 1940s. Even Matisse made an appearance as a backdrop and while not his design Marcel Duchamp’s The Large Glass sculpture appeared as a prop with his blessing.
Dali, 1944
Dali, 1971
Dali, 1944
Detail of Vogue cover by Dali
Matisse backdrop for a Vogue Cover
Vogue Cover by Miro
Vogue cover featuring Duchamp sculpture, 1945
Vogue Covers by Various Artists
Works by Warhol, Lichtenstein, Banksy, Fairey et al.
Stuart Davis was an American painter best known for his Cubist, jazz and billboard inspired modernist paintings. Early in his career, as a political progressive, he was a regular contributor to the leftist magazines The Masses and The New Masses. During the Great Depression he worked on several murals for the Federal Art Project. Other regular contributors to these magazines included renowned artists George Bellows and Alexander (Sandy) Calder.
Andy Warhol, father of the pop art movement, began his career as an illustrator but constantly blurred the line between fine and applied arts. In addition to his better known designs for albums covers (the eponymous titled “The Velvet Underground” and “Sticky Fingers” for the Rolling Stones) and Interview magazine, which he founded, he contributed covers to several publications, including Time and Vogue. Other Time contributors included fellow pop-artist Roy Lichentstein and other famed artists Marc Chagall,Robert Rauschenberg, Romare Bearden, Ben Shahn, Jacob Lawrence and Alex Katz.
Andy Warhol, 1984
Andy Warhol, 1965
Andy Warhol, 1984
Andy Warhol, 1986
Time Cover by Andy Warhol
Lally Weymouth, 1976
Contemporary artist Jeff Koons created a cover for the magazine in 2009. The magazine also invited other artists such as Jenny Holzer, Franceso Vezzoli, identical twins Doug and Mike Starn and even architect Frank Gerry.
Jeff Koons
The Starn brothers
Covers by Jeff Koons, Starn Brothers, Jenny Holzer and Francesco Vezzoli
Ben Shahn, 1962
Romare Bearden
Roy Lichtenstein, 1968
Alex Katz, 1982
Ben Shahn, 1962
Jacob Lawrence, 1968
Mark Chagall, 1965
Robert Rauschenberg, 1967
Romare Bearden, 1970
Roy Lichtenstein, 1968
Time Covers by Roy Lichtensteinand other artists
Fashion Magazine W
The fashion magazine W has likewise hired Vezzoli and Barbara Kruger to grace their covers. Perhaps the most famous artist today in the mysterious street artist Banksy, who has created covers for Time Out magazine among others.
Artist Shepard Fairey, who also began his career as a street artist these days is primarily a designer/ illustrator who contributes covers to magazines such as Time and The Nation and produces several posters, including three popular ones on the recent Women’s March.
Francesco Vezzoli
My Artworks for Magazine Covers
I have had the distinct privilege and honor to design some magazine covers myself. Although not among the big names or labels, they are special in their own right as they are the in house publications run by some very prestigious organizations. It was a humbling experience for me and even though not all my artworks may have been published, they helped hone my creative skills and opened my mind to newer possibilities. They helped me venture into the field of graphic design and taught me the art of combining conventional art techniques with advanced digital alternatives to produce designs that would do justice to the respective magazine’s requirements.
For each artwork, I was provided with a brief that required me to work on a particular theme for the publication in question. Here are the themes with their respective artworks and a brief description for each:
Health is Wealth – As the theme suggests, the objective was to depict that our most valuable treasure is physical and mental well being. According to Hindu mythology, Lakshmi is the Goddess of wealth, prosperity and fortune and an embodiment of beauty as well. She is depicted in Indian art as an elegantly dressed, prosperity-showering golden-colored woman seated or standing on a lotus pedestal, with four hands, which represent the goals of human life. I have used this very iconographic image of Lakshmi to depict the greatest wealth for us all – our health. With the help of various elements of doodle art, I have stylized her form, along with that of the lotus and the surrounding water pool. Each of her hands shows how every body part is equally important for our overall health and there is no bigger fortune that a healthy body, mind and soul.
Theme – Health is Wealth
Touching Lives through Welfare 1 – Depicting social welfare through art was a big challenge for me. So, I decided to combine drawing as well as doodling to produce an abstract composition which portrays specific welfare organizations in my region. Each arm represents one such organization and together, hand in hand, they all work in tandem towards one common goal – welfare of the under privileged. I have used geometrical shapes and patterns as doodle motifs in a multiple color palette to create this artwork.
Touching Lives through Welfare 1
Touching Lives through Welfare 2 – This one is another option I created on the theme of social welfare. Many people have made major contributions towards the eradication of social evils by dedicating their lives to the cause. When it comes to social reformers, social workers and philanthropists of the likes of Bill Gates, Mother Teresa, Annie Besant, Jane Adams and Jeanette Rankin to name a few have played a significant role in fighting social evils. Among my fellow Indians, philanthropists like Ratan Tata and Shiv Nadar and social activists like Irom Sharmila, Medha Patkar and Aruna Roy are also doing their bit. I have depicted these and several other pioneering social icons from around the world, who have done some outstanding work in their respective fields and brought about radical changes over the decades. This cover design is completely handmade art using a combination of wet and dry mediums in the form of water color brush pens, fine tip pens and colored pencils respectively.
Touching Lives through Welfare 2
The Steel Shark – As per the brief given to me, I had to create a cover design for a magazine depicting the mighty submarine in its full glory. So, I decided to take my obsession for submarines to the next level by combining doodling and digital art. In this artwork, I have personified the submarine as a shark which truly epitomizes its stealth and menacing power. I rendered this personified version with prismacolor pencils, whereas the underwater seascape has been rendered digitally. I have used the technique of doodling to render the waves arising from the sea.
The Steel Shark
Theme Pollution – This one is extremely special for me as the artwork which made it to the cover page of a magazine is also part of my ongoing Navrasa Series. (Please refer to previous blog posts to know more about this series). This artwork is an attempt to depict two sides of the same coin. While one side shows how fortunate we are to have Nature’s blessings in the form of her beautiful flora and fauna, the other side opens our eyes to how we are destroying this beautiful gift by polluting our environment.
This is evident as human decay in the form of the skeletal hand I have portrayed in the painting. The cigarette between the crooked bones of this hand represents the toxic poisons we are exhaling into our atmosphere through our industrial chimneys. Not only does this smoke symbolize the industrial infection that we are spreading but also the impending doom of nuclear warfare. The skeletal and decomposing remains of the elephant represent the consequences of our ignorance resulting from selfish acts like poaching, deforestation and our greed for more.
The left side of the artwork shows what Mother Earth will look like in her full glory, if we give her the chance to live. The foliage of green leaves with a scattering of blossoms, the lush green grass and the robust image of the elephant set against a bright blue sky all bear witness to the Nature’s masterful creativity.
This is a mixed media artwork where I have employed every medium ranging from oils, to acrylics as well as impasto and decoupage. I have achieved the visual effects for the elephant’s head through acrylic pouring. The text on top is actual newspaper cuttings which have been fused with the acrylic pour backdrop with the technique of decoupage. The various 3D effects providing texture to the foliage and the elephant tusks have been achieved with the help of the hot glue gun. I have taken special care to highlight the difference between a healthy tusk and a decaying one by depicting the latter in a mangled and fragmented state. The remainder of the painting has been rendered with oil paints.
Theme – Pollution
It was a great learning experience for me to work on designs for magazine covers. Even though not all of them got published, each and every one is very special for me as they broadened my horizons and helped me step into the world of graphic design or visual communication, where the sky is the limit. Who knows? Maybe I can delve into book covers, illustrations, posters or logos next!
DISCLAIMER – All the information, data and imagery in this blog post is for informational and educational purpose only. While there may be copyrighted material the use of which has not always been specifically authorized by the copyright owner, I have only made it available with the sole effort to stimulate creative progress and artistic enrichment.Some images may have been taken from the links included below and I give full credit to these websites/pages, thereby in no way claiming them to be my own. I have also used these links for reference purposes and collection of data; therefore I give full credit to the respective web pages. Most of the data in this post is based on my personal experiences and opinions and I am not responsible for any material that is found in the links at the end of this post.
What is it that can compliment or take away from your artistic creation? What can make your artwork stand out and make it look all the more special? What can enhance not just your art but also speak volumes about your aesthetic style?
It is the frame around your work of art. The frame is the finishing touch, the icing on the cake, the final component of a painting. Framing is an art in itself, and just as a good frame can enhance a work of art, a bad one can greatly depreciate its value.
Art is a key element to any well-decorated interior. It adds life and visual interest to the place it adorns. The frames surrounding your art have an important role to play in decorating. Frames separate and distinguish the artwork while also protecting it.
The primary objective of framing an oil or acrylic painting is to enhance the art and the art alone, without taking away focus from it in any which way. The primary objective of framing a work on paper is to protect the piece besides enhancing its appearance.
Framed vs. Frameless
Not all works of art need framing. For contemporary gallery-wrapped paintings, framing is completely optional. The term gallery wrap refers to canvas wrapped around thick stretcher bars and secured to the back rather than the sides of those bars. This mounting leaves the sides of the canvas smooth, neat and free of visible staples or tacks. Artists using this type of canvas mount often continue the painting around the sides or simply paint the sides a complementary neutral color. I personally prefer the latter and like to paint the sides of my canvases as a continuation of the composition I am depicting, especially for my acrylic pours.
Here are a couple of examples of artworks that exhibit this feature. The former is an acrylic pour done by my daughter on a stretched canvas and as evident, the composition continues or “flows” to the sides, hence framing is not required. The latter is a part of my Navrasa series where once again the painting continues around the sides, so I am still toying with the idea of whether to frame it or not! (Click on the thumbnails to view full images).
An unframed Acrylic Pour
One of my artworks with the composition continuing on the sides
When a painting on canvas is not gallery-wrapped, the stretchers are thinner and the staples are visible along the sides. This kind of canvas will obviously need to be framed, and the frame needs to have sufficient depth to accommodate the thickness of the canvas and stretchers. Oil or acrylic paintings on a canvas stretched over wood stretcher bars can be framed or unframed. If you leave a painting unframed, you’ll see its sides, which are typically gessoed in white or the color of the raw canvas or linen.
Paintings on board or panel usually require the structure of framing for display, as do most paintings on paper. However, box mounting these works for sleek effect renders framing optional. Another good option for such canvases is floater frames which are my personal favorite and would love to use for my future art projects.
Unframed paintings have a sense of casualness that can be quite charming. However, you need to be OK with the possibility of seeing some smears of paint on the edges and the thick bump created by the canvas folded over at the corners.
Choosing a Frame
When it comes to selecting frames for your art, there are no hard and fast rules. It is best to let your piece connect you to the right frame. There are several options for frame styles available at a wide range of prices. You can choose to do it yourself or get it done by framing stores. Whatever you choose, keep in mind the following key points about framing:
The Painting’s style – A period painting or one with a classical subject matter is well suited for a timeless, traditional, elegant gold-leafed frame or a handsome walnut or mahogany wood frame. Lighter, sublime or abstract paintings may look best in sleek, minimalist frames. For paintings that are in-between, there are transitional frames—those that blend elements of the traditional and the contemporary. Choose a frame finish that doesn’t compete with the art in terms of color or texture. For example, don’t choose a fussy frame with a mottled finish to go with a busy image.
The Painting’s size – Larger paintings usually look best with wider moldings and, therefore, larger frames. If, for some reason, space is a constraint, a floater frame is a better option. These usually add only 1 to 4 inches to the height and width of a large painting, whereas a regular frame may add as much as 7 to 12 inches to the overall dimensions.
Style and color of frame – The frame is supposed to enhance your art and not overpower it. Therefore, the style and color of the frame should be subdued. A frame that is the same color as the wall more or less blends into it visually thereby rendering all the focus on your art.
Mats for framing – A mat (also called a mount) is a thin piece of paper like material on which your art sits. It’s mostly decorative and acts as a backdrop for your art. Mats prevent the artwork from touching the glass and allow airflow around it, thereby preventing the work and glass from sticking together over time. Mats also help create visual transition space between the wall and artwork. When framing artwork, choose a mat that is lighter than the work of art but darker than the wall. For a traditional look, pick a prominent accent color from the art to complement the mat color. A gilded bevel on a mat can really elevate the look while still keeping it simple. But what exactly is a mat? I shall discuss this in detail further down in the post.
Size and proportion – If the mat and frame are of equal widths, they look like stripes around the work. Hence, the matting should be wider than the frame. The size of the artwork obviously decides the overall size of the frame, but one needs to take care of the width of the frame in relation to the size of the work. Generally, the larger the painting or print the wider the frame should be.
Preservation of the artwork – The quality of framing material used for a particular artwork depends on its value or importance. For instance, for works on paper, a 100 percent acid-free mat is a must, so that the work does not discolor or “burn” over time. Besides this, ensure the use of acid-free hinging tape to adhere the work to the mat. The type of glass used with the frame is another important aspect of preserving the artwork. Clear picture frame glass is most common and inexpensive, but it can’t block UV rays, which can cause irreversible damage to the piece. So if the work is being exposed to natural light it is important to choose a UV filtering glass. More about glasses later on.
The hanging hardware – For ready-made frames, ensure that the hanging hardware is secure enough to be able to hold your artwork onto the wall. Size and weight of the hardware are also important points to consider. If the framed art weighs a lot, use d-rings and a hanging wire.
Frames for works on Paper
Watercolors, pastels, charcoal drawings etc., require special care when it comes to framing owing to the perishable nature of their surfaces.
Before framing, the work should be mounted on a support in such a way that if required at any time in the future, the artwork can be removed from the frame without causing any damage to it. Also, there should be no remnants left behind of the previous framing structure. This is crucial for works of value or anticipated future value.
Acid-free corner pockets and acid-free adhesives are two good methods of securing artwork to its support. As for the support itself, archival foam board creates a sturdy structure for a framed piece on paper and helps protect artwork from pollutants that might find their way through the back of a framed piece.
Most works on paper require matting and framing under glass for further protection. The mat board, with a cutout window, is laid over the painting and prevents the glass from touching the surface of the artwork. A spacer can be used in place of a mat. Matting also contributes to the presentation of the artwork.
It‘s essential that all materials used be 100 percent acid-free. You may look back at pieces framed many years ago and see that the matting has discolored, as has the paper of the actual artwork where it came in contact with the mat board. This discoloration (acid burn), is caused by acid in cardboard backing, non-acid-free matting, acidic masking or Scotch tape. Many a fine work has been devalued owing to this. All good framers now use acid-free or archival materials.
Here is an example of one of the framed prints that adorn my home.
A framed print
Types of Frames
There are innumerable choices one can make when it comes to frames but choosing the right frame for a piece is paramount. Frames are made of a variety of materials, like wood, metal, resin, gesso and gold or silver leaf.
The right frame can augment the aesthetic appeal of a painting to a great extent. Not only does the frame merely house the artwork or just serve the purpose of hanging it on a wall, but also preserves the piece from damage by protecting it from fading and wrinkling, thus keeping the artwork well preserved for longer periods.
This makes deciding on the perfect frame a difficult task as the myriad of options available could leave you stumped. To avoid such hassles, it is best to do your homework about the most commonly used material for frames. Let me make it easier for you with the following list:
Wood – Wood has been traditionally one of the most popular framing materials for ages as not only is it versatile, but also comes in a wide range of textures and colours. It can also take paints and stains well. Moreover, wooden frames come in ornate as well as simple forms. They can complement almost any décor style thus making them a safe choice in most cases.
Faux Wood – Faux wood frames typically consist of a dense plastic material known as polystyrene. They look almost identical to genuine wooden frames. Shaping and drilling the material is easy. In addition, faux wood frames are both lightweight and immensely affordable.
Metals – Many fine art framing companies offer metallic frames which are equally versatile. Moreover, they usually come in an assortment of shapes and sizes. They are ideal for modern and minimalistic art styles. Narrow metallic frames can outline pictures subtly and simply fade away into the area of display.
Bamboo – Bamboo frames are not a conventional choice, but, their ability to add a rustic feel to any image makes them highly popular. Bamboo is both flexible and sturdy. Depending on the style of the frame, it can look casual or urban. People often select bamboo frames because it is an environment-friendly material.
Most of my framing is done in wood or faux wood but I am open to metal frames if the artwork demands so. Here are a few images of the different types of frames I have used for various artworks of mine.
My choices for frames
Tips for Selecting the Perfect Frame for Your Artwork
Some of the attributes of a quality frame include:
Drawing the Viewer’s Attention to the Picture and Not to the Frame – When you are selecting a frame, consider the key aspects of the artwork in question. Think about the elements that you want to accentuate in the piece. Light frames usually draw the attention of the viewers to the areas of contrast. They make the viewers focus on the softer lines in the painting. Dark and heavy frames can accentuate deep tones or subdued themes.
Blending in with Other Elements in the Display Space –Consider the place where you plan to hang the frame as it will need to complement the décor of the space in terms of size, colour and texture. This is why print framing professionals often exhort their customers to select frames having high levels of versatility.
Emphasizing the Colour and Texture of the Picture – If you were to pick a frame that doesn’t suit the colour combination and textural effects in the painting, the effect could be quite discordant and jarring. Paintings with simple lines will look good in decorative frames. Similarly, those featuring busy scenes will look better in simple and plain frames.
Maintenance and Durability – Besides picking a frame that goes well with the image, you will need to consider whether you want a frame with glazing that eliminates glare, ultraviolet rays etc. , and also one that is easy to clean and maintain.
What is Matting?
A regular mat consists of a beveled hole in the middle of the decorative mat, and then the artwork is placed on top of a foam mat, which sits behind the decorative one. A mat helps highlight artwork by separating it from the frame and drawing attention to the artwork itself. Besides highlighting the artwork, a mat also physically distances and prevents the artwork from sticking to the glass.
Mats are highly recommended for works on paper like drawings, prints or watercolors. Without a mat, these artworks tend to look more like posters. However, for multiple pieces like diptychs and triptychs that are meant to be read as one piece, it is advisable not to use a mat.
The entire objective of matting is to make your art stand out, so exercise caution when choosing mat color. An understated white or off-white goes with almost anything. If the piece is almost uniformly white, or if you wish to add some drama, you can go for a gray or black mat.
You can also add an accent mat, essentially a second mat inside the primary one that creates a thin outline around the artwork. This accent mat is optional though. But if you do opt for one, choose a color that’s from the work itself. This can be a shade that you want to highlight or an undertone you want to accentuate from your painting. Adding a color-contrasting mat can accentuate the artwork even more. It is recommended to use a neutral mat for the dominant border (white is classic these days), and adding a colored secondary mat that references a color in the artwork — but only if it truly enhances the image.
While the addition of a second mat or even two more mats further defines the artwork, thereby drawing the viewer’s attention to it, this also stands the risk of the frame overwhelming the artwork. So less is best and if you decide to use multiple mats, do so carefully.
A delicate wood fillet is an attractive alternative to a double mat. The fillet, which fits inside the opening of the mat board, between the board and the artwork, can match or complement the color of the frame.
Types of Mats
Paper mats – Paper mats can be acidic or non-acidic. Acidic paper mats, sometimes called “decorative mats,” are made with wood pulp. An acidic compound in the wood pulp called lignin creates yellow and brown burn marks on the artwork. One way to tell if a piece has been framed with an acidic mat is if the bevel has yellowed over time. If it’s acid-free, it should still be white. Acidic mat are fine for inexpensive, easily replaceable pieces, like posters. However, if you’ve purchased pre-matted artwork or have a piece that was matted a long time ago and you aren’t sure what type of matting was used, it might be worth replacing it with a non-acidic mat to be safe.
Regular mat board – Also called paperboard, this is also made of wood pulp, but has been acid-neutralized. This is the most commonly used mat material and is advertised as “acid-free.” It should last about a hundred years or so. Acid mat board does cost more than regular (acidic) paper mats, but not that much. This type of matting is best for most pieces, like low to mid-range artwork and photos.
One hundred percent cotton rag mats – Also known as rag mats, these are constructed of a cotton rag core and backing paper, which rests near the artwork. Rag mats are acid-free and high-quality. Like regular mat board, this type of matting is also appropriate for artwork that doesn’t need a high degree of conservation. Rag mats can be used for anything from cherished family photos to watercolor paintings.
Conservation or archival mat board – This is the most expensive, least acidic mat. It’s made of pH-neutral cellulose that’s been treated to be inert for hundreds of years and is used on more valuable pieces and works that require the highest level of preservation.
Other mat materials include vellum, suede and fabric-wrapped mats, such as linen. Sharing a couple of images of paintings where I have used mats to give you an idea of how matting can aesthetically enhance the piece.
Here are some examples of matting I have used for my art.
Matting options in my paintings
Mat scale
Boris Smorodinsky of Striving Artists Framing and Art Services in Los Angeles says there’s no hard-and-fast rule as to how wide a mat should be in relation to the artwork. In fact, framing in general is subjective and depends on the piece and the client’s personal preferences. However, Smorodinsky usually starts with a minimum width of 2 inches.
The mat and frame should not be of equal widths. Preferably, the matting should be wider than the frame. If the frame and mat are the same size, the eye tends to visualize stripes around the work.
Generally, weighted matting is preferred. This means that the bottom of the mat is deeper than the sides and top. Weighting, even when it’s subtle, provides visual balance when the framed piece is hung on a wall.
Glass for Framing
Glass primarily protects works on paper from dust and pollutants. The following options are available for the glass to be used for framing:
Regular glass is the most commonly used glass for framing. Although scratch-resistant, it can break easily during transportation and only filters out about half of the damaging ultraviolet (UV) light rays.
Non-glare glass works well on pieces placed directly in front of a window. The drawback is that this glass tends to soften the image and give a slightly fuzzy appearance to the work. It also gives low UV protection.
Conservation glazing is a coating applied to glass that offers 97 percent UV protection.
Museum Glass is the ultimate—so clear and glare-free that you can’t see it at all when you stand in front of a painting. It also provides the best UV protection. This glass is expensive, but worth the price. Optimum Museum acrylic, made by Tru Vue, is an acrylic with added UV-filtering benefits and is antireflective and scratch-resistant. Costing more than museum glass, Optimum Museum Acrylic is the most expensive option. Conservation Clear acrylic, also made by Tru Vue, is another option with the same UV benefits, but it is reflective.
Acrylic glazing, also known by the trade name Plexiglas, is much lighter than glass, which makes it a good alternative for large works of art. It’s virtually shatter proof, although it scratches easily. Available in regular and non-glare forms, acrylic provides about 60 percent UV protection. Regular glass cleaners can leave the surface looking foggy. Plexiglas is an option for large pieces or artwork that needs to be shipped because, being made of acrylic, it’s much more lightweight than glass. Like glass, it’s available in regular and UV-filtering options. Besides UV Rays, the infrared light spectrum can be just as damaging to artwork and can effectively cook pigment and paper, especially if the work is under glass. Glass is an excellent conductor of heat and can intensify the damaging aspects of infrared light. Plexiglas, on the other hand, is an insulator and can actually reduce the possibility of infrared damage.
Glass or Plexiglas is recommended for paper-based artwork whereas oil and acrylic paintings should be left uncovered because they release gases as they cure and need to breathe. Glass is also heavy and can be an obstacle for large pieces or ones that need to be shipped.
Consequences of Improper Framing
Quite often, the surface on which pictures and paintings appear is paper which is usually not durable and is prone to damage. It can tear or wrinkle, fade or stain. It can also appear stretched. This is because paper usually comprises of wood pulp, which contains acidic compounds. These can cause the paper to turn yellow and become brittle with time. Similarly, the use of cellophane and masking tape can cause stains. High humidity levels can change the structure of the paper itself and lead to the growth of moulds and mildew. In addition, ultraviolet rays can cause the colour of the picture to fade. Once the damage has begun, it can become irreversible.
Taking these factors into account, custom-made frames offer the best recourse. These frames typically feature high-quality materials. Thus, they can minimize all the risks that have the potential to damage printed artwork and documents. The materials used for making these frames will be free of acidic and alkaline ingredients. So, they will not damage the artwork by themselves. More importantly, they will also be able to keep out various environmental elements that could damage the picture.
It is for this reason that framing specialists often use acid-free mat boards and mount boards. These do not let acidity damage the artwork as they are typically composed of materials devoid of acids naturally such as cotton fibres. In addition, they often undergo additional buffering for maintaining a neutral pH value. Similarly, special acid-free mounting products eliminate the hassles of stains that come with using standard cellophane and masking tape. For instance, framing professionals often use linen hinging tape or acid-free hinging tape for mounting paintings.
Not many people think twice before opting for regular glass for their frames. But, glass framing professionals know the value of selecting the right glazing for the frame. The glazing placed in front of an artwork in a frame, protects it from moisture as well as contamination by touch. In addition, it keeps dirt and microorganisms away. As mentioned earlier, colors can fade with exposure to ultraviolet light. With UV-filter glazing, you will be able to eliminate these concerns. It is worth highlighting that a good frame will seal the artwork and keep all its components flat, tight and secure.
Wooden Frame Vs Metallic Frame
For many people, wood is the preferred material for frames. Not only is the look of wooden frames quite compelling but also they are typically suited for almost all kinds of art styles. They can blend in perfectly with any kind of colour combination and will never look dated or go out of style. As a result, they are among the most popular kinds of frames.
In the past, not too many options were available in terms of framing materials and wood was the only material of choice. But now there’s no dearth of framing options. Although frames made from a diverse range of materials are available today, it eventually boils down to two materials – wood and metals. People who like traditional frames invariably opt for wood and those with a liking for the contemporary go for metallic ones. Some aspects to consider while choosing between wooden and metallic frames are:
Type of Artwork – If the piece is a classic or traditional work of art, a wooden frame is recommended. These frames are ideal for exhibiting still life paintings, portraits and landscapes. On the other hand, for abstract paintings, minimalistic photography etc., consider metallic frames. The simple and clean lines of these frames make them ideal for displaying less intricately detailed artwork.
The Area of Display – Modern architecture and decor are well suited for metallic frames. In contrast, warmly-toned rooms will suit wooden frames perfectly. But, the simplicity of metallic frames makes them blend into spaces with any kind of décor style easily.
The Damage Potential – Wooden frames can be quite robust, but remain susceptible to damages. Owing to their heavier weight, they can sustain dents or scratches on falling. Repairing these is next to impossible. On the other hand, repairing or replacing the sides of a metallic frame is much easier.
Budget – Framing shops often charge higher rates for wooden frames as they comprise costlier material. In addition, the materials used in wooden frames require hand-gluing and nailing together. Moreover, the more ornate the frame, the higher the price. In contrast, aluminum metal frames are budget-friendly.
Can a canvas be Framed?
If the canvas is stretched and you’re happy with how its sides look, it can be displayed unframed. A painting or print on canvas, unlike works on paper, has a structure and shape of its own so not all canvases may require framing. Depending on the aesthetic appeal of the art being displayed on the canvas, one needs to decide whether to frame it or not, so as to ensure that the art itself is not compromised.
Framing of Art Prints
Art prints can have a white border on the edges. This does 3 things:
1. It gives the look of having a “built-in” mat around the print, making it look more like fine art rather than a poster.
2. It gives space around the edges so when framed, no part of the image is covered by the front frame lip or edge. (This can cover an image by 1/16″ to even 1/4″ on every side, depending on the frame. That means up to an entire half inch of your image could be covered up!)
3. It allows the bottom signature, title, and (if applicable) number of the print to show. Signed prints are worth more than unsigned prints, and numbered limited edition prints are worth more than open edition prints. On an “original print,” i.e., a hand-pulled printmaker’s work, like a linocut, woodcut, lithograph, etc., the number in the edition is very important, too. Different artists sign their pieces differently, but in general, signing on the front in pencil at the bottom of the piece is standard.
If you take your piece to a framer’s to be professionally framed, you may notice that more white space is left on the bottom of the piece than the top (or the mat may even be cut a little thicker on the bottom). This visually balances the piece. If too little white space is left on the bottom, it can feel cramped or top heavy.
Framing has no hard and fast rules so feel free to explore. A nontraditional painting can look like a million dollars in a hefty, ornate and traditional frame, and a very small painting can glisten like a precious stone when placed in an over sized frame.
I personally lean toward simpler frame styles and colors, but I also believe that an ornate frame can really give a face lift to a simple piece of art.
Regardless of how you frame your work, always ensure that you are using archival-quality materials that will take care of environmental factors, wear and tear as well as ageing.
Happy framing!
DISCLAIMER – All the information, data and imagery in this blog post is for informational and educational purpose only. While there may be copyrighted material the use of which has not always been specifically authorized by the copyright owner, I have only made it available with the sole effort to stimulate creative progress and artistic enrichment.Some images may have been taken from the links included below and I give full credit to these websites/pages, thereby in no way claiming them to be my own. I have also used these links for reference purposes and collection of data; therefore I give full credit to the respective web pages. Most of the data in this post is based on my personal experiences and opinions and I am not responsible for any material that is found in the links at the end of this post.
If there is one subject that has always foxed me, it’s what I am going to call a painting once it’s done. What could be that perfect name that would not only make my piece stand out in its full glory but also convey the message behind it in just a few words?
This name that captures the essence of the artwork is what we call its title. It is the artist’s poetic license that allows him or her to communicate the message behind his or her creation.”
I for one give a lot of thought to my titles because I feel they are as important as the artworks themselves. In my opinion, the title of a painting is an extension of the same creative process that goes into making the painting in the first place. I believe that my viewers will be able to extract a much more powerful experience from a piece of art if it has a title that complements it.
A good title is one that gives an insight into the artist’s creative thought process and what inspires him or her. It is the key to the artist’s unique way of thinking and his power of expression. If thought out well, the name of a painting can be extremely evocative and can be resonant of the artist’s personal feelings and interpretation of the subject depicted.
It is for this reason that in most cases, ideas for titles pop up as a result of the artist’s personal reaction to a particular situation or an emotional experience he or she may be going through. But this poses the risk of influencing the viewers and depriving them of their own personal reaction to the art piece, so it’s best to be true to the core concept of the artwork without affecting the viewer’s experience.
A good title also adds an element of mystery to the work and does not completely reveal the artist’s personal feeling about it. This gives viewers the liberty of forming their own opinion about the piece. It should just provide clues to the subject matter and allow the viewer to see the artwork from a perspective that is different from what the artist originally intended. I feel that the title can add this value to a painting.
A title plays a crucial role not only for the viewer, but also for the artists. It is a portal into the creative mind of the artist and also helps in navigating viewers through his thought process by approaching it from his own personal perspective. It is a testimonial, a symbolic representation, a gateway or a metaphor for the subject in question.
Titled Vs “Untitled”
When an artist titles his work, it gives him or her the chance to express in a few words what he or she means to convey through it. However, many artists feel that this can deprive their viewers from building an individual opinion about their art, thereby preventing them from interpreting it independently as per their own personal perspective. They feel that it stops viewers from extracting an intimate experience from the artwork. Hence, they prefer to leave it to the viewers to make their own interpretation by christening the painting with the term “Untitled.”
There are several other reasons why some artists have reservations about titling their work. Many world renowned masters of art have resorted to keeping major pieces of their work untitled. Some want to let a work speak for itself and not impose a label on the image while others don’t want to influence the viewer. Very often, an artwork really doesn’t need a title. This is particularly true for smaller sketches, studies, and preparatory works, many of which are simply intended as teaching aids or have the ability to stand on their own as works of art.
I somehow disagree with the idea of not baptizing a painting, especially if you are trying to sell your art. Not having a name for it kind of puts off your customer. Most art enthusiasts and collectors look for a name as it will give them a better insight about what they are going to be investing in. Having a title not only imparts an identity to your beautiful creation but also appeals to the interest of your buyer. And if you’re posting your work on the internet, the term “untitled” will not get you very far when it comes to search engine optimization (SEO). The probability of finding an “Untitled” painting of yours through a search engine is almost next to nil as compared to one that has a name. Moreover, yours is not the only “Untitled” composition that will come up in the search results so it’ll be like looking for a needle in a haystack!
How to title paintings according to the type of art
Your choice of title for your art piece shows what it means to you and gives the viewer some idea about approaching the piece.
If you are struggling with naming your art, a bit of research really helps. One way to approach naming your painting is to identify what category of art it fit into. Here’s how you can christen your work based on this criteria:
Portraits are usually titled by the subject’s name and sometimes a date, or occupation.
Still life works are a different kettle of fish and can be pretty tricky to title. A lot of thought needs to go into your composition before you give it a name, for instance, does it have a story to tell? Is it based on a theme or does it symbolize something? More creative your still life setups, more innovative and interesting are the possibilities for titles. Natural arrangements have a better story to tell than artificial ones which makes for better titles too. Creating a deliberate mood or theme, will be helpful when it comes to choosing a title integrated with the work. For less developed still life works or studies, your title can be simple and descriptive. Consider using time of the day, season, or mood as part of the title. Once you have identified these, it becomes easier to name it.
Landscapes can be named according to the location, the time of the day, the season and the mood you wish to project to your viewers. Mentioning the location is very important as not all your viewers may be familiar with the scene. Even the most famous and well known locations in the world may be unfamiliar to natives of your own land or those visiting from other countries. Adding a personal touch or connection along with the location can make the title that much more interesting. For example, doesn’t “Grandma’s favorite Orchids” sound better than just “Orchids?”Often the title can pick up on irony, contrast, or drama in the scene. I wish I had known all this before, otherwise I wouldn’t have simply named my floral still life just “Flora in a Pot” and my composition of fruits just “Fruit Platter!” Sounds boring right? How about “Summer Blooms” and “Fruits of my Labor?” Don’t you think they add an element of interest as well as a bit of drama to these pieces?
Abstracts can be totally non-objective in nature so your title may be the only way to communicate to your viewer what your painting is all about, why you created it, or the concept behind the work. For most abstract pieces, the title is the only key to the art other than the piece itself. However, if your abstract artwork is superficial with no intention to convey any specific message or deeper meaning, make sure your title communicates this to your viewer. For example, “Composition II in Red, Blue, and Yellow” by Piet Mondrian conveys to the viewer not to look for any hidden meaning. On the other hand, if your work is based on a specific concept, give the viewer a hint through your title. Titles such as “The Scream” by Edvard Munch help the viewer understand the artist’s perception.
“Composition II in Red, Blue, and Yellow” by Piet Mondrian
“The Scream” by Edvard Munch
Types of Titles
There are five main kinds of titles: Sentimental, Numerical, Abstract, Factual and Mysterious.
Sentimental titles are an attempt to express the emotional state of either the artist or the subject. Once again, Edvard Munch’s “The Scream” can fit into this category as it aptly brings out his sentiments.
The Scream by Edvard Munch
2. Numerical titles involve the use of numbers, especially if a series of work belonging to a common theme or concept are to be named. Many artists prefer to use numbers. Jackson Pollock gave his pictures conventional titles but changed to numbers. He commented: “…look passively and try to receive what the painting has to offer and not bring a subject matter or preconceived idea of what they are to be looking for.”
Jackson Pollock’s No. 5, 1948
3. Abstract titles are appropriate if you don’t wish to give away the meaning behind your painting and wish to leave it up to your viewers to make their own interpretations. They can also be used if your piece does not follow any specific theme or concept.They are used to express something that is appreciated in the intellectual and mental sense, an intangible expression concerning or relating to the work. An example of an abstract title is “Composition II in Red, Blue, and Yellow” by Piet Mondrian.
Composition II in Red, Blue, and Yellow by Piet Mondrian
4. Factual titles are used for naming artworks that depict real life scenes or events. For such titles, the date and location should be at the forefront of your title. You can always add a sentimental or mysterious component to this type of title too.“A Real Allegory of a Seven Year Phase in my Artistic and Moral Life” by Gustave Courbet, 1855 is one such label.
A Real Allegory of a Seven Year Phase in my Artistic and Moral Life by Gustav Courbet
5. Mysterious titles are difficult or possibly even impossible to understand as they impart an element of mystery to the art they are naming. They are deliberately enigmatic and do not explain the artist’s feeling clearly, nor do they identify the concept behind the work. They can be used for art that is obscure and inexplicable. J.M.W. Turner is an example of such an artist who used ironic, compound titles — e.g., The Fighting ‘Temeraire,’ tugged to her last berth to be broken up, 1838.
The Fighting ‘Temeraire,’ tugged to her last berth to be broken up, 1838 by J.M.W.Turner
When to come up with a title
Some artists have no trouble naming their artworks as the title is simply an extension of their creative expression. Several of them don’t think about titles until their artworks are finished and they see what their paintings evoke. Other artists have something clearly in mind as they create, and form titles along that idea. Most artists probably start thinking about a title somewhere in the middle stages of a painting, as their imagery takes shape. As is always true in art, there are no definite rules for titling a painting.
Most artists paint first and title last. Somewhere down the line, a title just pops out of the blue. A few of them work backwards and come up with a title first, working their piece around it. This latter approach works particularly well for eccentric art. The right title makes a difference as to how a work is seen and understood. There are three ways one can title their art:
Before starting the piece
Some artists can come up with a title for their work as soon as they’ve seen what they want to paint or an idea pops up in their heads. This helps keep their brain focused on what the piece is about.
While working on the piece
Many artists get clues about what to call their artwork while working on it. They may not decide for certain until it’s finished but a lot of pieces get a working title at the very least while they are works in progress.
After the piece is done
For most artists, the point at which people start to thinking about a title is the observation and reflection stage which comes when they have finishedthe artwork.
Should the title be long or short?
In my personal opinion, the length of your title depends on what and how much you want to give away about your painting through its name. Be that as it may, it is advisable to have a title that’s not just one word. A little extra thought in naming your masterpiece will go a long way when it comes to connecting with your viewers! I for one remember artists who tend to use long titles, even though I can never quite remember the titles themselves!
On the contrary, short titles are simple and easier to remember than longer ones. However, their lack of ingenuity can make them less unique. A little complexity can add individuality and uniqueness to the name.
How to write the name of a painting
The following details need to be taken care of when naming your artwork:
The artist’sname and the title of thepainting need to be part of the text.
The title should be in italics. Use title case, capitalizing the first word and all nouns, pronouns, verbs, and adverbs.
The year thepaintingwas completed should be in parentheses.
Some pointers on how to title your painting
Artists generally run through a series of title possibilities for each and every artwork before narrowing down on the perfect one. They carefully consider the ramifications of the probable titles and how they might add to or take away from their artwork. Titles highlight the visual aspect of the painting, provide knowledge and insight about the work as well as provide a glimpse into the artist’s mind-set. Here are a few points to consider while choosing a title:
1. Observe your artwork closely and carefully. What is the first thing about it that catches your eye? What is that you trying to depict? Is there a deeper meaning behind it? Does it convey a moral message? Is it based on any particular theme or concept?
2. Make a list of words that describe the piece in terms of colors, shapes, lighting effects, time of the day and season.
3. What thought or image inspired you to put down this work onto your canvas? What emotions or feelings did it invoke in you?
4. What exactly is the subject that you have painted? Is it nature, flowers, fruits, blue skies? List them out.
5. Now look at your painting as the viewer and not the artist and pick out from the list you have made above things that stand out the most and are most relevant to the piece in front of you. This can be a bit tricky, as those bright red roses in the vase may be your personal favorite, but the vase itself may just stand out a bit more.
6. Turn to your trusted literary friend, the Thesaurus to look for synonyms for the key words that describe your work best in the list you have made. This may open doors to new levels of creativity. You can even add a mysterious or sentimental element to make the title a wee bit dramatic.
7. Keep it short and sweet, giving your viewers the freedom and liberty to see the piece from their own perspectives and draw out the rest of its meaning or intent. This subtle ambiguity will make both the artwork as well as its title a memorable experience for your viewers.
8. Do not try to restate exactly what the painting is already communicating. Think of the title as an additional part of the art that provides something new. Choose a title that is slightly different than your art and offers something new and refreshing.
9. Identify the key feeling you experience through your artwork or want to convey. Then choose words or phrases for a title that conjure up those same feelings in you. Don’t be literal in your description of the artwork.
10. Whether literal or abstract, your title should be as expansive as possible so that your viewers have room for their own interpretation. Allowing them to find their own meaning in your work is not just generous, but also increases the likelihood that someone will connect to it personally and may even end up buying your art!
To summarize –
Avoid stereotypical and cheesy names, unless you intend being paradoxical or satirical. Be original.
Be precise and honest to soul of the piece.
Don’t be pompous and showy.
Provide your viewer only what is required, that is, enough to identify your piece.
Short and sweet is the best. Let your art do the talking.
Appreciate and value your work far more than just naming it “Untitled.”
How I title my work
It has been quite a challenge for me to come up with titles that not only do justice to my art but also elicit the emotional response I want from my viewers. Like most artists, I like to get my viewers emotionally involved in the art experience by just looking at my visual narrative and not getting influenced by the verbal one.
I like to come up with names that convey the power behind my pieces. I generally title my works based on the first thing that comes to my mind when I see them. I use color, shapes, form, textures and movement to resonate with the viewer on the subconscious and emotional level.I try to make my titles as compelling and thought-provoking as the artworks they are meant to name.
My titles usually take shape after the artwork is complete. On a general basis, most of my titles are a spin off from the theme or concept I have based my artwork on or the message or emotion I wish to convey through it. However, some may also arise from the very source that inspired the painting, or from the form the painting ultimately takes.
I genrally ave my favorite music playing in the background when I’m working with my art so if a song title or lyrics relates to what I’m currently working on, it goes down in my list of probable names for the piece. Why just music? It can be anything – lines from a movie, quotes from a book, poetry, mythology, feelings, emotions, you name it! My list of inspirations is endless!! All I need to do it is adapt it in my own unique way and make it my own! The dictionary and thesaurus have also been my dependable pals for developing titles, and I use them constantly to brainstorm through my lists and come up with the perfect names for my art.
Based on the above mentioned pointers and cues, here’s how I would classify the titles of my art:
1.Still Life – These include my earlier paintings, namely, “Flora in a Pot” and “Fruit Platter” which are not originals and were done by me as part of my learning process. I had to name them as part of the brief given to me for assignments during my art classes, hence I do not know the name of the original artists or their original titles. As I mentioned earlier in this post, the titles I chose for them were pretty dry and non-poetic and I wish I had thought of something more interesting and attractive.
Flora in a Pot(Not original – artist unknown)
Fruit Platter(Not original – artist unknown)
2. Landscapes – My imitations of “She Left” and “Winter Lake by Leonid Afremov fall into this category. Two of my original creations – Deep Sea Dweller and Eavesdropper also come under this category even though they are technically seascapes.
My rendition of Afremov’s “She Left”
My rendition of Afremov’s “Winter Lake”
Deep Sea Dweller
Eavesdropper
3. Abstracts – I have several abstract works, especially from my Dragon Series (Dragon-Camouflage, Dragon-The Fire Within, Dragon-Wrath, Dragon-Repentance and Dragon-Liberation), that I have tried to name carefully so as to maintain equilibrium between how much I reveal about the piece and how much liberty I give to my viewers in order to make their own interpretations. Another piece that fits here is from the Navrasa Series, namely, Hasya – Joy to the Soul.
Dragon – Camouflage
Dragon – The Fire Within
Dragon – Wrath
Dragon – Repentance
Dragon – Liberation
Hasya – Joy to the Soul
Some of my Abstract titles
4. Portraits – I have done several portraits, but mostly of dragons, being the dragon lover that I am! I have a couple of renditions of the Buddha as well as of the Hindu deities, Ganesha and Krishna too, which I have named Dragon, Dragon(The Wise), Dragon(The Furious), Dragon(Fury), Dragon – Resurrection, Awakening, Enlightenment, Ekdanta and Mormukutdhari respectively.
5. Sentimental – My art is a vehicle through which I transfer my sentiments to my audience, so most of my paintings mirror my emotions. I believe that almost all my pieces emote and express what I am feeling myself or attempt to invoke and extract some sentiment from my viewers. So definitely, my entire Dragon Series as well as the Navrasa Series have sentimental titles.
Some of mySentimental titles
6. Numerical – I am yet to use any numbers as part of the naming process for my art.
7. Factual – Not too sure which titles of mine fit in here. To be very honest, haven’t really tried my hands on this type of art yet, but it’s never too late to start!
8. Mysterious – I guess I could include Deep Sea Dweller and Eavesdropper here as they carry that mystic element with them.
My Mysterious titles
Names can increase the popularity of your art in a big way, so if you think that you have created something magnanimous, then go that extra mile to give it that extraordinary title it truly deserves. Assigning your art good titles is as much a part of the creative process as creating the art itself. Many world famous paintings have become masterpieces not just because of the visual, but also the verbal element. As an artist your journey to fame will cross many important milestones, one of them being how you name your art. So choose your titles judiciously, for once you have done so, your artwork will forever be limited within its boundaries and thereafter be defined by it.
Remember, good titles will highlight your work, so brainstorm and let the sparks fly till you ace the “name game!”
DISCLAIMER – All the information, data and imagery in this blog post is for informational and educational purpose only. While there may be copyrighted material the use of which has not always been specifically authorized by the copyright owner, I have only made it available with the sole effort to stimulate creative progress and artistic enrichment.Some images may have been taken from the links included below and I give full credit to these websites/pages, thereby in no way claiming them to be my own. I have also used these links for reference purposes and collection of data; therefore I give full credit to the respective web pages. Most of the data in this post is based on my personal experiences and opinions and I am not responsible for any material that is found in the links at the end of this post.
Whether a veteran artist, novice, art buff or a critic, if there’s one rule that applies to all who visit an art gallery or art museum, it is, DO NOT TOUCH. Unless it’s an interactive art exhibition where you are expected to touch and feel the artwork, there is generally a border line cordoning off the artworks from their viewers. But it’s hard to keep our hands off artists’ works as we humans experience the world through our sense of touch to a large extent.
It is this sense of touch that gives us an idea of textures. Rough or smooth, coarse or soft, these are some of the adjectives we use when we have to describe the texture of an object we touch.
But what exactly is texture? It can be difficult to define precisely, but it has everything to do with touch, thereby the sensation we get from a surface when we physically come into contact with it. In simpler words:
Texture is the tactile quality of the surface of an object.
Texture can also be associated with dimensionality or depth. The more a surface protrudes into the 3rd dimension or varies in its degrees of protrusion, the more pronounced the texture. It is for this reason that it is an important element of two-dimensional and three-dimensional designs and is distinguished by its perceived visual and physical properties. In the visual arts, texture is the perceived surface quality of a work of art.
More often than not, we see texture before we touch it, so it involves the sense of sight as well. The mere sight of texture in an artwork appeals and invokes that inquisitive nature in us to experience it by touching it, even though it says “hands off!” That is why texture in art is so inviting.
Broadly speaking there are two categories of texture in art, just as in life: rough and smooth. Both can be hard or soft, wet or dry, organic or synthetic, etc. and infinite gradations of roughness and smoothness are possible. Most artworks are not even meant to be touched. And even when an artwork can be touched its texture relates more to our aesthetic experience than our continued existence.
In the real world, we tend to experience texture with our sense of touch much more than with our vision. For the uninitiated, it can seem strange to frame texture in terms of visual aesthetics. In fact, when creating a 2D work of art (or a website), visual texture is purely an illusion. However, texture is a fantastic way to add emotional depth and visual variety to any design.
Nonetheless texture is an important part of our interaction with art. It is one among the seven principle artistic elements, along with line, color, shape, form, value and space. It can affect mood, evoke psychological associations, bring attention to a medium, or divert our focus toward materials used in a work. Used adeptly, texture can even challenge our perception of what is real.
Texture stimulates two different senses: sight and touch. There are four types of texture in art: actual, simulated, abstract, and inventedtexture.
Actual texture in an artwork has a certain physical tactile surface whereas visual texture or implied texturefeels a certain way(but actually isn’t).
Tactiletexture is the tactile quality of a surface, such as rough, smooth, sticky, fuzzy, soft or slick. A real texture is one you can actually feel with your hand, such as a piece of sandpaper, a wet glass, or animal fur. It also can be created by an artist by making a collage.
Real/Actual Texture
Actual texture is the physical feel an artwork has.It refers to the physical rendering or the real surface qualities we can notice by touching an object,such as paint application or three-dimensional art. From the silky texture of the paint to the rough texture of stone, artists use texture to add interest, create emphasis and expression, and add depth to their work. Visible brushstrokes and different amounts of paint will create a physical texture that can add to the expressiveness of a painting and draw attention to specific areas within it. Actual texture is a combination of how the painting looks, and how it feels on being touched. Real, tangible texture can be created through endless tactile possibilities: cutting, building, tearing or layering of materials, etc. Real or actual texture can dramatically enhance a work of art.
Many artists around the world use different items and materials to create actual texture. Some create textured pieces to be touched and experienced, such as MD Weems, who uses homemade gesso to sculpt texture into her artwork. Her textured artwork is then painted and sealed so that viewers can physically touch the artwork. The ability to touch the texture evokes multiple senses through sight and touch and allows for a deeper emotional feel.
MD Weems
It is possible for an artwork to contain numerous visual textures but still remain smooth to the touch.For example Realist or Illusionist works of art, which rely on the heavy use of paint and varnish, yet maintain an utterly smooth surface. In Jan Van Eyck’s painting “The Virgin of Chancellor Rolin” we can notice a great deal of texture in the clothing and robes especially, while the surface of the work remains very smooth. Vincent van Gogh is known to have used a great deal of actual texture in his paintings, noticeable in the thick application of paint in such paintings as Starry Night.
Jan van Eyck, The Virgin of Chancellor Rolin, 1435
Vincent van Gogh, The Starry Night, 1889
Examples of Art with Actual Texture
Marcia Gygli King, The Family, from The Culture Series, 2005.
Anselm Kiefer, Aschenblume, 1983-97.
Justin Gaffrey’s Painting.
Justin Gaffrey’s Painting.
Terese Agnew, Portrait of a Textile Worker, 2005.
Visual Texture/Implied Texture
Visual texture in art (also called Implied Texture) is texture that is not actually real. The artist creates the illusion of textures through manipulation of the media.It is an implied sense of texture that the artist creates through the use of various artistic elements such as line, form, shape, shading, and color.Visual texture is a visual quality of a surface. It is a result of painting or drawing of the real texture. Paint can be manipulated to give the impression of texture, while the paper surface remains smooth and flat. One artist who’s a master at creating visual textures in multiple media is Albrecht Durer.
Examples of Art with Visual Texture
Albrecht Durer, Portrait of Hieronymus Holzschuher, 1526
Ralph Goings, Ralph’s Diner, 1982
Max Ernst, Europe After Rain II, 1940-42
Gustave Caillebotte, Place de l’Europe on a Rainy Day, 1876-1877
Salvador Dalí, Girl at a Window, 1925
Pieter Claesz, Still Life with a Skull and a Writing Quill, 1628
Albrecht Durer, Young Hare, 1502
Jason de Graaf, Oil Paintings
Teresa Elliott, Deliverance
Examples of Visual Texture in Drawing
Vija Celmins, Drypoint – Ocean Surface, 1983
Leonardo da Vinci, Portrait of a Man in Red Chalk, c. 1512
Samuel Silva, Ballpoint Pen Drawings
Armin Mersmann, Eye Drawings
Photographs explore both real and implied texture — the photograph contains memories of textures captured in a freeze-frame moment.
Simulated texture
Simulated texture involves drawing the visual effect of texture without actually adding it. For instance, a texture may be made to look like something other than paint on a curve surface. An example is Cataract 3painted in 1967 by Bridget Riley, which creates the illusion of ripples in the paper through the repetition of lines.
Cataract 3 by Bridget Riley
Texture in Digital Art
Visual texture on websites is an illusion, and there are two basic types; realistic texture and implied texture. It’s important to understand the difference between the two, because their communicative effects are dramatically dissimilar.
Realistic Texture– These are attempts to recreate natural-looking textures in order to add realism to a page. An example of this might be a background that looks like rough stone, or perhaps some crumpled paper. Adding some realistic texture will often send a more literal message to the site visitor and can make the site feel more like a physical place. This effect isn’t necessarily positive or negative, but it’s definitely important to be aware of. But realistic textures can be difficult to execute, so they should be used carefully and sparingly.
Implied Texture–Implied texture isn’t intended to look like anything, but it can add lots of emotional depth to a page. This type of texture is abstract and isn’t meant to be touched, similar to most decorative wallpaper or fabric with printed designs. Implied texture can even lack definition to the point that it just looks like noise, intended to add some slight visual variation beyond flat colors. Flat areas of color don’t always need texture; however, it is a good habit to add a bit of noise to gradients. This makes transitions in value look more natural with less color banding.
Layering of Textures
Contemporary fashion designers and interior decorators advise that there shouldn’t be too many patterns or textures in a single composition. However, when textures are arranged in an organized sequence of layers, rather than thrown together randomly, they can be drafted into a meaningful design. In fact, on most websites, it’s impossible to include only one texture because blocks of text typically read as textural elements. This technique of layered texture plays a different role with implied textures and realistic textures.
1. Layering Implied Textures-It’s difficult to layer textures directly on top of one another when creating implied textures, because while the results may be aesthetically pleasing, it can make the page too distracting. Implied textures work when they’re subtle and light in opacity, but exceptions are always there. However, implied textures can work very well together when they’re adjacent to one another in a composition. Textures can be combined with colors and values to create distinct content areas in a single layout.
2. Layering Realistic Textures-In real life, hardly any surface features a purely homogeneous texture, so layering realistic textures is actually much more natural than creating a solitary realistic texture. This isn’t the case when using photographs directly in a design, but when creating realistic textures artificially in an image editing program, it’s especially important to think in layers.
We can also divide textures into another category:
Natural texture
It’s the texture we find in nature and is not made by humans. For example: stones, sand, rice, etc. The rendering of real objects can be implied using texture, even when the image leans toward abstraction.
Artificial texture
It’s the texture from things made by humans. For example: a pencil, a chair, a raincoat, etc.
Impasto texture
One of the earliest ways abstract painters experimented with texture is through a process called impasto. When we say a painting is impasto, we mean the painter has applied the paint to the surface in thick layers. An impasto work is considered painterly, since it gives prominence to the physical marks made by the painter. Post-Impressionist painters like Van Gogh used impasto to create drama, and to affect the way light interacted with the surface of their images since impasto layers create shadows and highlights. Abstract Expressionist painters like Jackson Pollock use thickly layered paint to bring attention to the act of painting and to reveal the personality and individual technique of the artist.
Sunflowers by Vincent van Gogh
Eyes in the Heat, 1946 by Jackson Pollock
The opposite of impasto texture is flatness. Artists like Helen Frankenthaler and Kenneth Noland stained their canvases, pouring thinned paint directly onto unprimed canvases to merge the surface with the paint. Their flat textures diverted focus away from the physical gestures of the artist, encouraging the contemplation of other elements like color, surface, and space. Early abstract artists such as Kazimir Malevich also painted flat, non-painterly images. Interestingly, many of the iconic flat paintings Malevich painted, such as Black Square, have, with age, acquired textures much different than the artist intended. It is fascinating to contemplate whether the meaning viewers perceive in such works has been altered by the change in texture.
Mountains and Sea, 1952 by Helen Frankenthaler
Ex Nihilo, 1958 by Kenneth Noland
Black Square by Kazimir Malevich
Texture can have more impact through variation and relief – contrasting rough areas with smooth ones. That will make a painting far more interesting than an even, unrelieved texture going from edge to edge.Remember- creating textures is easy; it’s where and how you place them that differentiate a good painting from an ordinary one.
What are some ways that artists create texture?
Texture is the look and feel of a surface. Painters have many ways to create different textures. They use different sized and shaped brushes: everything from tiny pointed brushes to flat, wide brushes. They can also use other tools—special knives, sponges, even fingers—to put create textures on canvas. Here are some techniques that artists employ for achieving textures:
They brush paint on in watery strokes and thick drips.
They put paint down in short, fat dabs and long, sleek strokes.
They twirl their brushes to make circles and curls.
They apply paint in thick layers that stick out from the canvas.
They put different colors on top of each other.
They mix in sand, dirt, or other materials into the paint.
They add white highlights to make things look shiny.
They scratch through paint to show colors underneath.
Techniques for creating textures:
Collage – The term collage comes from the French word “coller” meaning “glue”. It is a form of art in which various materials such as photographs and pieces of paper or fabric are arranged and glued together on a surface like paper.
Tromp l’oeil– This meansfool the eye. It is an art technique that creates optical illusions so the painted objects appear in three dimensions. It is usually used in murals.
Sand painting – Materials required for this technique are thick white paper, glue and sand. Apply the glue with a paintbrush creating the shapes you want. Before it dries cover the picture with sand and let it dry. Then take off the remained sand.
Create printing textures – Materials required for this technique are thick white paper and tempera painting, a range of materials (cotton, paper, plastic, a leave, etc.) The materials are painted with any colour and pressd softly onto the paper surface.
Create rubbings textures – Materials required for this technique are paper of varying weight and colour, soft pencil or chalk, a range of rough surfaces. A piece of paper is placed directly onto the surface intended to take the rubbing from, and then a soft pencil is used to rub on the paper.
Collage by Picasso
Painting using the tromp l’oeil by Pere Borrell. 1874
My experiments with Texture
When we talk of art, the first thing that comes to mind is paintings. The use of texture, along with other elements of design, can convey a variety of messages and emotions in a painting. As an artist, this is my first and foremost objective too, but that’s not it. Incorporating texture or tactile feel in my art is not only a deliberate choice designed to invoke a certain response in my audience, but also an attempt to capture the depth and dimension that goes beyond the work itself. Consequently, I aim to invoke that sense of curiosity among my viewers, thereby compelling them to find out more about the techniques I have employed in order to achieve certain textural effects.
As an artist, texture has always appealed to me and hence forms the essence of almost all of my artworks. When I look back, I find that with time, my explorations with this tactile element of art have evolved and matured, not just in terms of surfaces and mediums, but also the use of different materials and techniques. I have also been able to open my mind to conceptual application of different textural elements based on the requirement of the theme I wish to represent through my work.
Now, I shall attempt to classify my paintings into the various categories of textures I have listed above and how I have achieved them. So here they are!
Attempts with Actual Textures – Enlisted below along with their techniques, are some of my paintings where I have tried to produce actual textures:
S No
Painting Title
Technique used
1
Awakening
Impasto with modeling past for flower buds
2
Dragon-Fury
Crayon melt for the fire
3
Dragon-Resurrection
Impasto with modeling paste for scales and feathers
4
Shringar–Inner Beauty
POP for background
5
Shanta-Peace of Mind
Hot glue gun and gesso for tree
6
Hasya–Joy to the Soul
Impasto, hot glue gun and gesso
7
Veer-The Unsung Heroes
Hot glue gun, gesso for picture frame
8
Karuna-A Touch of Compassion
Acrylic pour and decoupage for elephant ear, hot glue gun and gesso for flora and foliage
9
Raudra-The Righteous Rage
Impasto with modeling paste for hair
10
Bhayanaka-The Terminal Fear
Impasto with modeling paste for flame background, decoupage with cling wrap & gesso for Grim Reaper’s cloak
My attempts with Actual Texture
Attempts with Visual/Implied Texture – I have attempted to impart visual or implied texture in the following artworks:
S No
Painting Title
Medium/Technique
1
Awakening
Oil paints to imply folds of Buddha’s drape and ripples & reflection in water
2
Enlightenment
Oil paints for background texture
3
Doodle Art (All)
Pens and marker for various lines, marks & patterns
4
Dragon Portraits (All 3)
Oil paints to imply scales of dragons
5
Dragon-Camouflage
Peel Painting for dragon scales
6
Dragon-The Fire Within
Acrylic pour with silicone for dragon gut
7
Dragon-Wrath
Acrylic Pour for dragon fire
8
Dragon-Repentance
Crackling effect for background, impasto and acrylic pour for eye
9
Dragon-Liberation
Acrylic Pour for wing
10
Ekdanta
Soft pastels for Ganesha
11
Mormukutdhari
Soft pastels for peacock feather, prismacolor pencils for Krishna
12
Deep Sea Dweller
Oil paints for clouds and waves
13
The Eavesdropper
Oil paints for clouds and waves
14
Flora in a Pot
Oil paints for flowers, pot and background
15
Fruit Platter
Oil paints for textures of fruits
Digitally Implied Texture – I have explored this category in one of my artworks titled Steel Shark wherein I have imparted a grainy texture and fluidity to the underwater seascape digitally.
It is my constant endeavor to produce a painting that excites my viewers enough to be able to emote freely. I believe that in order to get a realistic feel of a subject, an artist needs to explore and imbibe its texture into his or her creation. This can only be possible if he or she views the subject not just in two dimensions, but the third dimension as well. So I’m forever in search of tactile elements surrounding objects as I want them to come alive with my painting. I want my art to speak for itself. I want it to express my beliefs, feelings and emotions better than my words, for I truly believe in the saying, “A picture can speak a thousand words.”
DISCLAIMER – All the information, data and imagery in this blog post is for informational and educational purpose only. While there may be copyrighted material the use of which has not always been specifically authorized by the copyright owner, I have only made it available with the sole effort to stimulate creative progress and artistic enrichment.Some images may have been taken from the links included below and I give full credit to these websites/pages, thereby in no way claiming them to be my own. I have also used these links for reference purposes and collection of data; therefore I give full credit to the respective web pages. Most of the data in this post is based on my personal experiences and opinions and I am not responsible for any material that is found in the links at the end of this post.